Pattern Description:
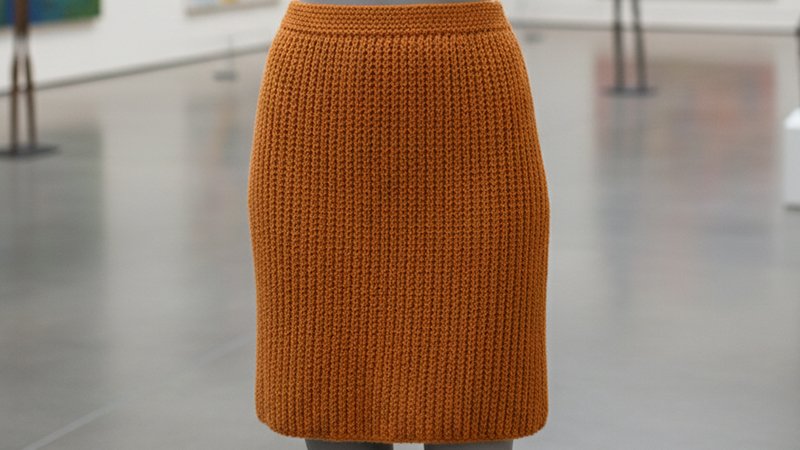
The Lana Pencil Skirt is a body-slimming, close-fit crochet garment designed to be a fashionable statement piece.
It is customizable for almost any hip size, with standard instructions covering XS-3XL.
The pattern utilizes single crochet and slip stitches and results in a skirt about 20 inches long. The design was intended to make the maker feel amazing and a little bit sexy.
Materials Needed & Measurements:
Materials & Tools
- Lana Skirt Crochet Kit (available for purchase).
- The Hook Nook I/5.5mm Crochet Hook.
- The Hook Nook “Main Squeeze” Yarn/Worsted (4).
- Yarn Needle.
- Measuring Tape.
- Scissors.
Yarn Quantity
The amount of yarn needed varies per size. For a Small size, approximately 5 skeins (about 750 yards) of The Hook Nook “Main Squeeze” Yarn are required.
Sizing and Fit
- Fit: The pattern is written for a close fit and has zero ease when calculating the standard sizes. It is described as body slimming.
- Length: The resulting skirt length is approximately 20 inches.
- Customization: Makers are encouraged to measure their hip size so they can make the skirt custom for their fit. If a maker desires an extra slimming or tight result, they should subtract 1-2 inches from their measured hip size to account for the stretch associated with the stitch.
Gauge
This swatch should measure 12 stitches by 13 rows when using the 5.5mm hook.
Abbreviations Used:
- Ch – Chain
- SC – Single Crochet
- SC2Tog – Single Crochet 2 Together
- SS – Slip Stitch
- MC – Main Color
Instructions for Making the Lana Pencil Skirt Pattern:
Body of Skirt
- Ch 71.
- SC in the second loop from the hook and SC across (70).
- [Do NOT Ch 1] SS across until the end of the row (70).
- Ch 1. SC across until the end of the row (70).
- Repeat steps #3 and #4 until you reach your hip measurements (see sizing notes above).
- Closing the Skirt: Once the desired length is reached, fold the piece in half with the wrong side showing.
- SC to attach the two folded sides, ending 20 stitches before the end to create the slit.
- Note: If you desire a shorter slit, end 25–30 stitches prior.
Waistline
- Attach yarn to the top of the skirt at the seam.
- SC around until back at the beginning, then SS to attach.
- Ch 1. SC around, then SS to attach.
- Ch 1. SC in the first 5 stitches, then SC2Tog (Single Crochet 2 Together), then SC in the next 5 stitches. Repeat this sequence until the end of the row.
- Ch 1. SC around, then SS to attach.
- Repeat step #5 for four more rows (Rows 5–8) and finish off.
Finishing Touches
- Attach yarn to the bottom corner of the skirt near the slit.
- SC around the bottom edge of the skirt.
- Optional: Create belt loops along the waistline so that you can add a belt if desired.