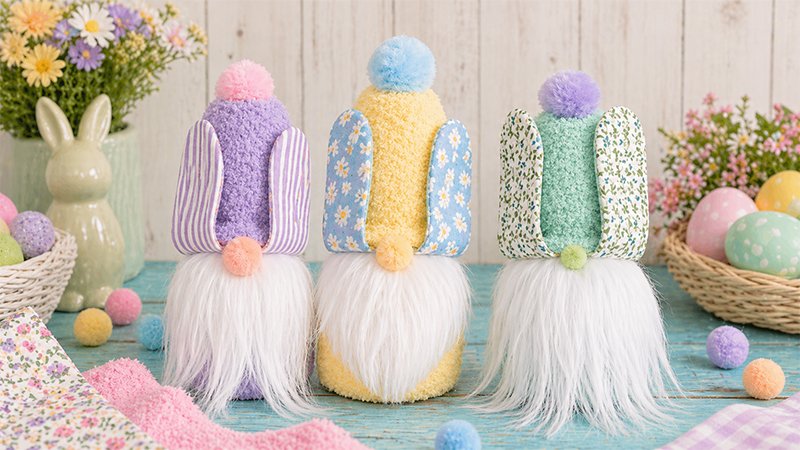
Creating an Easter Bunny Sock Gnome is a fun, beginner-friendly craft that requires minimal supplies and no advanced skills. Follow these detailed steps to make your own adorable gnome.
Materials You’ll Need (for 1 gnome)
Basic Supplies:
- 1 fuzzy sock (pastel or Easter-themed)
- Optional: 1 extra old sock (for lining if needed)
Filling:
- ½–1 cup rice, dry beans, or poly pellets (for weight)
- Fiberfill (Poly-Fil) for stuffing
Decorations:
- Small piece of faux fur (for beard)
- Cotton fabric scraps (for ears)
OR felt for a no-sew option - Fusible interfacing (optional but recommended for fabric ears)
- 3 pom poms:
- 1 small (nose)
- 2 larger (hat top + bunny tail)
Tools:
- Scissors
- Hot glue gun + glue sticks
- 2 clear elastic hair ties
Optional:
- Printed ear and beard templates
Step 1: Cut the Sock
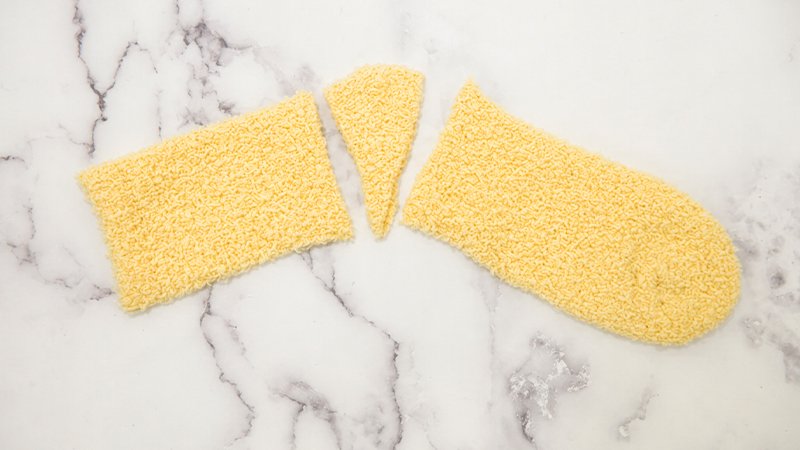
- Lay your sock flat on a table.
- Cut it into three horizontal sections:
- Toe section → will become the body
- Middle section → discard
- Top cuff → will become the hat
Step 2: Make the Gnome Body
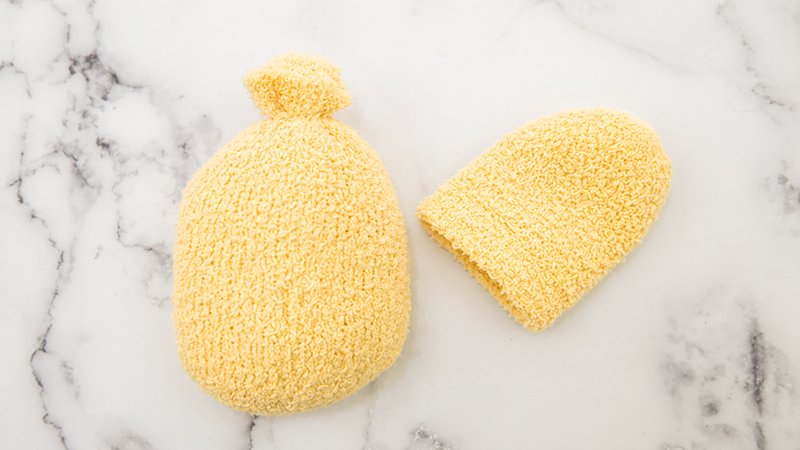
- Take the toe section and turn it inside out if needed.
- (Optional) Insert an old sock inside as a liner if your sock is thin.
- Pour in ½ to 1 cup of rice or beans to create weight.
- Add fiberfill stuffing on top until the body feels firm and round.
- Gather the open end and secure tightly with a clear elastic hair tie.
- Shape the body so it sits flat and stable.
Step 3: Create the Hat
- Take the top cuff piece of the sock.
- Turn it inside out.
- Tie off the raw (cut) end using another elastic hair tie.
- Turn it right side out again.
- Lightly stuff with fiberfill to give the hat shape (don’t overstuff).
Step 4: Prepare the Beard
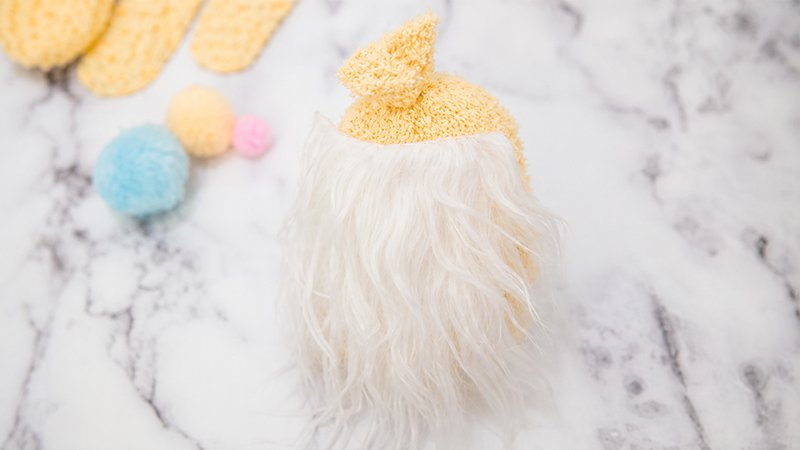
- Place your beard template on the back side of the faux fur.
- Trace the shape.
- Carefully cut:
- Use small snips to avoid cutting the fur fibers too short.
- Try separating fibers with your fingers while cutting.
Tip: Always cut from the back of the fur for a natural look.
Step 5: Make the Bunny Ears

Sewn Fabric Version:
- Cut 4 ear shapes (2 pairs) from cotton fabric.
- Fuse interfacing to 2 pieces (optional, but helps structure).
- Place each pair right sides together.
- Stitch around edges (leave bottom open).
- Trim edges, turn right side out, and press flat.
No-Sew Option (Recommended for beginners):
- Use felt
- Cut ear shapes directly—no stitching needed
Step 6: Assemble the Gnome
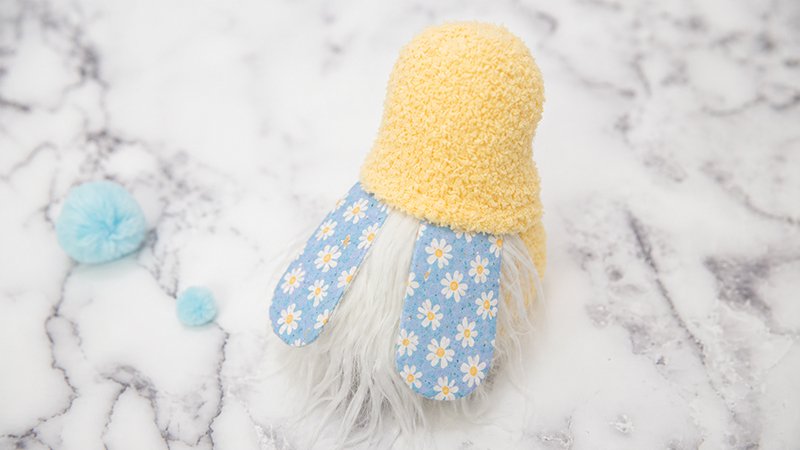
1. Attach the Beard
- Place the beard on the front upper half of the body.
- Test placement with the hat before gluing.
- Glue only along the top edge of the beard.
2. Attach the Ears
- Position the ears above the beard.
- Leave a small gap in the center for the nose.
- Glue securely in place.
3. Add the Hat
- Slide the hat over the top:
- It should cover the ear bases and beard edge.
- Glue the hat:
- Start with the back and sides
- Then secure the front
4. Add the Nose
- Glue the small pom pom between the ears, just under the hat brim.
5. Add Final Details
- Glue a large pom pom on top of the hat.
- Glue another large pom pom to the back bottom for the bunny tail.
Step 7: Shape and Finish
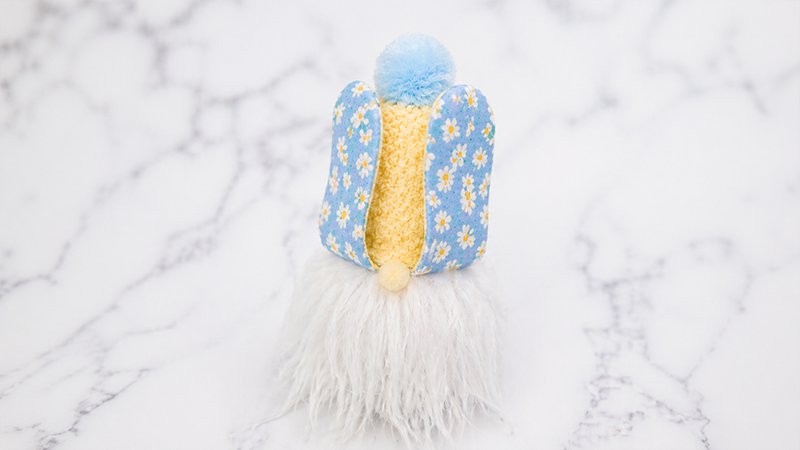
- Bend ears upward.
- Add a small dab of glue at the base to help them stand.
- Adjust beard and hat as needed.
Your Gnome is Complete!
You now have a cute Easter Bunny Sock Gnome ready for:
- Mantel décor
- Table centerpieces
- Easter baskets
- Handmade gifts
Extra Tips
- Mix different sock colors for variety
- Trim beard for different styles
- Add ribbons, mini carrots, or flowers for personalization
- Make multiple gnomes—they look best in groups!
This same method can be used to create gnomes for Christmas, Halloween, or any holiday—just switch colors and accessories.