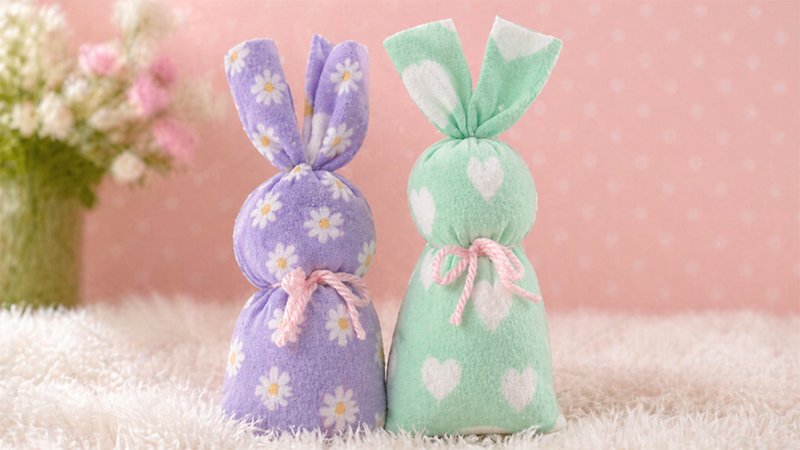
Looking for a quick, cute, and stress-free sewing project? This fleece bunny is perfect for kids, beginners, classrooms, or a cozy afternoon craft. With just two lines of sewing, you can turn a simple fabric scrap into an adorable stuffed bunny in minutes.
Materials You’ll Need
Gather everything before you start:
- Fleece or felt fabric (12″ x 16″)
- Pillow stuffing (polyfill or similar)
- 1 rubber band
- Ribbon or yarn (for the neck)
- Sewing machine
- Fabric scissors
Optional:
- Puffy paint, markers, or buttons (for the face)
Step-by-Step Instructions
Step 1: Prepare the Fabric
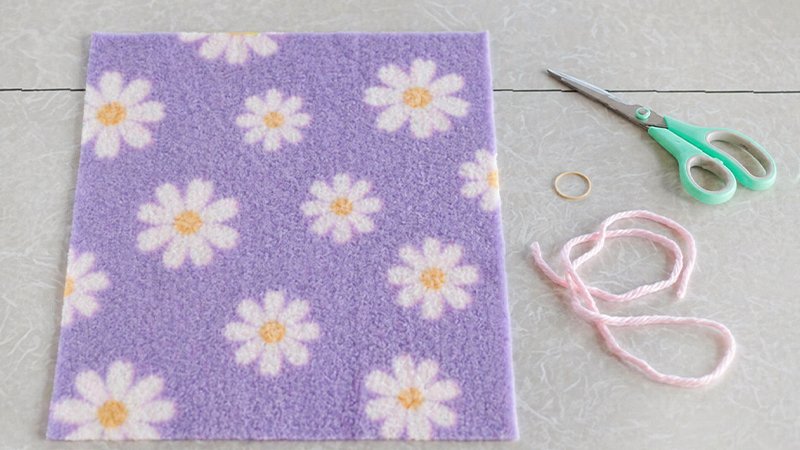
- Lay your fleece flat on a table.
- Fold it in half lengthwise, so it becomes:
- 6 inches wide
- 16 inches tall
- Make sure the right sides (soft sides) are facing each other.
Tip: If your fabric looks the same on both sides, don’t worry—just pick one side.
Step 2: Sew the Body (Only Sewing Required!)
- Place the folded fabric under your sewing machine.
- Using a zig-zag stitch, sew:
- Down the long open side
- Across the bottom edge
- Leave the top open.
Use about a ⅜ inch seam allowance
A beginner trick: align the fabric edge with the edge of the presser foot
You’ve now created a simple fabric pouch.
Step 3: Turn It Right Side Out
- Reach inside the pouch.
- Pull the fabric through the opening.
- Push out the corners gently.
Now the seams are hidden inside.
Step 4: Stuff the Bunny
- Take small handfuls of stuffing.
- Push them down into the bottom of the pouch.
- Keep filling until about 10 inches of the bunny is stuffed.
Don’t overstuff—it should feel soft, not stiff.
Step 5: Create the Body Shape
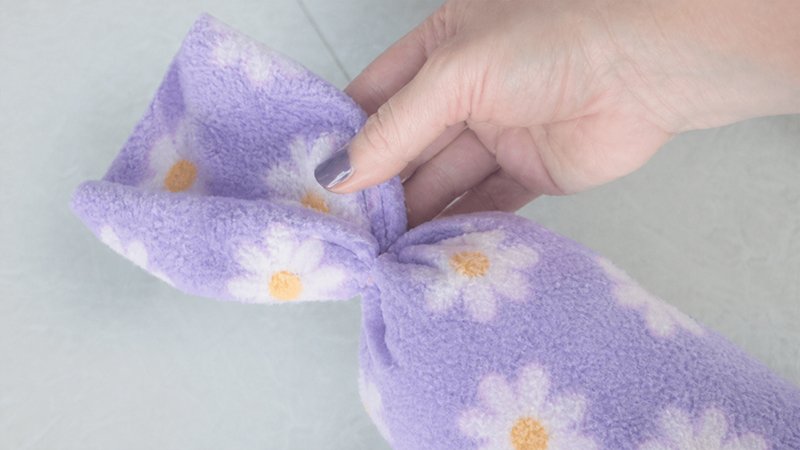
- Gather the fabric just above the stuffed area.
- Wrap a rubber band tightly around it.
This separates:
- The body (bottom)
- The head + ears (top)
Step 6: Make the Ears
- Take scissors.
- Cut straight down the center of the top fabric.
- Stop cutting when you reach the rubber band.
Now you have two ears!
Optional:
- Trim the ear tops into rounded shapes for a softer bunny look
- Leave them square for a fun, quirky style
Step 7: Define the Head
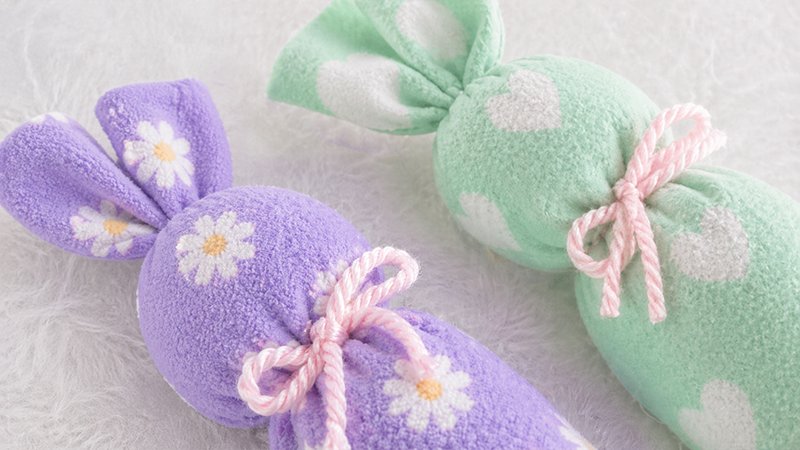
- Tie a ribbon or yarn just below the rubber band
- Pull it snug and tie a bow
This creates a neck, making the bunny shape clear
Optional: Add Personality
Make your bunny unique!
- Draw eyes and nose with fabric paint
- Sew on buttons (for older kids only)
- Add blush with markers
- Tie extra bows or accessories
Creative Variations
No Fabric? Use a Sock!
- Fill a sock with stuffing
- Tie it off
- Cut ears the same way
Eco-Friendly Filling
Instead of stuffing, use:
- Fabric scraps
- Old socks
- Yarn leftovers
Make a Heat Pack Bunny
- Fill with rice instead of stuffing
- Microwave briefly for a warm, cozy bunny
Try Different Sizes
- Small: 6″ x 8″ (great for gifts)
- Medium: 10″ x 11″
- Large: scale up for bigger plushies
Final Tip
This project is perfect for teaching kids:
- How to sew straight lines
- Basic fabric handling
- Creative confidence
And best of all—it’s fast, forgiving, and fun!
Happy sewing!