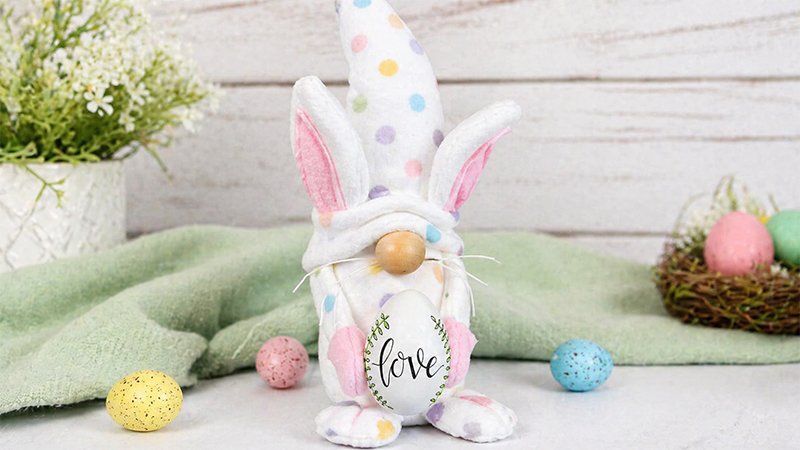
If you’re looking to add a charming handmade touch to your Easter décor or brighten up your spring mantle, this Bunny Gnome Sewing Pattern is a perfect choice. Inspired by traditional Scandinavian gnomes (tomte), this design is beginner-friendly and flexible—you can either sew it or assemble it with hot glue.
What makes this project especially valuable is its versatility. The base pattern, often called “Scandinavian Sweeties,” can be reused throughout the year to create different seasonal gnomes—making it a worthwhile addition to your crafting collection.
Project Overview
- Skill Level: Easy (great for beginners)
- Time Required: ~1 hour 5 minutes
- Estimated Cost: Around $10
Materials and Tools
Materials
Make sure to gather everything before you begin:
- Fleece Fabric (¼ yard each): Two contrasting colors (one for body, one for hat/details)
- Mongolian Faux Fur: For the beard (soft and fluffy works best)
- 12-Gauge Floral Wire (12 inches): Helps the gnome hold shape and pose
- Poly-Fill Stuffing: For filling the body and limbs
- Poly-Beads (about 1 cup): Adds weight so the gnome stands upright
- Wood Round or Bead (1–1.5 inches): For the nose
- Embroidery Thread: For whiskers and toe details
- Pom Pom: For the bunny tail
- ModPodge: To stiffen whiskers
Tools
- Hot glue gun and glue sticks
- Sewing machine (or hand sewing needle)
- Fabric scissors
- Razor blade or craft knife (for cutting faux fur cleanly)
- Darning needle
- Pins and fabric marker
- Optional: Cricut/Silhouette cutting machine
Step-by-Step Instructions
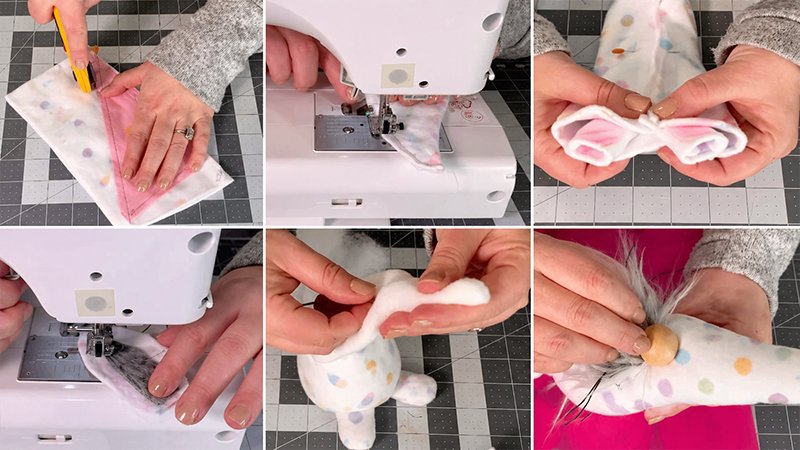
1. Cut and Prepare All Pattern Pieces
Start by cutting all fabric pieces according to your pattern.
From your main fleece color, cut:
- 1 body piece
- 2 arm pieces
- 1 circular base
From your contrasting fleece, cut:
- 1 hat piece
- 4 mitten pieces (2 pairs)
- 4 foot pieces (2 pairs)
For the ears, cut:
- 4 outer ear pieces (main color or contrast)
- 2 inner ear inserts (contrast color recommended)
Tip: When cutting mittens and feet, flip the pattern to create mirrored pairs—this ensures proper left/right alignment.
2. Sew the Body and Attach the Feet
Body:
- Place body pieces right sides together.
- Pin around edges and sew, leaving an opening (usually at the bottom or side).
- Do not turn yet.
Feet:
- Take two foot pieces and sew them together in a U-shape, leaving the top open.
- Turn right-side out.
- Lightly stuff with Poly-Fill (don’t overfill—keep them soft).
Attach Feet:
- Position feet inside the body (toes pointing inward slightly).
- Pin them in place against the front body panel.
- Stitch securely.
Base:
- Attach the circular base to the bottom of the body.
- Leave a small opening for stuffing later.
3. Create the Hat, Arms, and Ears
Hat:
- Fold hat piece right sides together.
- Sew along the long edge to form a cone shape.
- Leave the brim edge open.
Arms & Mittens:
- Sew mitten pieces together (right sides facing).
- Attach mittens to arm pieces if separate.
- Sew arms closed, leaving a small opening.
- Turn everything right-side out.
Ears:
- Place the inner ear insert onto the front of one outer earpiece.
- Top-stitch the insert in place.
- Place the second outer ear piece on top (right sides together).
- Sew around edges, leaving the bottom open.
- Turn right-side out and gently press flat.
4. Stuff and Weight the Body
- Begin by pouring Poly-Beads into the bottom of the body (use a funnel if needed).
- This gives stability so your gnome won’t tip over.
- Add Poly-Fill stuffing on top until the body is full and firm.
- Insert the 12-inch floral wire into the center:
- Push it down into the body
- Secure it with hot glue to keep it from shifting
- Close the opening by sewing or gluing securely.
5. Add Facial Features and Details
Beard:
- Cut faux fur using a razor blade from the back side (this prevents cutting the fur strands).
- Shape into a rounded or pointed beard.
Nose:
- Glue the wooden bead/round just above the beard.
Whiskers:
- Cut several strands of embroidery thread.
- Coat them lightly with ModPodge.
- Let dry until stiff.
- Bundle and glue beneath the nose.
Bunny Toes:
- Using embroidery thread and a darning needle:
- Wrap thread around the front of each foot 2–3 times
- Pull slightly to create toe indentations
- Tie off securely
6. Final Assembly
Ears Through Hat:
- Place the hat onto the gnome (without gluing yet).
- Mark where you want the ears to come through.
- Cut small slits in the hat.
- Insert ears through the slits.
Try different positions before gluing—this changes the gnome’s personality!
Assemble Everything:
- Glue the beard and nose onto the body.
- Pull the hat down snugly over the nose.
- Secure the ears in place with glue.
- Attach arms to the sides of the body.
- Glue a pom pom onto the back as the tail.
Pro Tips for a Polished Look
- Ear placement matters: Higher ears = playful look, lower ears = relaxed look
- Use sharp tools for faux fur: Always cut from the back to preserve fluff
- Batch your work: If making multiple gnomes, cut all pieces first to save time
- Add personality: Try accessories like mini carrots, eggs, or bows
Final Thoughts
This Bunny Gnome is more than just a seasonal craft—it’s a reusable base pattern you can adapt for holidays year-round. Once you master this design, you can easily create Christmas gnomes, fall gnomes, or even themed gifts.
Enjoy the process, experiment with styles, and most importantly—have fun crafting!