
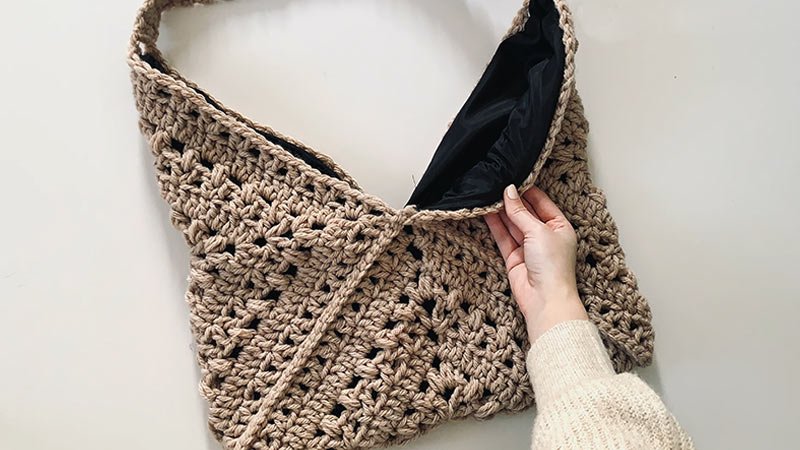
Looking for a fun and trendy crochet project? This Granny Square Bag is perfect for using up your leftover yarn or playing with your favorite color combinations!
With 13 vivid squares joined using the Join-As-You-Go (JAYGO) method and a sleek rope-style handle, this stylish bag is both practical and eye-catching. Let’s get started!
Skill Level
Intermediate
Finished Measurements
- Individual Square: 6.5″ x 6.5″
- Finished Bag (without handles): 16″ W x 16″ L
- Handle Length: 15″
Materials Needed
- Yarn: Caron One Pound, #4 worsted weight (260 yards total in 8-9 colors for squares; 265-300 yards in Main Color for joining, edge, and handles)
- Hook: 5.00 mm (H/8)
- Other Notions:
- Scissors
- Stitch markers
- Measuring tape
- Yarn needle
Abbreviations (US Terms)
- beg – beginning
- ch – chain
- dc – double crochet
- sc – single crochet
- sl st – slip stitch
- sp(s) – space(s)
- st(s) – stitch(es)
Stitching Instructions for Making the Granny Square Bag Free Crochet Pattern:
Granny Square Instructions (Make 13 Squares):
- General Notes:
- The right side is always facing.
- Beginning ch 3 counts as a dc.
- Change colors after each round.
- Rounds 2-5 begin in any corner space.
- Round 1 (Color A):
- Ch 4, sl st to form a ring.
- Ch 3 (counts as dc), 2 dc in ring, ch 2, 3 dc – repeat * 3 times.
- Ch 2, sl st to top of beg ch-3. (12 dc, 4 ch-2 corners).
- Fasten off.
- Round 2 (Color B):
- Sl st into any ch-2 corner.
- Ch 3, 2 dc in corner, 3 dc in next space, (3 dc, ch 2, 3 dc) in next corner – repeat * 3 times.
- 3 dc in first corner, ch 2, sl st to top of beg ch-3. (24 dc).
- Fasten off.
- Round 3 (Color C):
- Sl st into any ch-2 corner.
- Ch 3, 2 dc in same corner, 3 dc in next space, 3 dc in next space, (3 dc, ch 2, 3 dc) in next corner – repeat * 3 times. 3 dc in first corner, ch 2, sl st to top of beg ch-3. (36 dc).
- Fasten off.
- Round 4 (Color D):
- Sl st into any corner.
- Ch 3, 2 dc in same space, 3 dc in next space (repeat twice), (3 dc, ch 2, 3 dc) in next corner – repeat * 3 times. 3 dc in first corner, ch 2, sl st to top of beg ch-3. (48 dc).
- Fasten off. Weave in ends.
Join-As-You-Go (JAYGO) Assembly – Round 5
Now it’s time to join your squares. You’ll join the squares while working Round 5 using the Main Color. Corners now use ch 3 instead of ch 2.
- Square #1: Work Round 5 fully without joining: 3 dc in each space across, and (3 dc, ch 3, 3 dc) in each corner.
- Square #2: Join to one corner of Square #1 during Round 5. In joining corner: Ch 1, sl st to 2nd ch of adjacent corner, ch 1.
- Squares #3, #6, #7, #8, #9: Join on two sides. Use the following sequence:
- Join to the first square as usual, then drop the yarn to join to the second square.
- Along the side: Skip 3 sts on adjacent square, sl st to next space, skip 3 sts, 3 dc in next sp – repeat.
- In corners: Ch 1, sl st to adjacent ch-3 sp, ch 1.
- Squares #4, #5, #10, #11: Join on one side using the same side-join sequence.
- Squares #12 & #13: These are center bottom squares. Join on four sides to surrounding squares using the same join techniques.
Bag Folding and Top Edge
- Once Squares 1-6 are joined, fold the bag in half with the right side facing out. Continue joining the rest of the squares (7-13) following the layout.
- Place stitch markers on the top corners of Squares 1 and 2 to indicate handle placement.
Top Edge (Main Color):
- Round 1: Sc in every stitch around. In each ch-3 space, work 3 sc. At joined corners, place 1 sc in each square’s corner space and skip the join. Sl st to beginning st.
- Round 2: Ch 1, sl st in each stitch around. Sl st to first sl st. Fasten off. Weave in ends.
Handle Instructions (Make 2)
- Use the Main Color. Handles are worked in continuous rounds; right side of the stitches will be inside the tube.
- Start: Leave a 12″ tail. Ch 6, sl st to form a ring.
- Round 1: Sc in each ch (6 sc). Do not join. Place a stitch marker in the first sc.
- Rounds 2+: Sc around in continuous rounds. Move the marker up each round.
- Round 3+: To create the tube effect, sc into the horizontal loop (leg) on the wrong side of the previous round.
- Continue until the handle measures 15 inches. Fasten off, leaving a 12″ tail.
Attach Handles
- Sew one handle end to the inside top corner of Square 1, and the other end to Square 2.
- Repeat with the second handle on Squares 10 and 11.
- Stitch securely about 1″ below the top edge, from the inside of the bag. Weave in all ends.
This vivid Granny Square Bag is now ready to carry your essentials with handmade charm!
Whether you’re headed to the market or a picnic, it’s the perfect accessory to show off your crochet skills.
Download PDF


