Pattern Description:
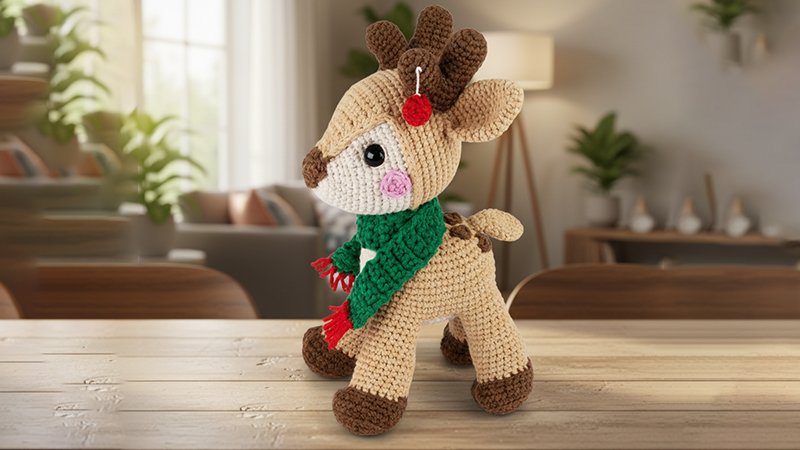
This adorable handmade reindeer pattern is perfect for festive crafts or holiday décor. It features a soft, rounded body, antlers, and a cute red nose, bringing a cheerful Christmas charm.
The simple design can be stitched or glued, making it beginner-friendly and ideal for felt or fabric projects, tree ornaments, or playful holiday gifts.
Materials Needed & Measurements:
- Brown, beige, and red felt pieces (approximately 8″ x 8″)
- Thread or fabric glue
- Needle and scissors
- Stuffing or cotton
- Ribbon for hanging (6-8 inches)
- Paper template for cutting pattern shapes
Instructions for Making the Reindeer Pattern:
Step 1: Preparing Your Materials
Before you begin, gather all your supplies in one place. You’ll need brown felt for the reindeer’s body, beige felt for the face and inner ears, and red felt for the nose.
Have a pair of sharp scissors, matching thread, a sewing needle, fabric glue (optional), and polyester stuffing ready.
If you plan to hang your reindeer as a decoration, keep a short ribbon or string on hand. Print or draw a simple reindeer pattern on paper to use as a cutting template.
Step 2: Cutting the Pattern Pieces
Lay the paper template over your felt sheets and trace around each shape using a fabric pencil or tailor’s chalk.
You’ll need two identical body pieces, one beige face patch, two small inner ears, a red oval for the nose, and four antler pieces (two for each side).
Carefully cut out each shape, keeping your edges smooth for a clean finish. Double-check that all parts match in size before moving to the next step.
Step 3: Assembling the Antlers and Ears
Place two antler shapes together and stitch around the edges using a small running or blanket stitch.
You can lightly stuff the antlers with cotton to give them shape, but it’s optional. Repeat this process for the second antler.
Next, layer the inner beige ear pieces on top of the brown outer ears. Stitch or glue them together neatly. Once complete, set the ears and antlers aside.
Step 4: Attaching the Facial Features
Take one of the body pieces – this will be the front. Position the beige face patch slightly lower than the top of the head and secure it with pins or glue.
Sew it on using a neat, even stitch. Then, place the red felt nose in the center of the face patch and stitch it in place.
For the eyes, you can either sew small black beads, use embroidery thread to create small knots, or glue on tiny black felt circles. This step brings your reindeer to life, so take your time to align the features evenly.
Step 5: Connecting the Ears and Antlers
Position the ears and antlers at the top of the reindeer’s head, ensuring they’re symmetrically aligned.
The ears should sit slightly below the antlers. Secure them temporarily with pins so they stay in place while you stitch.
You can lightly tack them down with a few stitches to hold their position before assembling the full body.
Step 6: Sewing the Body
Place the two body pieces together with the facial side facing out. Start stitching around the edges using a blanket or whip stitch, beginning at one side of the head.
As you sew, make sure the antlers and ears are caught securely between the two body layers. Continue stitching around, leaving a small gap near the bottom.
If you’re using fabric glue instead of sewing, apply a thin line of glue along the edges and press the pieces firmly together, leaving an opening for stuffing.
Step 7: Stuffing the Reindeer
Through the small opening, gently insert polyester stuffing or cotton into the body. Use a pencil or chopstick to push the filling into the corners and curves, ensuring the reindeer takes on a plump, even shape.
Don’t overfill, it should be firm but not stretched. Once you’re satisfied with the shape, sew the opening closed with small, neat stitches.
Step 8: Adding Final Details
To complete the look, attach the ribbon for hanging. Fold the ribbon into a loop and stitch or glue it to the top center of the head, just behind the antlers.
You can also decorate your reindeer with a small bow around its neck, a bell, or glitter accents to make it more festive. For a personal touch, embroider a name or the year on the back.
Step 9: Finishing Touches and Presentation
Inspect your reindeer for any loose threads or uneven stitching and trim as needed. Fluff the stuffing gently to keep the shape smooth.
If you’ve used glue, allow it to dry completely before handling. Once finished, your handmade reindeer is ready to hang on your Christmas tree, add to a holiday wreath, or gift to a friend.
This simple yet charming reindeer pattern captures the warmth and joy of the season. With soft felt textures and minimal materials, it’s an accessible project for crafters of all levels.
Whether made alone or as a family activity, each reindeer will have its own unique character, spreading festive cheer wherever it’s displayed.