Pattern Description:
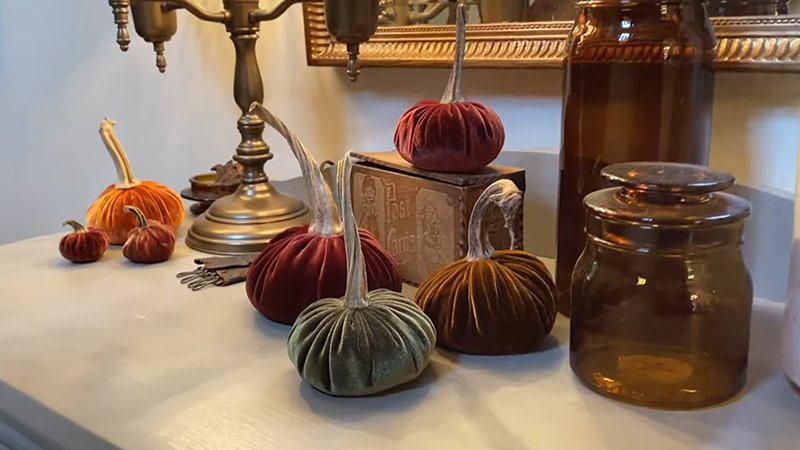
Bring a touch of cozy sophistication to your autumn decor with this free velvet pumpkin pattern.
This simple, beginner-friendly project turns a soft rectangle of stretch velvet into a beautiful, plump pumpkin with elegant grooves and a realistic faux stem.
With minimal sewing and materials, you’ll create plush, heirloom-quality pumpkins that elevate your home’s fall aesthetic.
Materials Needed & Measurements:
- Stretch Velvet Fabric: Choose stretch velvet- it’s soft, pliable, and easy to shape by hand or with a sewing machine.
- Faux Pumpkin Stems: These can be purchased or collected from old decorative pumpkins.
- Stuffing: Use polyester fiberfill (Poly-fil) or scrap fabric for eco-friendly filling.
- Embroidery Thread: Select a strong thread for gathering and shaping the grooves.
- Sewing Needles: You’ll need a standard sewing needle for hand stitching and a 3½” long needle for shaping (this makes threading through the pumpkin effortless).
- Additional Tools: Scissors, measuring tape, optional sewing machine, hot glue gun, and small pliers (helpful for pulling the needle through dense stuffing).
Measurements & Cutting Guide
The rule of thumb: the length of the fabric = twice the width.
| Pumpkin Size | Fabric Rectangle Measurement | Notes |
| Small | 6″ x 12″ | Perfect for table accents |
| Medium | 8″ x 16″ or 9″ x 18″ | The 9″ x 18″ size yields a 6″ diameter pumpkin |
| Large | 10″ x 20″ or 12″ x 24″ | Use a long needle for best results |
Seam Allowance: ⅜”
Gathering Stitch Distance: ¼” from fabric edge
Stuffing Amount: ~2 large handfuls per pumpkin
Groove Thread Length: 48″
Instructions for Making the Velvet Pumpkins Pattern:
Sew the Fabric Tube
- Fold the velvet rectangle widthwise, right sides together (RST).
- Sew along the open edge using a ⅜” seam allowance.
- Turn the sewn piece right-side out, you now have a soft velvet tube.
Close the Bottom
- Thread a long piece of embroidery thread onto a standard needle.
- Sew a wide running stitch around the bottom opening, ¼” from the edge.
- Leave the ends long, then pull both tightly to gather and close the bottom.
- Tie a double knot to secure and trim the excess.
- Keep your needle and thread handy for the next step.
Stuff and Close the Top
- Turn the pumpkin right-side out if not already done.
- Fill it with stuffing, about two generous handfuls, until plump but not overly firm.
- Repeat the gathering stitch around the top opening, ¼” from the edge.
- Pull the thread tight to close the top, knot securely, and trim.
Shape the Grooves
- Cut a 48″ length of embroidery thread and thread it through the 3½” long needle.
- Tie a sturdy knot at the end of the thread.
- Gently press the pumpkin to flatten slightly- this makes threading easier.
- Insert the needle from the top through the center and out the bottom. Pull until the knot rests snugly at the top.
- Bring the needle back up around the side to the top again, insert it through the same center point, and push it down through the bottom once more.
- Pull tightly to form the first groove (dimple).
- Repeat this looping process six times evenly around the pumpkin to create six defined sections.
- Adjust tension for even shaping. Use pliers if needed to pull the needle through dense stuffing.
- When finished, tie a couple of secure knots at the top and trim the excess thread.
Finishing Touches
- Attach a faux stem to the top center using hot glue.
- For a refined, vintage look, spray-paint stems gold or bronze before attaching.
- Allow glue to cool and set before displaying.
Final Thoughts
Your handmade velvet pumpkins are now complete- luxurious, soft, and perfectly shaped. These charming decor pieces are ideal for centerpieces, mantel displays, or thoughtful handmade gifts.