Pattern Description:
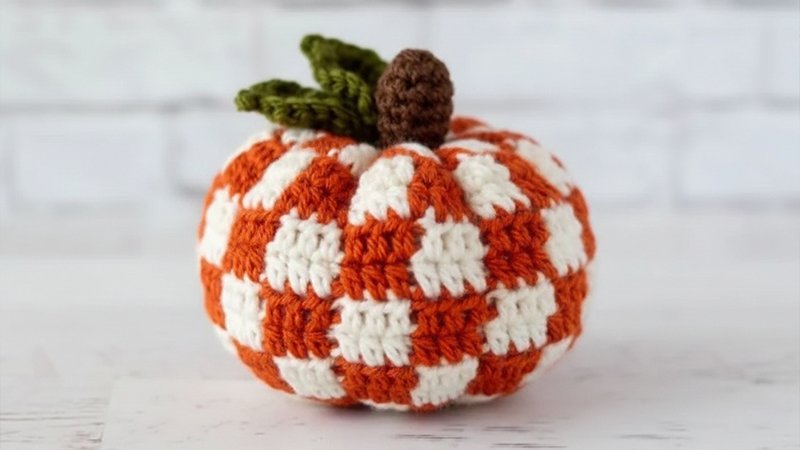
The Cutest Plaid Pumpkin is a charming, easy-to-make crochet pattern perfect for fall décor. Using simple double crochet stitches and carried color changes, it creates a cozy plaid effect.
The piece is gathered, stuffed, and shaped into a pumpkin with defined ridges, topped with a natural stick stem, a crochet leaf, and optional rustic embellishments for a delightful handmade touch.
Materials Needed & Measurements:
Materials Needed:
- Yarn: Worsted Weight Yarn (The author used Red Heart Super Saver in Black, White, and Grey Heather for the pumpkin, and Caron Simply Soft in Woodland Heather for the leaf).
- Hook: Size H hook (5 mm).
- Yarn needle.
- Big handful of poly-fill.
- Stem: 2 inch (or so) stick.
- Hot glue gun.
- Other adornments you’d like to tie around the stem (The author used raffia, ribbon, jute that was curled…).
Measurements
The finished dimensions are approximately 7 inches wide by 3 inches tall. Additionally, when finishing off the main piece, the pattern instructs leaving a very long tail, specifically 5 feet for sewing up the ends.
Abbreviations Used:
- ch = chain
- st(s) = stitch(es)
- sl = slip
- dc = double crochet
- tr = treble
- sc = single crochet
Instructions for Making the Cutest Plaid Pumpkin Pattern:
Pumpkin Body Construction
Use a Size H hook (5 mm) and Worsted Weight Yarn.
- Starting Row With black yarn: ch 72, then join to the first ch with a sl st.
- Round 1 ch 2, then dc in the same st that you sl st’d into, and in the next 3 sts. Change to gray: dc into next 4 sts. [change to black: dc into next 4 sts, change to gray: dc into next 4 sts] Repeat [] around. Sl st into the first dc to join (72 total sts).
- Round 2 Change to black: ch 2, dc into 4 sts. Change to gray: dc into next 4 sts. [change to black: dc into next 4 sts, change to gray: dc into next 4 sts] Repeat [] around. Sl st into the first dc to join.
- Rounds 3–4 (Still using gray) ch 2, dc into 4 sts. Change to white: dc into next 4 sts. [change to gray: dc into next 4 sts, change to white: dc into next 4 sts] Repeat [] around. Sl st into the first dc to join.
- Rounds 5–6 Follow the same instructions as Round 2 (using black and gray).
- Rounds 7–8 Follow the same instructions as Round 3 (using gray and white).
- Rounds 9–10 Follow the same instructions as Round 2 (using black and gray).
- Rounds 11–12 Follow the same instructions as Round 3 (using gray and white).
- Rounds 13–14 Follow the same instructions as Round 2 (using black and gray).
- Finishing the Body Finish off the yarn, leaving a very long tail, specifically 5 feet, to sew up the ends, as quite a bit is needed to finish the pumpkin.
Leaf Construction
Use green yarn (Caron Simply Soft in Woodland Heather was suggested).
- ch 6.
- Working in the back loop only: in the 2nd ch from the hook, sc, sc, dc, dc, 3 tr in the last st.
- Now working on the other side of your base chain: 3 tr in the first st, dc, dc, sc, sl st into the last st.
- Finish off and sew in ends.
Closing the Bottom
- Thread the long tail of the project onto a yarn needle.
- Make a running stitch through one of the open ends on the very outer row of stitches, using long strides (a loose running stitch) to make gathering easy.
- After going all the way around, pull the yarn tight to gather, and then secure it with a knot.
- Do not cut the yarn or unthread the needle; pull the yarn through the inside of the work to use it for the other side.
Stuffing and Closing the Top
- Stuff the pumpkin full of poly-fill.
- Repeat the gathering process on the other open end: use the yarn and needle, sewing in and out to gather the top, and knot again to secure.
Creating Indentations (Ribbing)
- Take the yarn and put it over to the other side of the pumpkin.
- Insert the needle through the middle of the other side.
- Repeat this process seven times, spacing them however you think looks good (it does not have to be perfect).
- Tie another knot after the indentions are complete, and weave the end in.
Attaching the Stem and Leaf
- Put a dab of hot glue in the center of the pumpkin to attach a 2-inch stick (or a stick of similar length).
- Press firmly to set the stick until the glue is cooled.
- The leaf can either be hot glued or sewn on.
- Add any desired adornments (such as raffia, ribbon, or curled jute) to finish off the piece.