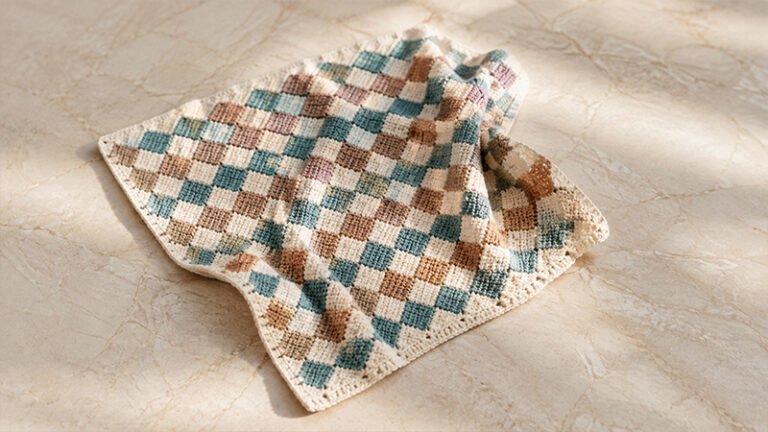
You’ve been scrolling through social media lately, and you’ve probably noticed the explosion of checkered patterns in fashion.
Today, I’m excited to share a detailed pattern for the “Checkerboard Cookie” Sweater Vest. Inspired by the adorable checkered cookies often seen in Japanese anime, this vest combines a trendy boxy fit with a delicious two-tone palette that looks good enough to eat.
This vest is designed with a boxy, slightly oversized fit, making it a perfect layering piece for any season. Whether you’re a beginner trying colorwork for the first time or an experienced crocheter looking for a stylish project, this step-by-step guide will walk you through it.
Preparation: Materials & Sizing
Materials Needed
- Yarn: Lion Brand Skein Tones (Medium Weight 4)
Suggested shades: Almond and Cocoa- S/M: 4 skeins (2 of each color)
- L/XL: 6 skeins (3 of each color)
- 2XL/3XL: 7 skeins (3 of one color, 4 of the main body/ribbing color)
- Hook: 4.5 mm crochet hook
- Notions: Darning needle, scissors, stitch markers
Gauge
4” x 4” square = 16 stitches x 14 rows in Half Double Crochet (Hdc)
Checking gauge is strongly recommended for accurate sizing.
Final Measurements (Laid Flat)
- S/M: 17” wide x 16.5” long
- L/XL: 21” wide x 18.5” long
- 2XL/3XL: 25” wide x 20.5” long
Stitch Guide (US Terms)
- Ch – Chain
- St(s) – Stitch(es)
- Sc – Single Crochet
- Hdc – Half Double Crochet
- Hdc2tog – Half Double Crochet Two Together (decrease)
- Sc blo – Single Crochet in Back Loop Only
Master Technique: Seamless Color Changes
To create the checkerboard effect, you’ll switch colors mid-row.
- Work your Hdc until 3 loops remain on your hook.
- Drop the current color to the back (wrong side).
- Pull the new color through the last 3 loops to finish the stitch.
- Continue crocheting with the new color.
- Alternate sides as you turn each row.
This method keeps the color transition clean and seamless.
Phase 1: Front Panel
You’ll begin with two large color blocks that later shift into the checkerboard pattern.
Foundation Chain
With Color A, Ch 71 <87, 101>
Row 1 (Right Side)
Hdc in 2nd ch from hook.
Hdc in next 34 <42, 49> chains.
Before finishing the last stitch of this section, pull Color B through the final 3 loops.
Drop Color A.
Hdc in remaining 35 <43, 50> chains.
Stitch count: 70 <86, 100>
Row 2
Ch 1, turn.
Hdc 35 <43, 50> with Color B.
Before finishing the last stitch, pull Color A through.
Drop Color B.
Hdc in remaining stitches.
Rows 3–24 <27, 30>
Repeat Row 2, switching colors in the middle of every row.
Armhole Shaping + Checkerboard “Switch”
Row 25 <28, 31>
Ch 1, turn.
Hdc2tog twice (decrease across first 4 sts).
Hdc 31 <39, 46>, switch colors,
Hdc 31 <39, 46>,
Hdc2tog twice at end.
Stitch count: 66 <82, 96>
Row 26 <29, 32> (Color Stack Switch Row)
Ch 1 with Color B (cut Color A).
Hdc 33 <41, 48>, switch to Color A,
Hdc to end.
This row shifts the checkerboard stacking direction.
Row 27 <30, 33>
Ch 1, turn.
Hdc2tog twice,
Hdc 29 <37, 44>, switch color,
Hdc 29 <37, 44>,
Hdc2tog twice.
Stitch count: 62 <78, 92>
Row 29 <32, 35>
Ch 1, turn.
Hdc2tog twice,
Hdc 27 <35, 42>, switch color,
Hdc 27 <35, 42>,
Hdc2tog twice.
Stitch count: 58 <74, 88>
Row 31 <34, 37>
Ch 1, turn.
Hdc2tog twice,
Hdc 25 <33, 40>, switch color,
Hdc 25 <33, 40>,
Hdc2tog twice.
Stitch count: 54 <70, 84>
Rows 32–44 <35–48, 38–52>
Hdc across, maintaining the color change in the center of each row.
No more decreases.
Front panel complete.
Phase 2: Front Straps
Work straps directly onto the panel.
Left Strap
Row 1
Ch 1, turn.
Hdc in next 16 <19, 22> stitches.
Row 2
Ch 1, turn.
Skip first stitch, Hdc across.
Row 3
Ch 1, turn.
Hdc across until 2 stitches remain, skip one, Hdc in last stitch.
Rows 4–6 (S/M ends here)
Continue decreasing 1 stitch per row (alternating sides to shape neckline).
Rows 7–10 (L/XL & 2XL/3XL only)
Continue shaping until required strap length is reached.
Fasten off.
Right Strap
Count 16 <19, 22> stitches from opposite edge.
Attach yarn.
Repeat shaping logic, mirroring decreases so neckline curves inward.
Fasten off.
Phase 3: Back Panel
Repeat front panel instructions through Row 44 <48, 52>.
Additional Back Length
Work 4 extra rows of Hdc straight across (no shaping).
Back Straps
Attach yarn at each side.
Work:
- 2 rows of Hdc
- Width: 11 <12, 13> stitches
Fasten off.
Phase 4: Assembly
Place panels with right sides facing together.
- Seam shoulders.
- Seam sides.
- Turn vest right side out.
Optional Ribbing (Highly Recommended)
Bottom Ribbing
Attach yarn at bottom edge.
Ch 7.
Sc in 2nd ch from hook and next 5.
Sl st into next 2 stitches of body.
Turn.
Skip sl sts.
Sc blo across ribbing row.
Repeat around entire bottom.
Armhole Ribbing
Ch 5 (4 stitches wide ribbing).
Repeat ribbing process evenly around armhole.
Neck Ribbing
Ch 7 (6 stitches wide ribbing).
Repeat same method evenly around neckline.
“Fluffy” Lightweight Variation
Use a lightweight yarn such as Drops Alpaca Silk for a fitted tank-style version.
Adjustments
- Subtract 8 stitches from foundation chain.
- Example S/M: 71 → 63
- Work 2 extra rows before color switching
- Skip ribbing
- Instead, work 1 round of Single Crochet around neckline and armholes
Final Thoughts
Once ends are woven in, your Checkerboard Cookie Vest is ready to wear! This piece is a fun way to practice colorwork while embracing a trendy, anime-inspired silhouette.
Happy crocheting