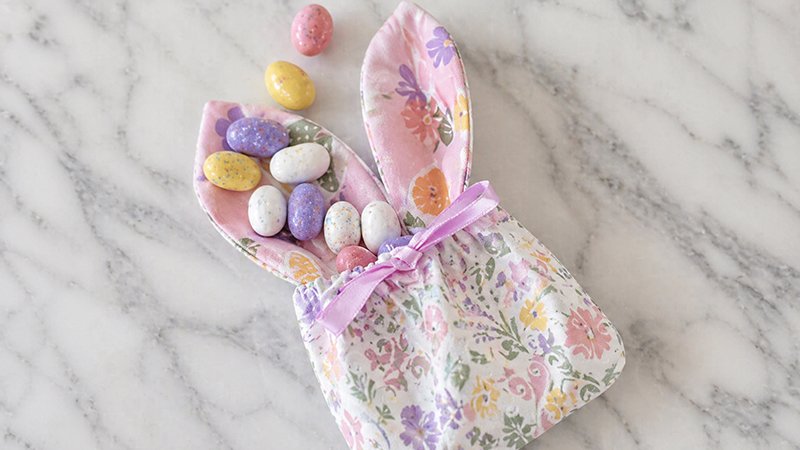
Easter is the perfect time to add a handmade touch to your gifts, and these bunny treat bags are simple, fast, and beginner-friendly. Using a “trace and stitch” method, you can make multiple bags in just a couple of hours—even if you’re new to sewing.
Materials Needed (Per Bunny Bag)
Prepare the following:
- 4 fabric squares (5” x 5”)
- 1 for bunny ears
- 1 for bunny face/front
- 1 for the bag back
- 1 for ear lining
- 16 inches of ribbon (⅛”–¼” wide)
- Fabric marking tool (pencil or heat-erasable pen)
- Matching thread
- Sewing machine
- Iron
- Free bunny ear and face templates (printed and cut)
Tip: Pre-cut multiple 5” squares if you plan to batch-make several bags.
Step 1: Trace the Templates
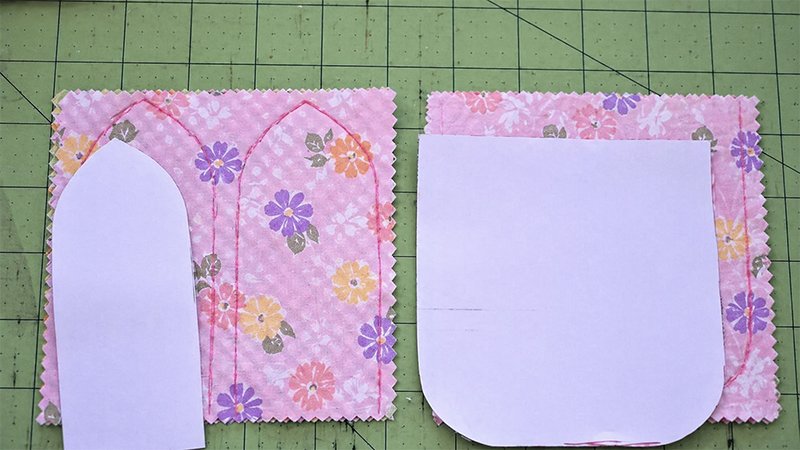
- Cut out the paper templates for the bunny ears and face.
- Take two fabric squares:
- On one square, trace two bunny ears.
- On another square, trace the bunny face shape.
- Leave at least ¼ inch space around each traced shape.
Do not cut the fabric yet—you will sew first, then trim.
Step 2: Create the Ribbon Casing
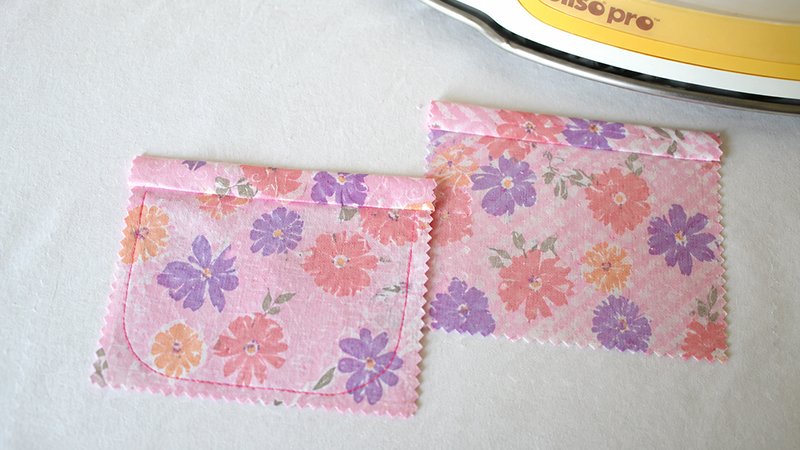
This step prepares the opening for your drawstring.
- Take the front (face) square and the back square.
- On the top edge of each:
- Fold down ¼ inch, press with the iron.
- Fold again ½ inch, press again.
- Open these folds back up (this is important for sewing later).
Add the Buttonhole (Front Square Only):
- Draw a vertical line (about ⅜ inch long) in the center, just below the fold line.
- Sew a buttonhole over this line.
- Carefully cut open the buttonhole.
Step 3: Pin and Sew
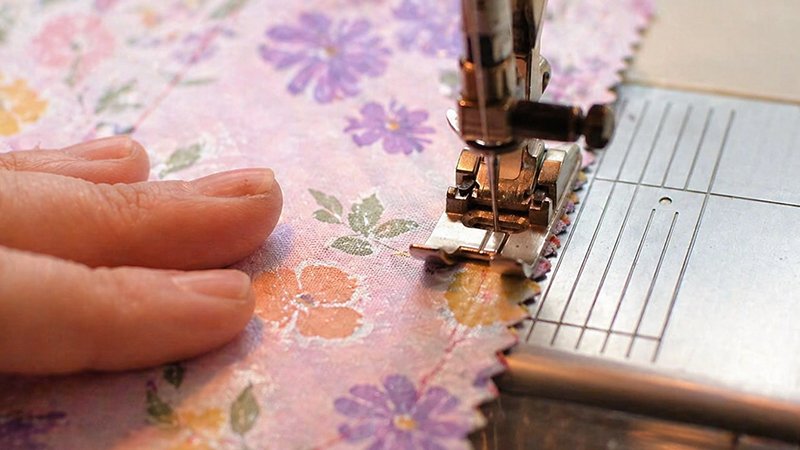
- Layer your squares right sides together:
- Ear square + ear lining square
- Front (with buttonhole) + back square
- Make sure the casing folds are unfolded before sewing.
- Pin everything securely.
Stitching:
- Sew directly on the traced lines:
- Around the bunny ears
- Around the bag shape
- Start sewing from the top edge for best alignment.
Step 4: Trim and Turn the Ears
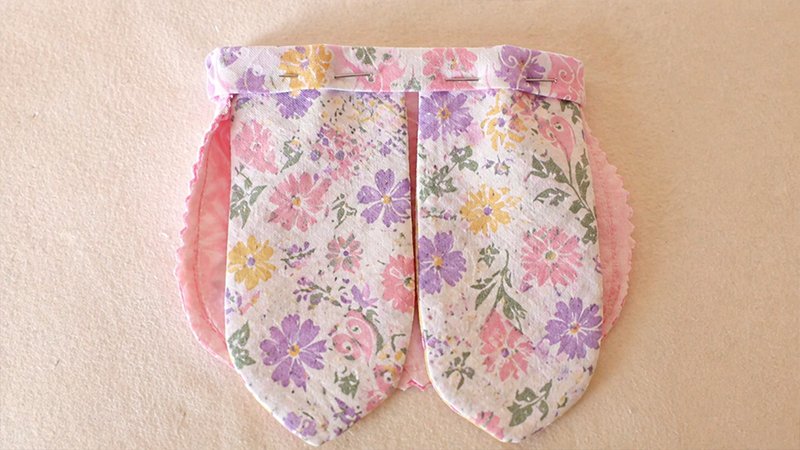
- Trim excess fabric around stitched shapes, leaving about ¼ inch seam allowance.
- At the tip of each ear, trim off the point (without cutting stitches).
- Turn the ears right side out.
- Use a blunt tool (like a chopstick) to gently push out the curves.
- Press flat with an iron.
Step 5: Attach Ears & Sew Casing
- Keep the bag inside out.
- Refold and press the casing folds back into place.
- Position the ears on the back panel, tucked under the casing:
- The side facing you now will be the back of the ears later.
- Pin the ears in place.
Stitch the casing:
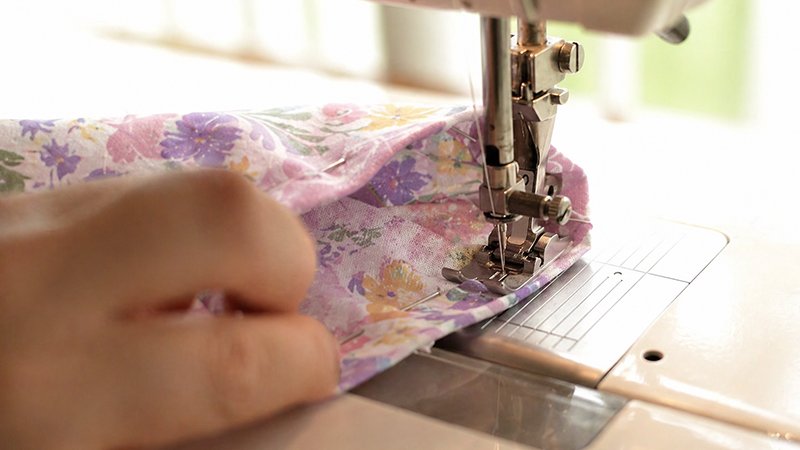
- Sew along the folded edge of the casing:
- Start and stop at the side seams
- Catch the ears in your stitching
- Backstitch at both ends to secure.
Tip: If your sewing machine has a small free arm, use it. Otherwise, carefully turn the bag right side out for easier stitching.
Step 6: Finish the Bag
- Turn the bag right side out.
- Use a safety pin or bodkin to thread the 16” ribbon through the casing via the buttonhole.
- Pull both ends and tie a knot or bow.
Final Result
You now have a cute bunny treat bag—perfect for:
- Easter candy
- Small gifts
- Party favors
Extra Tips
- One charm pack (about 20–21 squares) can make 5 bunny bags.
- Mix and match fabrics for unique designs.
- Add embellishments like embroidery, buttons, or fabric paint for personality.
Enjoy making your handmade bunny bags—and have a fun, creative Easter! 🐣