Pattern Description:
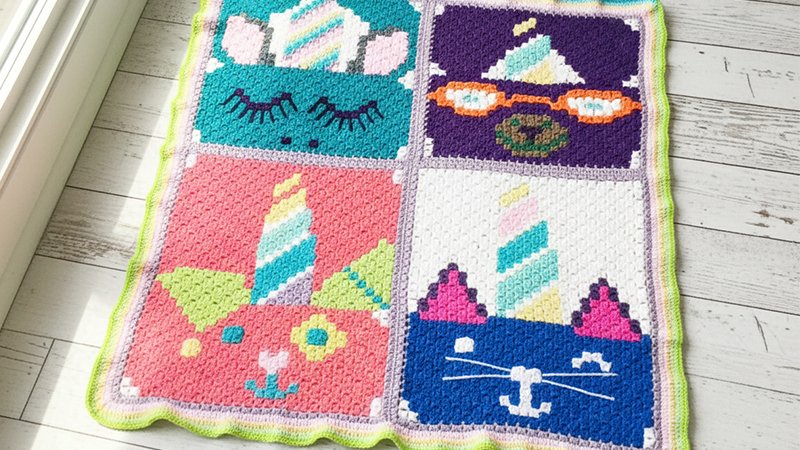
This whimsical corner-to-corner (C2C) blanket celebrates four adorable unicorn characters- a unicorn, cat, puppy, and llama- each stitched from a 25×34 pixel graph.
Using the traditional C2C method with three double crochets per square, the blanket is worked in separate sections, bordered individually, then whip-stitched together.
A colorful multi-round border completes the design, creating a bright, magical blanket perfect for kids and unicorn lovers alike.
Materials Needed & Measurements:
| Category | Detail | |
| Finished Measurements | 34.5 inches by 46 inches | |
| Gauge | 6 squares of 3 double crochets (dc) = 4 inches | |
| Crochet Hook | H/5mm crochet hook | |
| Yarn Weight | Worsted weight (#4) yarn | |
| Specific Yarn Used | Red Heart Super Saver (#4 worsted weight yarn) | |
| Yarn Colors Used | Cafe Latte, Buff, Cream, White, Black, Petal Pink, Pale Plum, Turqua, Minty, Lemon & Grey Heather | |
| Additional Tools | Blocking boards (optional) | |
| Technique Used | Corner-to-corner (C2C) technique. The traditional method involves chaining 6 to start each new row and chaining 3 at the beginning of each square. | |
| Borders | The pattern includes instructions for crocheting a border around each graph. The designer used purple for the borders around each section, and then added rounds of pink, yellow, green, and blue once the sections were sewn together. |
Abbreviations Used:
- C2C – Corner to Corner
- dc – Double Crochet
- ch – Chain
- st – Stitch
- sts – Stitches
- Rnd – Round
- RS – Right Side
- WS – Wrong Side
Instructions for Making the Whimsical Unicorn Blanket Pattern:
Crocheting the Character Sections (C2C Technique)
The pattern is executed using the corner-to-corner (C2C) technique. You have the option to follow either the pixel graph or the written instruction (available for both right-handed or left-handed crocheters).
Each unicorn character is designed on a 25×34 pixel graph.
- Use the traditional method of C2C.
- For each square, make three double crochets (dc).
- To begin each new row, chain 6.
- At the start of each square, chain 3.
- The designer started crocheting the graph in the bottom right corner.
Adding Borders to Individual Sections
Once each of the four sections (graphs) is completed, you must crochet a border around the graph. The pattern provides instructions for this individual border. The designer chose purple for this border, but you may choose any color, such as white.
Joining the Sections
After all the graph sections are finished, you will sew them together. The recommended joining method is the whip stitch. When using the whip stitch, stitch together the front loops on the right side and the back loops on the wrong side.
Adding the Final Border Rounds
Once the graph sections are sewn together into the full afghan, you will add a final, external border. Since the individual sections already had a purple border, the final border used rounds of pink, yellow, green, and blue.
The instructions for these four final rounds are as follows:
- Round 1 (pink): In each corner, make 2 double crochets (dc) in each of the 4 corner dcs. Dc once in each stitch (st) on the sides.
- Round 2 (yellow): In the four stitches in the corners, perform the sequence: 2dc, dc, 2dc, dc. Dc once in each stitch on the sides.
- Round 3 (green): In the four stitches in the corners, perform the sequence: 2dc, dc, 2dc, dc. Dc once in each stitch on the sides.
- Round 4 (blue): In the four stitches in the corners, perform the sequence: 2dc, dc, 2dc, dc. Dc once in each stitch on the sides.