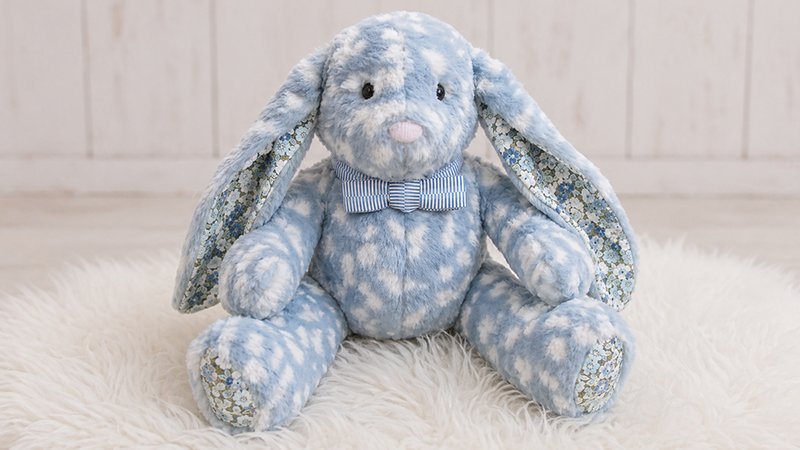
Made from one simple pattern, each bunny develops its own personality depending on your fabric, textures, and accessories. The goal is a soft, vintage-inspired toy with gentle colors and delicate details—something that feels handmade and heirloom-worthy.
Below is a clear, step-by-step guide to help you successfully create your own bunny.
Materials You’ll Need (For One Bunny, ~12” Tall)
Fabric:
- ⅝ yard Cuddle fleece or plush fabric (main body)
- ⅜ yard quilting cotton (ears and feet accents)
- ⅜ yard lightweight fusible interfacing (for structure)
Stuffing & Details:
- 12 oz polyester fiber fill
- ~2 cups weighted pellets (Poly-Pellets)
- Two ½” black buttons (eyes)
- Pink yarn (nose)
- Chunky yarn (tail pom-pom)
Tools:
- Sewing machine (walking foot recommended)
- Pins or clips
- Fabric marker
- Scissors or rotary cutter
- Yarn needle
- Pom-pom maker (optional but helpful)
Step 1: Prepare and Cut the Pattern
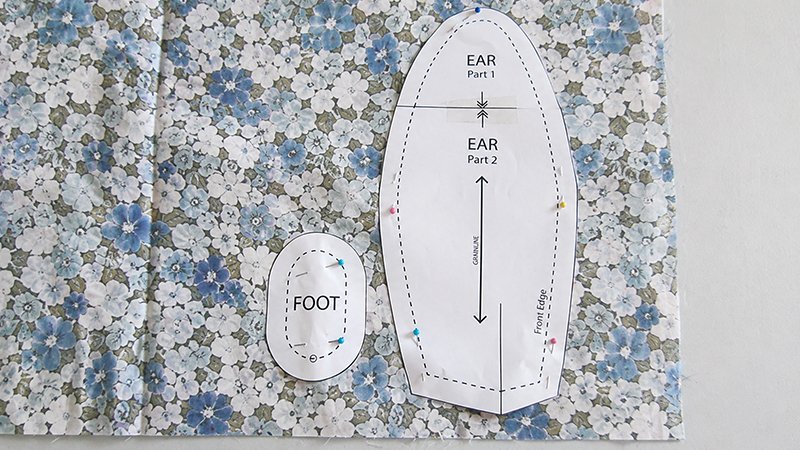
Print your pattern at 100% scale and assemble it carefully. You will create four main pattern pieces:
- Bunny Front
- Bunny Back
- Bunny Ear
- Bunny Foot
Important Tip: Fabric Nap Direction
Cuddle fabric has a “fur direction” (nap). Always:
- Run the nap top to bottom on body pieces
- Run the nap toward the ear tips
This ensures your bunny looks smooth and professional.
Cutting:
- From Cuddle fabric: cut
- 2 fronts
- 2 backs
- 2 ears
- From cotton fabric: cut
- 2 ears (lining)
- 2 feet
- From interfacing: cut
- 2 ears
- 2 feet
Fuse interfacing to the wrong side of the cotton pieces.
Step 2: Make the Ears and Feet
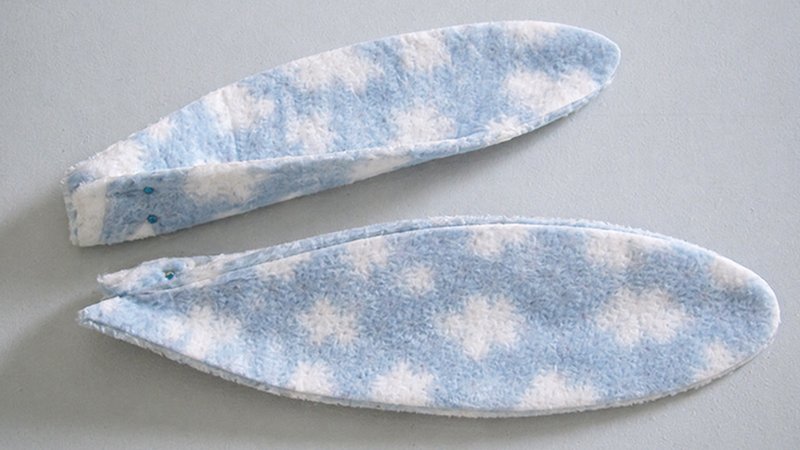
Ears:
- Place one fleece ear and one cotton ear right sides together.
- Sew around edges with a ½” seam allowance, leaving the bottom open.
- Trim curves and turn right side out.
- Gently push out edges using a blunt tool.
- Fold the base slightly off-center to give the ear a natural shape.
Feet:
Feet remain flat for now, but should have interfacing attached for structure.
Step 3: Sew the Bunny Body
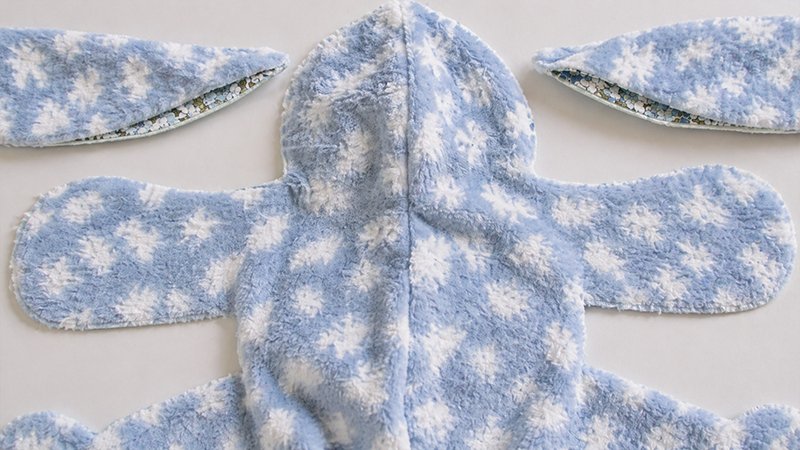
Darts:
- Mark darts on the front and back pieces.
- Stitch from edge to point.
- Cut open the fold of each dart to reduce bulk and press flat.
Center Seams:
- Sew the two front pieces together along the center.
- Repeat for the back pieces, but leave a 3–4 inch opening for stuffing.
Attach Ears:
- Position the ears on the front piece where marked.
- The folded side should face inward toward the face.
- Pin securely.
Join Front and Back:
- Place front and back pieces right sides together, sandwiching ears inside.
- Pin well (plush fabric can shift).
- Sew around the entire edge, leaving leg openings unstitched.
Step 4: Insert the Feet
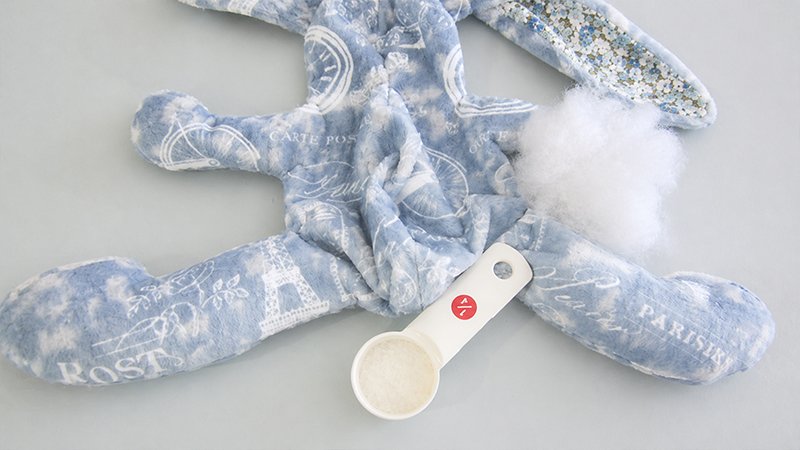
This step can feel tricky, but it becomes easier with patience.
- Clip the leg openings every ½ inch to help curves spread.
- Mark four points on each foot (top, bottom, sides).
- Match these points to the leg opening seams.
- Pin carefully and sew slowly with a ½” seam allowance.
Once both feet are attached:
- Trim excess fabric
- Turn the bunny right side out
Step 5: Stuffing the Bunny (Light/Heavy Method)
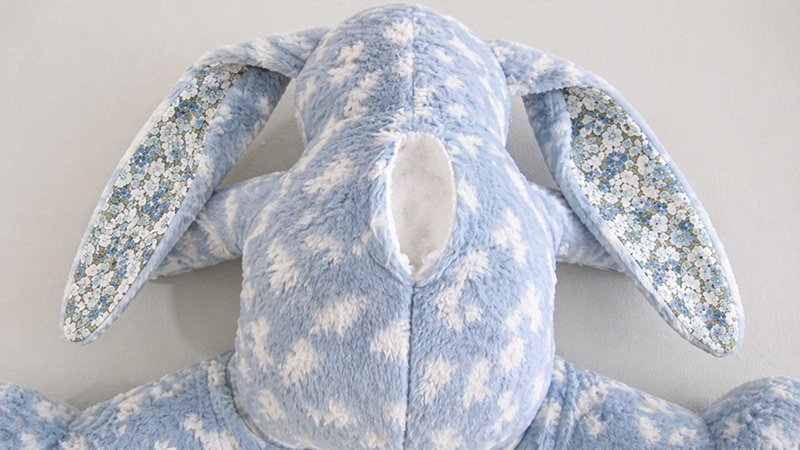
This technique helps your bunny stay soft but sit upright.
Feet & Paws:
- Add fiber fill first
- Add:
- ¼ cup pellets in each foot
- ~2 tablespoons pellets in each paw
- Cover pellets with more fiber fill
Head:
- Use only fiber fill
- Stuff firmly so the head keeps its shape
Body:
- Lightly stuff arms so they remain flexible
- Fill the lower body with fiber fill
- Add 1 cup of pellets at the bottom for weight
- Add more fiber fill to secure everything
Close Opening:
Use a ladder stitch (invisible stitch) to hand-sew the back closed.
Step 6: Add Facial Features and Tail
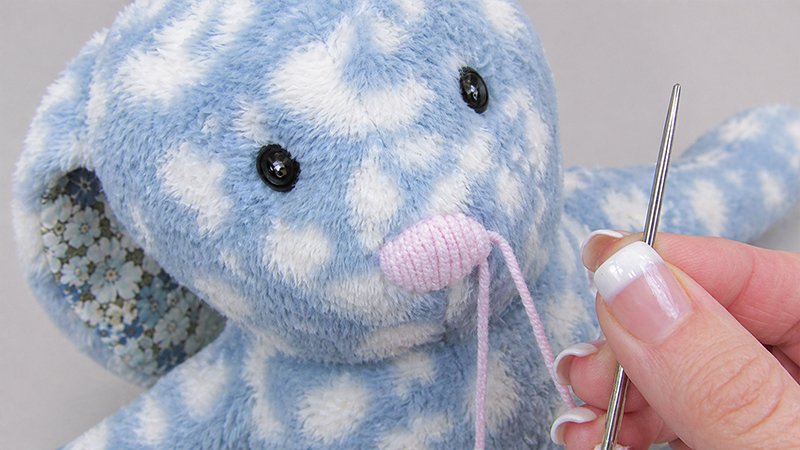
Eyes:
- Sew buttons securely through the head
- Pull the thread slightly tight to shape the face
For children’s toys, replace buttons with embroidered eyes.
Nose:
- Use pink yarn
- Stitch a small triangle shape with layered loops
Tail:
- Make a 2.5–3 inch pom-pom
- Attach by threading yarn through the body and tying tightly
Final Touches & Customization
Now your bunny is complete—but this is where creativity shines.
Try adding:
- Ribbon bows (like Lolly)
- Lace collars (like Flora)
- Bowties (like Chester)
- Tiny outfits or accessories
Each small detail adds personality and charm.
Helpful Tips for Success
- Use lots of pins or clips—plush fabric moves easily
- Sew slowly, especially around curves
- Don’t worry about perfect seams—the fabric hides mistakes
- Always double-check nap direction before cutting
Conclusion
These cuddle bunnies are more than just soft toys—they’re meaningful handmade keepsakes. With simple techniques, careful stuffing, and a bit of creativity, you can create a bunny that feels unique and special every time.
Even if you’re new to sewing plush fabrics, this project is forgiving, fun, and incredibly rewarding.