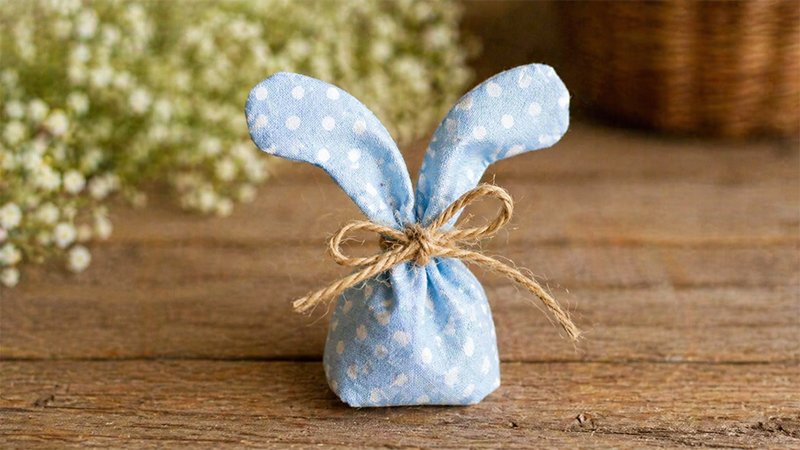
Create a charming and functional Bunny Sachet Bag using this easy-to-follow sewing pattern. Perfect for beginners and experienced sewists alike, this project is ideal for using fabric scraps while making something both decorative and practical.
Finished Sizes
- Mini Bunny: დაახლოებით 3 inches tall
- Large Bunny: approximately 6 inches tall
Materials Needed
Fabric:
- Mini: Two pieces, 2¼” x 3″
- Large: Two pieces, 4½” x 6″
Notions:
- Filling (lavender, rice, silica gel, sand, etc.)
- Ribbon, lace, or yarn (for ears)
- Fusible web (for large bunny face)
- Embroidery floss (optional for face)
Tools:
- Printed bunny pattern (do not scale)
- Sewing machine or needle and thread
- Fabric marker or pencil
- Scissors
- Iron
- Blunt tweezers or turning tool
Pattern Preparation
- Print the bunny template on letter-size paper.
- Ensure the print scale is set to 100% for accurate sizing.
- Cut out the pattern piece neatly.
Cutting & Marking
- Place two fabric pieces with the wrong sides facing up.
- Trace the bunny shape onto one piece of fabric.
- Mark a 1-inch opening along one side seam (important for turning and filling).
- Align both fabric pieces with right sides together.
Sewing Instructions
- Begin stitching at one end of the marked opening.
- Sew along the traced line around the bunny shape.
- Stop stitching at the other end of the opening—leave it unsewn.
- Use a short stitch length for better control, especially around curves and ears.
Trimming & Clipping
- Trim seam allowance:
- Mini bunny: about ⅛ inch
- Large bunny: about ⅜ inch
- Carefully clip curves and notch rounded areas.
- This prevents bulk and ensures smooth shaping after turning.
- Avoid cutting into the stitching line.
Turning the Bunny
- Use the 1-inch opening to turn the bunny right side out.
- Insert blunt tweezers to gently pull out the ears one at a time.
- Push out seams carefully to define the shape.
- Take your time—ears are delicate.
Pressing
- Lightly press the bunny with a warm iron.
- Smooth out wrinkles and shape the edges neatly.
Face Decoration (Large Bunny Only)
- Trace the face design onto fusible web.
- Iron onto fabric (wrong side).
- Embroider facial details before attaching.
- Fuse the completed face onto the bunny front using an iron.
Filling the Sachet
- Choose your desired filling:
- Lavender → scented sachet
- Rice/wheat → heat pack
- Silica gel → moisture absorber
- Sand → weight (paperweight/doorstop)
- Make a paper funnel:
- Roll the paper into a cone shape
- Cut a small tip opening
- Insert the funnel into the opening and fill carefully.
- For bulkier fillings, use tweezers or fingers.
Closing the Opening
- Fold seam allowance inward neatly.
- Use a ladder stitch (invisible stitch) to close the gap.
- Secure the thread and trim excess.
Shaping the Bunny
- Shake the bunny gently so the filling settles at the base.
- Wrap the thread around the base of the ears.
- Pull tightly to gather and define the ear shape.
- Knot securely.
Finishing Touch
- Tie ribbon, lace, or yarn over the gathered ear section.
- Adjust into a neat bow for decoration.
Helpful Tips
- Use cotton or linen fabric for the best structure and breathability.
- Sew slowly around curves for better accuracy.
- Keep seam allowance consistent to maintain symmetry.
- Do not overfill—leave enough space for shaping.
Optional Uses
- Drawer freshener
- Sleep sachet
- Heat pack
- Shoe deodorizer
- Gift decoration
- Pet toy (with catnip)
His Bunny Sachet Bag is a quick, versatile project that combines creativity with functionality. Make one or a dozen—they’re perfect for gifts, seasonal décor, or everyday use. Happy sewing!