Every childhood tends to revolve around one small, comforting object—a blanket, toy, or soft companion that helps toddlers feel safe in an unfamiliar world.
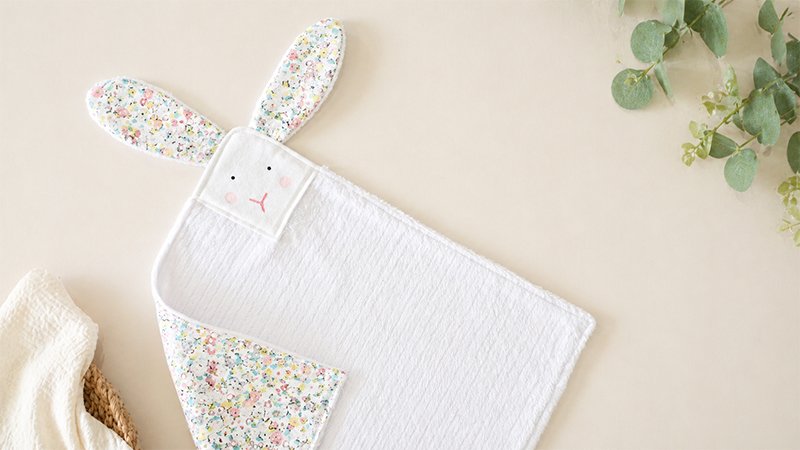
A “lovey” combines the best of both worlds: it’s lightweight, portable, and easy for little hands to hold on to. This DIY bunny lovey is especially popular because it blends a soft mini blanket with an adorable bunny head and floppy ears.
The finished piece is about 12 inches square, making it perfect for travel, naps, or everyday comfort. Below is a more detailed, step-by-step guide to help you create one, even if you are new to sewing.
Materials You’ll Need
Main Fabrics (Body of the Lovey):
- ½ yard of Fabric A (e.g., minky, fleece, flannel, or cotton)
- ½ yard of Fabric B (contrasting fabric for the back)
Face Fabric:
- ⅛ yard (or at least a 4″ x 4″ piece) of smooth cotton or flannel
(Avoid fuzzy fabric here so the face details show clearly.)
Other Supplies:
- Matching thread
- Sewing machine (or hand sewing needle)
- Fabric scissors
- Pins or clips
- Iron
- Fabric marker or chalk
- Turning tool (or blunt pencil)
- Fabric paint OR embroidery thread for facial features
Step 1: Cut All Pieces
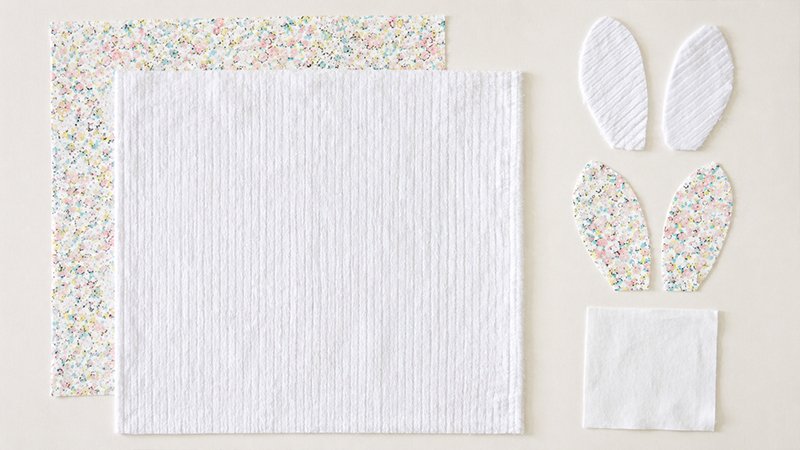
- From both main fabrics, cut:
- Two 13″ x 13″ squares (one from each fabric)
- For the bunny ears:
- Use a simple ear template (about 6–7 inches tall)
- Cut:
- 2 ear pieces from Fabric A
- 2 ear pieces from Fabric B
- For the face:
- Cut one 3.25″ x 3.25″ square from the smooth fabric
Tip: If you don’t have a template, draw a long oval shape and slightly taper one end for a natural ear look.
Step 2: Sew the Bunny Ears
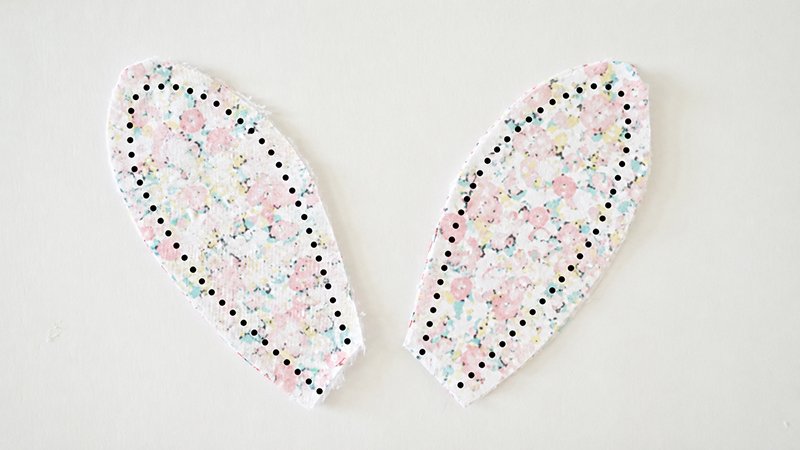
- Take one ear piece from Fabric A and one from Fabric B.
- Place them right sides together.
- Stitch around the curved edges using a ¼-inch seam allowance.
- Leave the bottom straight edge open.
- Repeat for the second ear.
- Turn both ears right-side-out:
- Use a pencil or turning tool to gently push out the curves.
- Optional:
- Press flat with an iron.
- Fold the bottom slightly or pinch the sides inward for a more dimensional ear shape.
Step 3: Prepare and Attach the Face
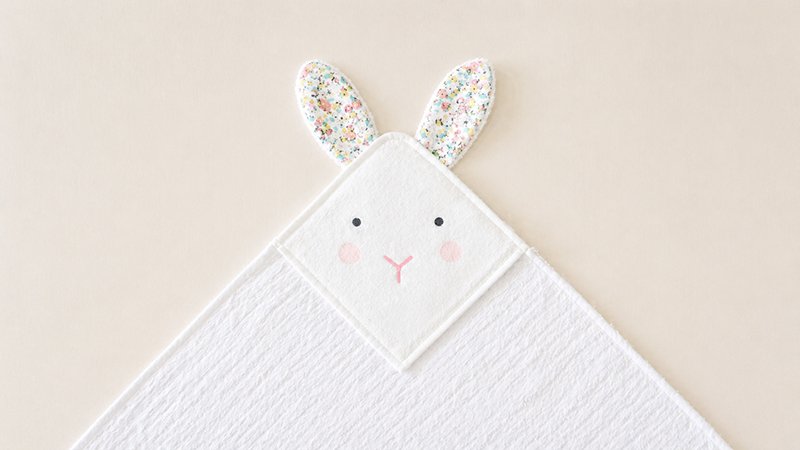
- Take the face square and fold:
- ¼ inch inward on two adjacent edges (forming a corner)
- Press these folds firmly with an iron.
- Place the face piece on one corner of the front fabric square:
- Folded edges should be facing inward (bottom and side)
- Raw edges should align with the outer edges
- Pin in place.
- Sew along only the two folded edges using a ⅛-inch seam allowance:
- Leave the top and outer side open (this is important for inserting ears)
Step 4: Insert the Ears
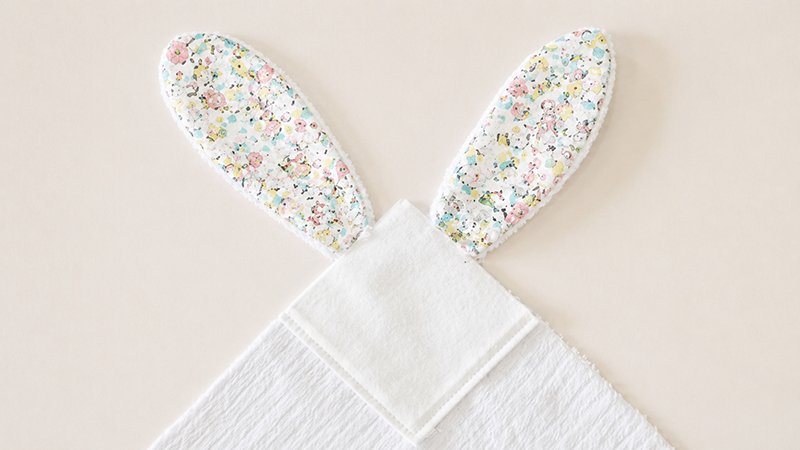
- Take both ears and position them under the face piece:
- Flip them inward toward the center of the square
- Let them overlap slightly
- Make sure:
- The open ends of the ears align with the corner edges
- The ears are tucked inside (they will be hidden when sewing)
- Pin securely so they don’t move.
Step 5: Assemble the Lovey
- Place the back fabric square on top:
- Right sides together
- Sandwiching the ears inside
- Pin around all edges.
- Sew around the entire square using a ½-inch seam allowance:
- Leave a 3-inch opening on one side for turning
Important:
- Be careful not to sew the ears into the side seams accidentally.
- Keep them folded inward while stitching.
Step 6: Turn and Finish
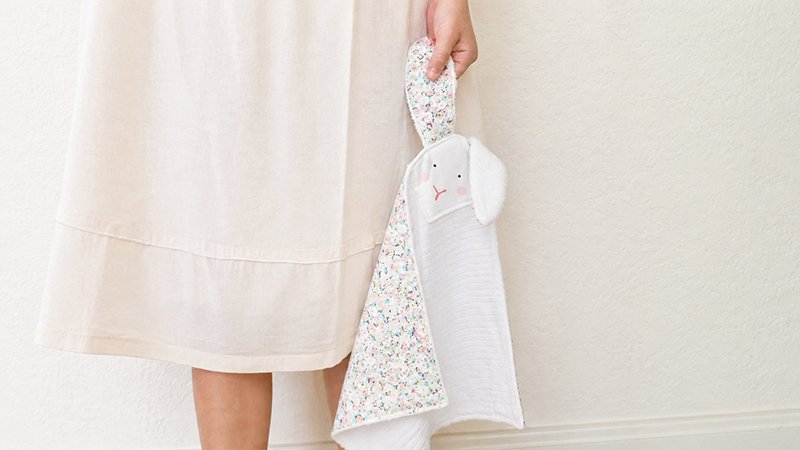
- Turn the lovey right-side-out through the opening.
- Push out all corners neatly.
- Press flat with an iron.
- Fold the raw edges of the opening inward.
- Topstitch around the entire square:
- This closes the gap
- Adds durability and a clean finish
Step 7: Add the Face Details
You have two safe options:
Option A: Fabric Paint
- Draw simple eyes, nose, and cheeks
- Let dry completely before use
Option B: Embroidery
- Use embroidery thread for:
- Eyes (small dots or closed lashes)
- Nose (triangle or oval)
- Mouth (optional)
Avoid:
- Buttons
- Beads
- Loose attachments
(These can be choking hazards for babies.)
Final Tips
- Make two loveys: one for use and one as a backup.
- Wash fabrics before sewing to prevent shrinkage later.
- Use soft, baby-safe materials for maximum comfort.
- Keep stitching secure—this lovey may be tugged, chewed, and washed often!