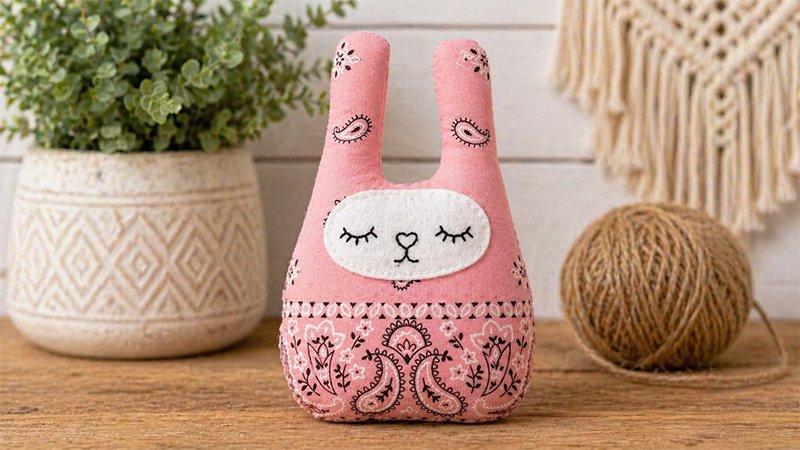
Easter is the perfect season for soft, handmade projects, and few things are as charming as a handmade bunny. The Bandana Bunny Softies, originally designed by Stephanie from Swoodson Says and highlighted by Caroline Fairbanks of SewCanShe, are a delightful project that combines simplicity with personality. These softies are beginner-friendly, quick to sew, and ideal for using fabric scraps—making them both practical and adorable.
Below is a clear, step-by-step guide to help you successfully sew your own Bandana Bunny, even if you are relatively new to softie-making.
Materials You’ll Need
Before starting, gather your supplies:
- Main fabric: Quilting cotton or flannel (soft and easy to sew)
- Accent fabric: For inner ears and bandana
- Stuffing: Polyester fiberfill
- Thread: Matching or neutral
- Embroidery floss or safety eyes: For facial features
- Basic tools: Fabric scissors, pins, sewing machine, hand needle, marking pen
Step 1: Prepare the Pattern and Fabric
Cut your fabric pieces carefully:
- 2 body pieces (mirror images)
- 4 earpieces (2 outer, 2 inner/accent)
- 1 bandana triangle
Precision in cutting ensures your bunny will align properly during assembly.
Step 2: Sew the Ears
Take one outer ear piece and one inner ear piece. Place them right sides together.
- Stitch around the curved edges, leaving the bottom straight edge open.
- Trim and clip along the curves (this prevents puckering).
- Turn the ear right side out using a blunt tool.
- Press flat with an iron.
Tip: Fold the bottom edges slightly inward and stitch a small pleat to give the ears a natural, curved shape.
Repeat for the second ear.
Step 3: Add the Face
Before assembling the body, it’s best to complete the face.
- Use embroidery for a soft, child-safe finish:
- Satin stitch for the nose
- French knots or small stitches for eyes
Place the face in the upper third of the front body piece. This positioning gives the bunny a cute, balanced expression.
If using safety eyes, attach them securely now (only recommended for children over 3 years old).
Step 4: Attach the Bandana
The bandana is what makes this bunny unique.
- Fold and hem the long edge of the triangle (or use pinking shears to prevent fraying).
- Position the bandana on the front body piece, just below the face.
- Align the raw edges with the sides of the bunny’s neck.
- Baste (temporarily stitch) it in place.
This ensures the bandana stays secure when the body is sewn together.
Step 5: Assemble the Bunny
Now it’s time to bring all the pieces together.
- Place the ears on the right side of the front body piece, pointing downward. Baste them in place.
- Lay the back body piece on top, right sides together, sandwiching the ears and bandana inside.
- Pin around the edges carefully.
Sew around the entire bunny shape, leaving a 2-inch gap along the side or bottom for turning and stuffing.
Step 6: Turn and Shape
After sewing:
- Trim seam allowances and clip curves to reduce bulk
- Turn the bunny right side out through the opening
- Use a blunt stick or chopstick to gently push out ears and curves
Press lightly if needed to smooth the shape.
Step 7: Stuff the Bunny
Fill the bunny using small pieces of fiberfill:
- Start with the ears and head
- Gradually move down to the body
- Avoid overstuffing, but ensure it feels evenly firm
Take your time—this step determines the final look and feel.
Step 8: Close the Opening
Use a ladder stitch (invisible stitch) to hand-sew the opening closed.
- Fold raw edges inward
- Stitch carefully so the seam disappears
This gives your bunny a clean, professional finish.
Final Tips for Success
- Use scrap fabrics creatively to make each bunny unique
- Press seams as you go for a polished result
- Practice embroidery on scrap fabric before working on the bunny
- Make multiple bunnies—they’re quick and addictive!
With just a little time and creativity, you can create a collection of charming Bandana Bunny Softies perfect for Easter gifts, decorations, or keepsakes.
This project is simple enough for beginners yet enjoyable for experienced sewists looking for a quick, satisfying make.
Happy sewing!