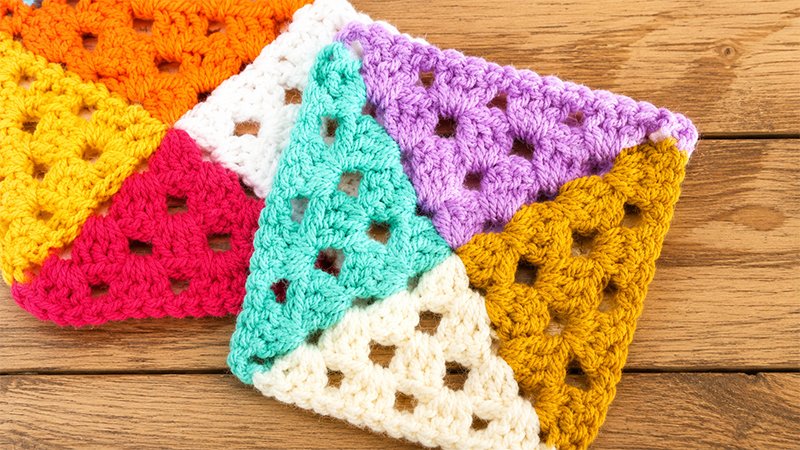
This beautiful variation of the classic granny square is worked in four distinct color quadrants.
By turning your work after every round and strategically changing colors at the corners, you create clean, sharp lines where the four sections meet.
Materials Needed
-
Yarn: Aran-weight (Category 4) yarn in 4 contrasting colors: A, B, C, and D.
-
Hook: 5.5 mm (US I/9 / UK 5) crochet hook.
-
Notions: Tapestry needle for weaving in ends, and scissors.
Pattern Notes
-
Stitch Counts: The
ch 3at the beginning of a round always counts as your first double crochet (dc). -
Repeats: Instructions inside asterisks (
*...*) or parentheses ((...)) should be repeated as directed. -
Color Changes: To keep transitions seamless, always execute your color changes during the final yarn over (yo) and pull through of the very last double crochet stitch of a section.
-
Turning: You will alternate between the Right Side (RS) and Wrong Side (WS) by turning your work at the end of every round.
Step-by-Step Pattern Instructions
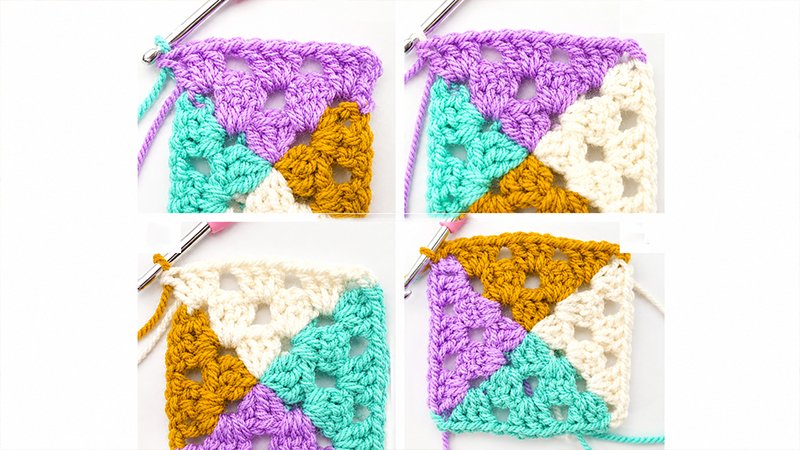
Round 1 (Right Side – RS)
Using Color A, begin by forming a Magic Circle (MC).
-
[Color A]: Ch 3. Work 2 dc into the ring. On the very last step of the second dc, yarn over with Color B and pull through to complete the stitch.
-
[Color B]: Ch 2 (this creates your first corner space). Work 3 dc into the ring, switching to Color C on the final pull-through of the third dc.
-
[Color C]: Ch 2. Work 3 dc into the ring, switching to Color D on the final pull-through of the third dc.
-
[Color D]: Ch 2. Work 3 dc into the ring, ch 1, then slip stitch into the top of your initial ch-3 to join. (The final ch-1 and slip stitch count as your last ch-2 corner space).
-
Stitch Count: 3 dc stitches per side; 4 corner spaces.
Round 2 (Wrong Side – WS)
Always change colors on the wrong side to keep the seam hidden.
-
[Color D]: Ch 1, turn your work. Slip stitch into the corner space you just created. Ch 3, then work 2 dc into that same corner space. Ch 1. In the next corner space, work 3 dc, switching to Color C on the final pull-through.
-
[Color C]: Ch 2. Work 3 dc back into that same corner space you just occupied. Ch 1. Move to the next corner space and work 3 dc, switching to Color B on the final pull-through.
-
[Color B]: Ch 2. Work 3 dc back into that same corner space. Ch 1. Move to the next corner space and work 3 dc, switching to Color A on the final pull-through.
-
[Color A]: Ch 2. Work 3 dc back into that same corner space. Ch 1. Move to the final corner space (where you started this round), work 3 dc, ch 1, and slip stitch into the top of the initial ch-3 to join.
-
Stitch Count: 6 dc stitches and 1 ch-1 space per side.
Round 3 (Right Side – RS)
-
[Color A]: Ch 1, turn your work. Slip stitch into the immediate corner space. Ch 3, then work 2 dc into the same space. Ch 1. Work 3 dc into the next ch-1 side space, ch 1. In the next corner space, work 3 dc, switching to Color B on the final pull-through.
-
[Color B]: Ch 2. Work 3 dc back into that same corner space. Ch 1. Work 3 dc into the next ch-1 side space, ch 1. In the next corner space, work 3 dc, switching to Color C on the final pull-through.
-
[Color C]: Ch 2. Work 3 dc back into that same corner space. Ch 1. Work 3 dc into the next ch-1 side space, ch 1. In the next corner space, work 3 dc, switching to Color D on the final pull-through.
-
[Color D]: Ch 2. Work 3 dc back into that same corner space. Ch 1. Work 3 dc into the next ch-1 side space, ch 1. In the starting corner space, work 3 dc, ch 1, and slip stitch into the top of the initial ch-3 to join.
-
Stitch Count: 9 dc stitches and 2 ch-1 spaces per side.
Round 4 (Wrong Side – WS)
-
[Color D]: Ch 1, turn. Slip stitch into the corner space. Ch 3, 2 dc in the same space, ch 1. (Work 3 dc, ch 1) into each of the next two ch-1 side spaces. In the next corner space, work 3 dc, switching to Color C on the final pull-through.
-
[Color C]: Ch 2. Work 3 dc back into that same corner space, ch 1. (Work 3 dc, ch 1) into each of the next two ch-1 side spaces. In the next corner space, work 3 dc, switching to Color B on the final pull-through.
-
[Color B]: Ch 2. Work 3 dc back into that same corner space, ch 1. (Work 3 dc, ch 1) into each of the next two ch-1 side spaces. In the next corner space, work 3 dc, switching to Color A on the final pull-through.
-
[Color A]: Ch 2. Work 3 dc back into that same corner space, ch 1. (Work 3 dc, ch 1) into each of the next two ch-1 side spaces. In the starting corner space, work 3 dc, ch 1, and slip stitch into the top of the initial ch-3 to join.
-
Stitch Count: 12 dc stitches and 3 ch-1 spaces per side.
Round 5 (Right Side – RS)
-
[Color A]: Ch 1, turn. Slip stitch into the corner space. Ch 3, 2 dc in the same space, ch 1. (Work 3 dc, ch 1) into each of the next three ch-1 side spaces. In the next corner space, work 3 dc, switching to Color B on the final pull-through.
-
[Color B]: Ch 2. Work 3 dc back into that same corner space, ch 1. (Work 3 dc, ch 1) into each of the next three ch-1 side spaces. In the next corner space, work 3 dc, switching to Color C on the final pull-through.
-
[Color C]: Ch 2. Work 3 dc back into that same corner space, ch 1. (Work 3 dc, ch 1) into each of the next three ch-1 side spaces. In the next corner space, work 3 dc, switching to Color D on the final pull-through.
-
[Color D]: Ch 2. Work 3 dc back into that same corner space, ch 1. (Work 3 dc, ch 1) into each of the next three ch-1 side spaces. In the starting corner space, work 3 dc, ch 1, and slip stitch into the top of the initial ch-3 to join.
-
Stitch Count: 15 dc stitches and 4 ch-1 spaces per side.
How to Expand Your Square
To make your square larger, continue repeating the logic established in Rounds 4 and 5.
The Golden Rule for Growth:
-
Always remember to turn your work at the beginning of every round.
-
Each new round will add exactly one additional 3-dc cluster to each side of the square.
-
You will always switch to the next color at the second corner cluster of your current section.
Once you reach your desired size, fasten off your yarn, cut the threads, and use your tapestry needle to securely weave in all loose ends. Your multi-colored quadrant granny square is complete!