Pattern Description:
Pattern Description
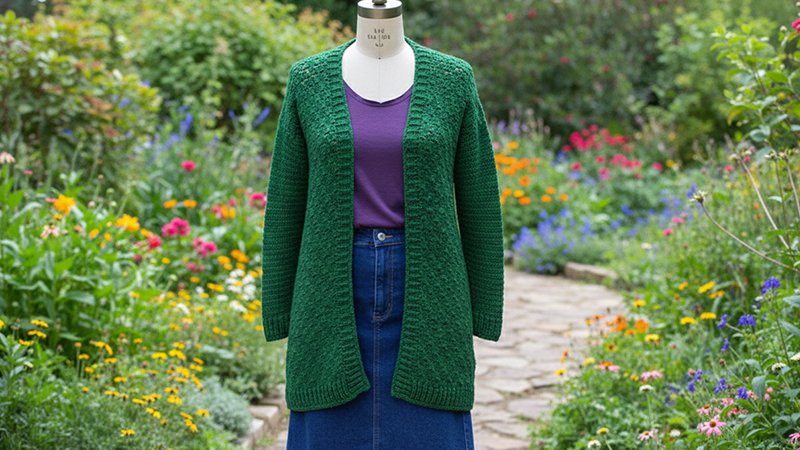
The Librarian Cardigan is a free crochet pattern, rated Intermediate, inspired by the super cozy cardigans worn by librarians in cold, air-conditioned libraries.
The design focuses on ease of making and achieving beautiful texture. The body is constructed from three panels (one back and two front) using a corner-to-corner pattern.
Materials Needed & Measurements:
Materials
- Hook: H-8 (5 mm) Hook.
- Note: The gauge for panels uses an I-9 (5.5 mm) hook.
- Yarn: Worsted Weight, #4 yarn.
- Use Jeans Yarn by Lion Brand, which is 100% acrylic, 3.5oz/100g, 246y/225m.
- Yarn Quantity: 6 (7, 8, 9, 9) (10, 11, 11, 12) balls.
- Tools: Scissors, Tapestry Needle, Tape Measure.
Measurements
Sizes Available: XS (S, M, L, 1X) (2X, 3X, 4X, 5X).
Finished Bust (in.): About 31.5 (36, 40, 44, 48) (52.5, 57, 61, 65) in.. Finished Bust (cm): 80 (91.5, 101.5, 112, 122) (133, 145, 155, 165) cm.
Finished Length (in.): About 28 (28, 29, 29, 30) (30.5, 30.5, 31, 31) in.. Finished Length (cm): 71 (71, 74, 74, 76) (77.5, 77.5, 79, 79) cm).
Gauge:
- Panels (I-9 (5.5 mm) hook): 16 squares x 6 squares = about 4 in. (10 cm).
- Sleeves (H-8 (5 mm) hook): 16 dc + 9 rows = about 4 in. (10 cm).
Stitch Explanation
- Each C2C square:
- ch 3 + 3 dc
- Starting Square:
- ch 6
- dc in 4th ch from hook
- dc in each of the next 2 ch
- (Counts as ch-3 + 3 dc)
- Continuing Square:
- sl st into ch-3 space of previous square
- ch 3
- work 3 dc into the same ch-3 space
Abbreviations
- beg = begin(ning)
- BPdc = back post double crochet
- ch = chain
- dc = double crochet
- dc2tog = double crochet 2 stitches together
- FPdc = front post double crochet
- rep = repeat
- rnd(s) = round(s)
- RS = right side
- sc = single crochet
- sl st = slip stitch
- st(s) = stitch(es)
Instructions for Making the Librarian Cardigan Pattern:
Body Construction
The body is made in 3 panels (one back and two front) using a corner-to-corner pattern, starting in the lower right-hand corner. Rows are worked back and forth and read diagonally. Odd-numbered rows are worked up; even-numbered rows (which are on the RS) are worked down.
Back Panel
With I-9 (5.5 mm) hook, make a panel with 24×39 (27×39, 30×41, 33×41, 36×42) (40×43, 43×43, 46×44, 49×44) squares.
- Work from the Starting Square and Increase Rows until you count across the bottom the same number of squares as the first number for your size (width).
- At this point, work a Decrease Row for each row from the bottom up (to maintain width), and work an Increase Row for each row starting from the top. Rep alternating Decrease and Increase Rows until your panel height reaches the second number for your size.
- Then, work all remaining rows as Decrease Rows (using a Decrease Square at the beg of rows where you no longer wish to increase) until ending with 1 square.
- Fasten off.
Front Panel (Make 2)
With I-9 (5.5 mm) hook, make panels with 10×39 (11×39, 12×41, 13×41, 14×42) (15×43, 17×43, 17×44, 18×44) squares.
- Follow the same method as the Back Panel: Starting Square, Increase Rows up and down until width is reached.
- Work Decrease Rows from the bottom up and Increase Rows from the top down until height is reached.
- Work Decrease Rows in both directions until ending with 1 square.
- Fasten off.
Assembly
With RS together, line up the panels and sew the shoulders. Sew the sides from the bottom up, leaving 7 (7.5, 7.5, 8.5, 8.5) (9.5, 9.5, 10.5, 10.5) in. open for the armhole.
Sleeves
Sleeves are worked in rnds without turning at the beg of rnds. Arm length can be lengthened or shortened.
- From RS, with H-8 (5 mm) hook, join yarn with a sl st in the underarm of either armhole.
- Rnd 1: Ch 1 (does not count as a st), evenly sc in the end of each row around the armhole opening; join with sl st in the first sc – 62 (66, 66, 74, 74) (84, 84, 92, 92) sc.
- Rnd 2 (Decrease Rnd): Ch 2 (does not count as a st), dc in first st, dc2tog, dc in each st to last 2 st(s), dc2tog; join with sl st in first dc.
- Rnd 3: Ch 2 (does not count as a st), dc in each st around; join with sl st in first dc.
- Rep Rnds 2 & 3 until 36 (38, 40, 42, 44) (52, 52, 58, 58) dc remain.
- Next Rnd (Further Decrease): Ch 2 (does not count as a st), dc in first st, dc2tog, dc in each st around; join with sl st in first dc.
- Next 5 (4, 6, 1, 3) (2, 3, 1, 1) Rnd(s): Ch 2 (does not count as a st), dc in each st around; join with sl st in first dc. Total rnds: 33 (34, 34, 35, 35) (36, 37, 37, 37).
Ribbed Cuff
- Rnds 1-4: Ch 2 (does count as a st), FPdc around next st, BPdc around next st, FPdc around next st; rep from around; join with sl st in top of beg ch-2.
- Rnd 5: Ch 1, sc in each st around; join with sl st in first sc.
- Fasten off. Rep to make the second sleeve.
Bottom Band
From RS, with H-8 (5 mm) hook, sl st in one lower front corner.
- Row 1: Ch 2, dc 5 evenly spaced over every 2 squares across the bottom edge.
- Rows 2-5: Ch 2 (does not count as a st), turn, FPdc around next st, BPdc around next st, FPdc around next st; rep from to last st, dc in last st.
- Fasten off.
Neck Cuff
From RS, with H-8 (5 mm) hook, sl st in one lower front corner.
- Row 1: Ch 2, dc at the end of each row of the bottom band, dc 5 evenly spaced over every 2 squares up one side, across neck area, and down the other side.
- Rows 2-4: Ch 2 (does not count as a st), turn, FPdc around next st, BPdc around next st, FPdc around next st; rep from to last st, dc in last st.
- Next Rnd: Ch 1, turn; work sc up and down the neck cuff, across the back edge; join with sl st in beg ch-1.
- Fasten off.
Weave in ends.