Pattern Description:
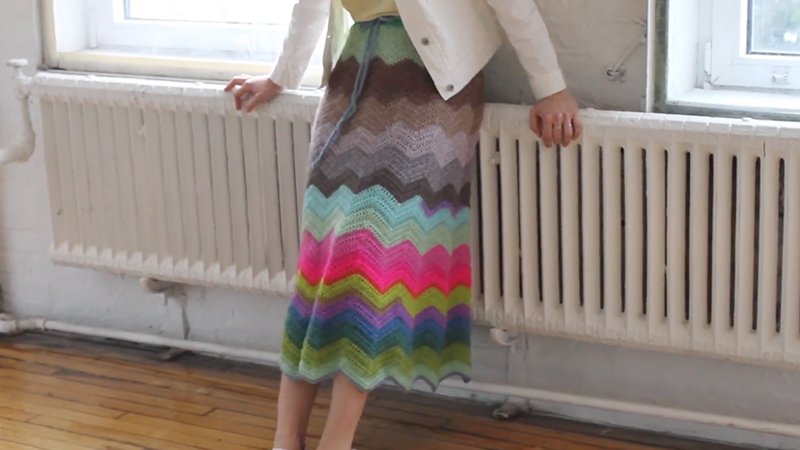
The Monte Rio Skirt is a trendy, lightweight crochet skirt designed to be versatile and comfortable, embodying a relaxed, bohemian yet effortlessly chic vibe.
It is suitable for summer outings, casual gatherings, or layered looks in cooler months. The pattern combines openwork and solid sections to create visual interest.
Options allow for customization of length (mini to full-length) and adjustment to fit unique style preferences.
Materials Needed & Measurements:
Materials Needed
- Yarn: A lightweight yarn is recommended, such as cotton, a cotton-blend, bamboo, or linen, for comfort and breathability. You will need approximately 600–800 yards, depending on the desired size and length of the skirt.
- Crochet Hook: A size H (5mm) or I (5.5mm) hook is needed.
- Measuring Tape: Essential for taking measurements to ensure the skirt fits perfectly.
- Scissors.
- Tapestry Needle: Used for securely weaving in any loose ends and making final adjustments.
- Stitch Markers: Necessary for keeping track of pattern repeats.
- Optional Embellishments: Items such as beads, fringe, or small appliqués can be added for extra flair and personalization.
Measurements
- Waist: Measure around your natural waistline where the finished skirt will rest.
- Hip: Measure around the fullest part of your hips.
- Length: Determine the desired skirt length (options include mini, knee-length, midi, or full-length) and measure from your waist down to that chosen hemline.
Instructions for Making the Monte Rio Skirt Pattern:
Creating the Waistband
The waistband forms the foundation of the skirt and should be firm.
- Foundation Chain: Create a chain that is equal to your measured waist circumference, then add 2–3 extra stitches for ease and comfort.
- First Row: Work the first row into the foundation chain using single crochets (SC) or half-double crochets (HDC).
- Joining and Design: Join the row with a slip stitch to continue working in the round for a seamless skirt, or turn the work if you prefer a flat waistband design.
- Optional Support: For added comfort and support, you can crochet around a piece of elastic or incorporate a drawstring.
Crocheting the Skirt Body
The body of the skirt is typically worked from the waistband downwards, ideally in rounds for a seamless look, thus avoiding any side seams.
- Pattern and Design: Alternate between solid sections and openwork patterns to create visual interest. Openwork designs can include lace, mesh, or shell stitches. For a fitted appearance at the top, you can start with a solid section before transitioning to an openwork design for the lower portion.
- Increasing for Fullness: To achieve a flared effect in the skirt, you must increase the stitch count. This is done by working two stitches into the same stitch at regular intervals every few rounds.
- Length: Continue crocheting until the skirt reaches your predetermined desired length.
- Edging: For an elegant finish, you may add a scalloped or lace edge at the hemline.
Finishing the Skirt
Once the full length is achieved, follow these finishing steps:
- Weaving in Ends: Use a tapestry needle to securely weave in all loose ends.
- Blocking: Lay the skirt flat on a blocking mat. Pin the skirt into shape to ensure it holds its form and the stitch patterns are clearly defined. Allow the skirt to dry completely before wearing.
- Adding Embellishments: If desired, personalize the skirt by sewing on decorative elements such as fringe, beads, or small appliqués.
Customization Tips
The pattern allows for extensive customization to suit individual taste:
- Length Adjustments: The pattern can be customized to create any length, from a mini skirt to a full-length maxi.
- Yarn Choices: Different yarns impact the drape. Lighter yarns (like bamboo or silk) will create a more flowy appearance, whereas cotton yarns provide more structure and form.
- Color Variations: Choose colors (bold, multicolored, or neutrals like beige, white, or gray) that suit your personal style and wardrobe.
- Design Variations: To create unique texture, mix up stitch patterns. You can use picots, cluster stitches, or shells for textured sections, contrasted with simpler stitches for smooth areas.