Pattern Description:
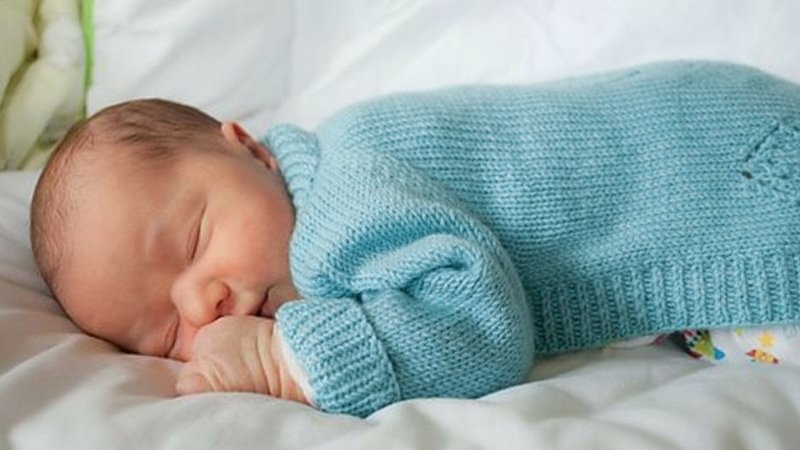
This Newborn Vertebrae is a frontless cardigan designed for newborns (approximately 3.5kg – 4.5kg birthweight or 7lb – 10lb) to keep their back and arms warm.
It is ideal for baby wearing and skin-to-skin cuddles, and its frontless design helps avoid frequent washing of dirty fronts.
The garment is constructed top-down, cast on at the neckline, with the upper back and top half of the sleeves worked in one piece using raglan shaping.
Materials Needed & Measurements:
- Yarn:
- Soft 4ply/fingering weight yarn (100g/350-400m).
- Approximately 0.5 skein (up to 1 skein) is required.
- Suitable for plant or animal fibres.
- Yarn Weight:
- 4ply/fingering weight.
- Needles:
- 3.25mm and 2.75mm needles (or size required to obtain gauge, plus one 2 sizes smaller).
- The 3.25mm needles are used for the chest, body, and upper sleeves (flat or circular).
- Double pointed needles or a long circular needle are needed for small circumference sleeves (3.25mm for main sleeve, 2.75mm for ribbing).
- The 2.75mm needles are used for the body ribbed hem and body edging (circular needle of at least 60cm recommended).
- Notions:
- 4 stitch markers.
- Tape measure.
- Scissors.
- Darning needle (for sewing in ends).
- Waste yarn or a stitch holder (for sleeve separation).
- Measurements:
- To fit a newborn with birthweight of 3.5kg – 4.5kg (7lb – 10lb).
- Finished chest circumference of garment: 41cm (worn with a small amount of positive ease).
- Finished sleeve length of garment: 12cm (from underarm to cast off edge).
- Finished body length of garment: 25cm (from top of shoulder to cast off edge).
- Gauge (in stocking stitch, blocked): 28sts/10cm on 3.25mm needles.
Stitches & Abbreviations Used:
- k – knit
- p – purl
- RS – Right Side of work
- kfb – knit into the front and back of a stitch (an increase)
- sl1p – slip 1 stitch as if to purl
- WS – Wrong Side of work
Instructions for Making the Newborn Vertebrae Pattern:
PART A: Upper back & upper sleeves
The construction begins by casting on at the neckline.
- Cast On: Using the larger needle (3.25mm), cast on 45 stitches.
- Row 1 (WS): purl all stitches.
- Row 2 – Marker Placement Row (RS):
- kfb, place marker, kfb, k9, kfb, place marker, kfb, k19, kfb, place marker, kfb, k9, kfb, place marker, kfb.
- You should now have 53 stitches. The stitch distribution between markers will be (2 / 13 / 23 / 13 / 2).
- Row 3 (WS): purl all stitches.
- Row 4 (RS):
- kfb, k1, slip marker, kfb, k11, kfb, slip marker, kfb, k21, kfb, slip marker, kfb, k11, kfb, slip marker, kfb, k1.
- You should now have 61 stitches. The stitch distribution will be (3 / 15 / 25 / 15 / 3).
- Row 5 (WS): purl all stitches.
- Row 6 (RS):
- kfb, k2, slip marker, kfb, k13, kfb, slip marker, kfb, k23, kfb, slip marker, kfb, k13, kfb, slip marker, k1, kfb, k1.
- You should now have 69 stitches. The stitch distribution will be (4 / 17 / 27 / 17 / 4).
- Row 7 (and all WS/odd rows): purl all stitches.
- Row 8 (RS):
- knit to first marker, slip marker, (kfb, knit to 1 stitch before next marker, kfb, slip marker) work stitches within ( ) 3 times in total, then knit to end of row.
- The stitch count will increase by 6 stitches every RS row.
- Repeat Rows 7 & 8 until you have 159 stitches on your needles.
- The stitches should be divided as follows: 4 / 47 / 57 / 47 / 4.
- End having just worked a Row 7 (WS/odd row).
- Sleeve Separation Row (RS):
- k4, remove first marker.
- Place the 47 stitches between the removed marker and the next marker (left sleeve) onto waste yarn.
- Remove this marker, and k57 to the next marker.
- Remove this marker. Place the 47 stitches between this removed marker and the next marker (right sleeve) onto waste yarn.
- Remove final marker, and k4 to end of row.
- You should now have 65 stitches live on needles for the body, with 47 stitches on each piece of waste yarn for the sleeves.
PART B: Body
- Work in stocking stitch (knit on RS rows, purl on WS rows).
- Continue until the body measures approximately 22.5cm from the top of the shoulder.
- End having just worked a RS/knit row.
PART C: Body hem
- Change to smaller needle (2.75mm). If using a contrast colour for the ribbed edgings, change now.
- Set up row (WS): purl all stitches.
- Row 1 (RS): k2, (p1, k1) repeat stitches within ( ) until 1 stitch remains, k1.
- Row 2 (WS): p2 (k1, p1) repeat stitches within ( ) until 1 stitch remains, p1.
- Repeat Rows 1 & 2 until the ribbed body hem measures approximately 2.5cm.
- Cast off loosely using the larger needle (3.25mm), in the established rib pattern.
PART D: Sleeves
The sleeves are worked in the round, using double pointed needles or a long circular needle for “magic loop”.
- Return the 47 stitches from one piece of waste yarn to the larger needle (3.25mm).
- Pick up and knit 1 stitch from the base of the armhole (the underarm/armpit area). Place a stitch marker between this picked-up stitch and the other stitches, indicating the start/end of the sleeve round.
- Knit across stitches already on the needle (which you released from the waste yarn) until you reach the stitch marker. Your work should now be joined in the round, with 48 stitches.
- Work in Stocking Stitch (knit all stitches, for every round) until the sleeve measures approximately 10cm from the underarm. You may choose to work some decreases on the underside of the sleeve for a more tapered fit.
- Change to smaller needle (2.75mm). If using a contrast colour for the ribbed edgings, change now.
- Knit one round.
- Work in 1×1 ribbing (k1, p1, across all stitches in the round) for 2-3cm.
- Cast off loosely using the larger needle (3.25mm), in the established rib pattern.
- Repeat instructions for the second sleeve.
PART E: Body ribbed edging
For this section, a circular needle of at least 60cm is recommended for comfort.
- Using the smaller needle (2.75mm), pick up and knit 3 of every 4 stitches along the ‘raw’ edge of the knitting (framing the body opening).
- Continue to pick up and knit stitch for stitch along the cast on edge (back of neck). The total number of picked-up stitches should be an even number.
- Work in 1×1 ribbing for approximately 3cm.
- Cast off using the larger needle (3.25mm), in the established rib pattern.
FINISHING
- Sew in all ends. If there is a small hole beneath each armhole, use the yarn tail in that area to close any gap.
- Wash the garment in a gentle wool wash.
- Lay the garment flat and in shape to dry (blocking). You will need to pin the body ribbed edging flat to dry, as it has a tendency to curl towards the neckline.