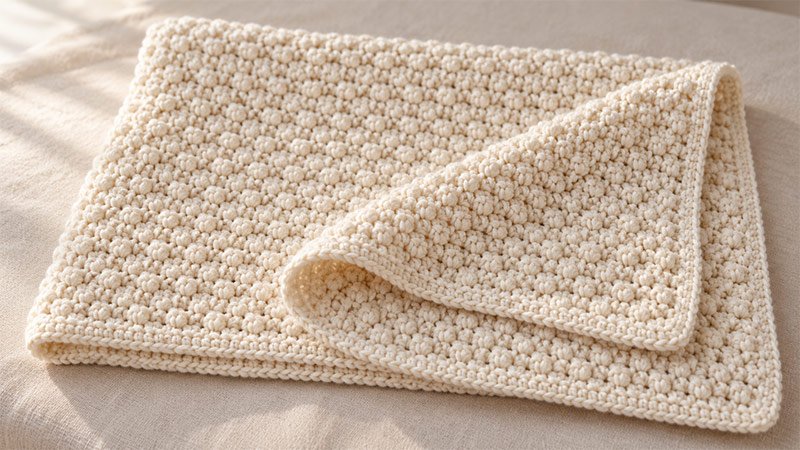
The Piper Baby Blanket is an original crochet design with a simple two-stitch texture and a neat single crochet border. Alternating single crochet and double crochet creates a close fabric with small raised details.
The blanket is worked flat in rows. After the first row, you repeat the same instructions until the body reaches the planned length. A narrow border finishes the edges without adding much weight.
This pattern uses US crochet terms. The instructions below describe a newly written design rather than a reproduction of a particular published Piper pattern.
Why You’ll Love This Pattern
- A short repeat: The main fabric uses only sc and dc.
- Simple shaping: Every body row has the same stitch count.
- Easy sizing: Adjust the starting chain and number of rows to change the dimensions.
- A practical finish: The plain border keeps the edges tidy.
- Flexible colors: Use one shade or add stripes without changing the stitch pattern.
Skill Level
Confident beginner
You should know how to make a foundation chain, work single and double crochet, turn your work, and join with a slip stitch.
The main skill to watch is stitch placement: each sc is worked into a dc from the previous row, and each dc is worked into an sc.
Yarn Requirements
Choose a DK-weight yarn, category 3, that feels soft and has clear care instructions. A smooth, washable acrylic or cotton-acrylic blend works well for this design.
For the size listed below, allow approximately:
- Blanket body: 950–1,100 yards.
- Border: 100–150 yards.
- Total: 1,050–1,250 yards, approximately 960–1,145 meters.
These are planning estimates. Your yarn choice, tension, and finished dimensions will affect the amount used.
To calculate how many balls to buy, divide the total yardage needed by the yardage per ball and round up. For example, if each ball contains 250 yards, five balls provide 1,250 yards.
Tools & Notions
- 4 mm crochet hook, or the size needed to meet gauge.
- Yarn needle.
- Scissors.
- Measuring tape.
- Four stitch markers for the border corners.
- Optional stitch markers for the first and last stitches of each row.
Gauge
16 sts and 18 rows = 4 inches / 10 cm in the main pattern, measured after washing and drying the swatch according to the yarn label.
To make a gauge swatch:
- Ch 26.
- Work Row 1 of the blanket instructions. You will have 24 sts.
- Repeat Row 2 until the swatch is about 6 inches tall.
- Wash and dry the swatch as you plan to care for the blanket.
- Measure across the center, away from the edges.
If you have more than 16 sts in 4 inches, try a larger hook. If you have fewer than 16 sts, try a smaller hook.
Stitch gauge controls width. For length, measure the blanket as you work because row gauge can vary.
Size
At the stated gauge:
- Body: Approximately 30 × 36 inches / 76 × 91 cm.
- With border: Approximately 32 × 38 inches / 81 × 97 cm.
The final size depends on the width of your border and how the fabric settles after washing.
Adjusting the Size
The body uses an even number of stitches. Your starting chain must therefore be an even number plus 2.
At the stated stitch gauge:
Desired body width in inches × 4 = approximate stitch count.
Round to the nearest even number, then add 2 for the foundation chain.
For example, a 34-inch-wide body needs approximately 136 sts, so you would ch 138. Work more or fewer rows to reach your preferred length.
Abbreviations
- ch: Chain.
- sc: Single crochet.
- dc: Double crochet.
- sl st: Slip stitch.
- st / sts: Stitch / stitches.
- rep: Repeat.
- rnd: Round.
- yo: Yarn over.
- [ ]: Work the enclosed instructions as directed.
- ( ): Stitch count or additional information.
Special Stitch
Sc–Dc Texture Repeat
This pattern uses a two-stitch combination rather than a separate advanced stitch.
Work 1 sc in the next st, then 1 dc in the following st.
Repeat these two stitches across the row.
Because each row has an even number of stitches and you turn after every row, the stitches alternate naturally:
- Work sc into a dc from the previous row.
- Work dc into an sc from the previous row.
Do not place both stitches into the same stitch.
Single Crochet
Insert the hook into the indicated st, yo, and pull up a loop. Yo and pull through both loops on the hook.
Double Crochet
Yo, insert the hook into the indicated st, yo, and pull up a loop. Yo and pull through 2 loops. Yo and pull through the remaining 2 loops.
Pattern Instructions
Pattern Notes
- Ch 1 at the beginning of a row does not count as a stitch.
- Work the first stitch into the first actual stitch of the previous row.
- Work under both top loops unless instructed otherwise.
- Each body row begins with sc and ends with dc.
- Every body row contains 120 sts: 60 sc and 60 dc.
- Count your stitches during the first few rows to check that the edges stay straight.
Step 1: Make the Foundation Chain
- Ch 122 loosely.
- If your starting chains tend to be tight, use a hook one size larger for the chain only. Return to your main hook before working Row 1.
Step 2: Work Row 1
- Sc in the 3rd ch from the hook, dc in the next ch.
- Rep [sc in next ch, dc in next ch] across the remaining chains.
- Turn. (120 sts)
- The 2 skipped chains do not count as a stitch.
Step 3: Work Row 2
- Ch 1, sc in the first st, dc in the next st.
- Rep [sc in next st, dc in next st] across.
- Turn. (120 sts)
- The first sc should sit in the dc at the end of the previous row.
Step 4: Continue the Blanket Body
- Rows 3–162: Rep Row 2.
- At the stated gauge, 162 rows will measure approximately 36 inches.
- Measure the body on a flat surface without stretching it. If needed, work fewer or more repeats of Row 2 to reach a body length of 36 inches.
- After the final row, do not turn. Keep the yarn attached for the border.
Step 5: Work Border Round 1
This round creates an even edge around the blanket.
- Ch 1.
- Work 3 sc into the last st of the final body row. Place a marker in the middle sc to identify the corner.
- Work sc evenly down the first side edge.
- At the lower corner, work 3 sc into the corner foundation stitch. Mark the middle sc.
- Work 1 sc into each available foundation stitch across the bottom, stopping before the opposite corner stitch.
- Work 3 sc into that corner stitch. Mark the middle sc.
- Work sc evenly up the second side edge.
- Work 3 sc into the first st of the final body row. Mark the middle sc.
- Work 1 sc in each remaining st across the top, stopping before the corner where the round began.
- Sl st to the first sc to join.
For the side edges: Begin with approximately 1 sc into the end of each row. Lay the blanket flat as you work and adjust the spacing where needed.
- If the edge ripples, use fewer stitches.
- If the edge pulls inward, add stitches.
There is no fixed total stitch count for this round because side-edge spacing depends on your row gauge.
Step 6: Work Border Round 2
- Ch 1, sc in each st around, working 3 sc into each marked corner st.
- Move each marker to the middle sc of the new corner group.
- Sl st to the first sc to join.
Step 7: Work Border Rounds 3 and 4
- Rep Border Round 2 twice.
- After Round 4, check the border width. If it measures less than approximately 1 inch and you want the listed finished size, continue repeating Round 2 until it reaches that width.
- Fasten off, leaving a 6-inch tail.
Step 8: Weave In the Ends
Thread each tail onto a yarn needle.
Weave the tail through the backs of several stitches, change direction, and weave through another section. Keep the fabric relaxed so the ends do not pull the stitches together.
Trim the remaining tails after checking that they are secure.
Step 9: Wash and Shape
Wash the blanket according to the yarn label.
Gently remove excess water without wringing. Lay the blanket flat, straighten the edges, and ease the corners into shape. Allow it to dry fully.
Avoid stretching the fabric to force it to the stated measurements.
Optional: Add Stripes
For stripes, change colors after any completed row:
- Work the final dc until 2 loops remain on the hook.
- Yo with the new color and pull through both loops.
- Turn, ch 1, and continue Row 2.
- Leave tails long enough to weave in securely.
Keep the border plain for a consistent finish.
Baby-use note: Use the blanket for supervised cuddling or floor time. Keep loose blankets out of an infant’s sleep space.