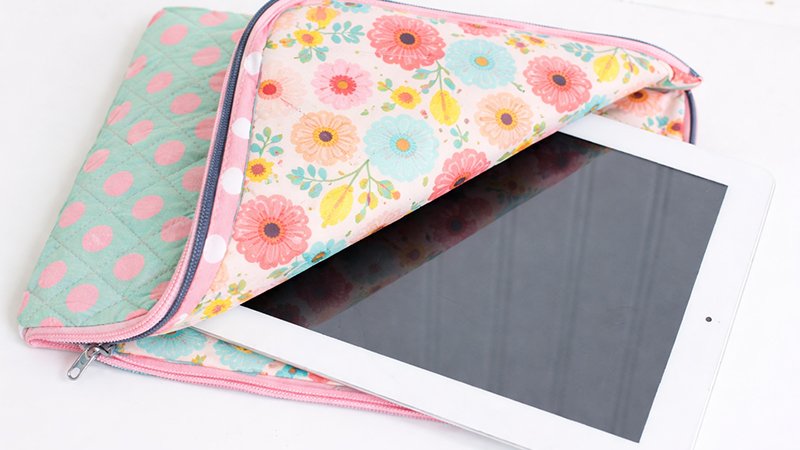
If you want to protect your tablet while showcasing your personal style, this Pretty Quilted iPad Case is a perfect project. Inspired by classic quilted designs like Vera Bradley, this case combines beauty, durability, and practicality. Even if you’re a beginner, this project is approachable and highly satisfying.
Finished Size & Fit
- Final size: 7½” x 10”
- Designed for: Standard iPad (~7” x 9½”)
- Can also fit: Slightly larger tablets, depending on thickness
The quilted layers provide padding, while the zipper ensures your device stays secure.
Materials & Tools Needed
Before starting, gather everything you need:
Fabrics
- Main (outer) fabric: ½ yard
- Coordinating lining fabric: ½ yard
Batting & Notions
- Cotton quilt batting: 1 yard (e.g., Warm & Natural)
- Zipper: 20” long
- Bias binding strips: You will make these yourself
Tools
- Fabric marking pen/pencil
- Acrylic ruler with 45° angle markings
- Rotary cutter & cutting mat (recommended)
- Sewing machine
- Zipper foot
- Iron
- Quilt basting spray or curved safety pins
- Bowl or cup (~4” diameter) for rounding corners
Step 1: Cutting Your Fabric
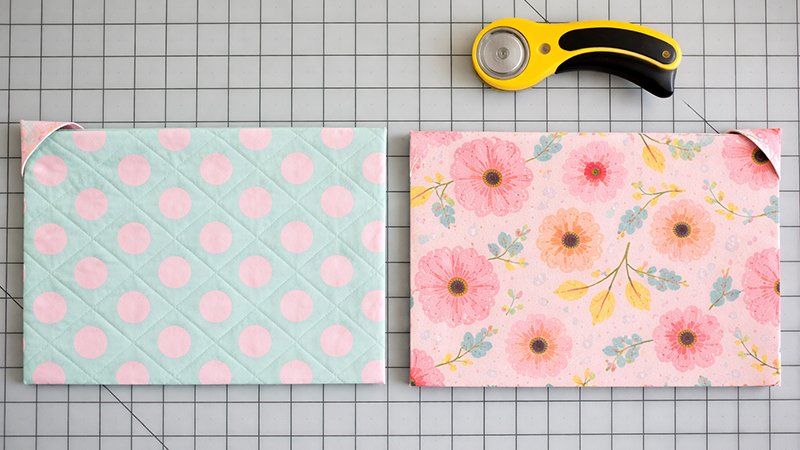
Accuracy is important for a professional result.
Main Fabric
- Cut 1 rectangle: 12½” x 19”
- Cut 3 bias strips: 1½” wide x ~25” long
- Use the 45° angle on your ruler
- Bias cuts allow flexibility for curves
Coordinating Fabric (Lining)
- Cut 1 rectangle: 12½” x 19”
Batting
- Cut 2 rectangles: 12½” x 19”
Step 2: Create the Quilt Sandwich
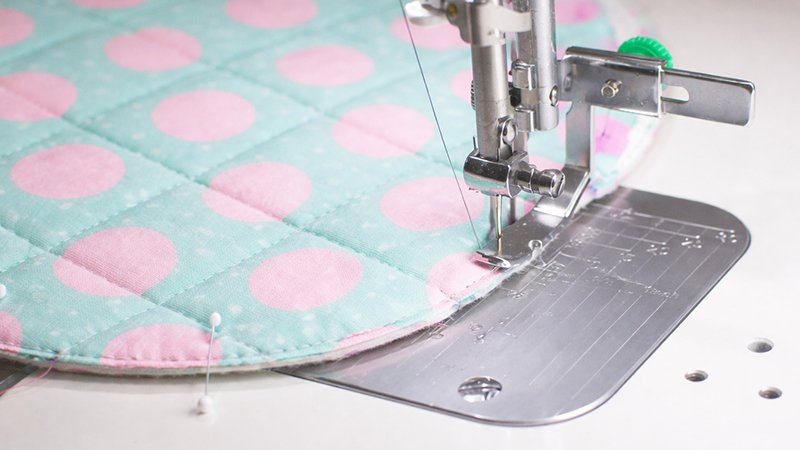
Layer your materials in this exact order:
- Bottom: Lining fabric (wrong side facing up)
- Middle: Two layers of batting
- Top: Main fabric (right side facing up)
Make sure:
- Both fabric wrong sides face the batting
- All edges are aligned
Secure layers using:
- Quilt basting spray (quickest), OR
- Curved safety pins (traditional method)
This prevents shifting during quilting.
Step 3: Quilting the Fabric
This step creates the signature diamond pattern.
Marking the Lines
- Using your ruler, draw lines:
- 1½” apart
- At a 45° angle
- Rotate the fabric and draw lines in the opposite direction
→ This forms a diamond grid
Sewing
- Stitch directly along all marked lines
- Go slowly to keep lines straight
- Start from the center and work outward (helps reduce puckering)
Step 4: Cut & Shape the Pieces
- Cut the quilted piece in half
- Trim both pieces to:
- 9” x 11½”
Round the Corners
- Use a bowl or cup (~4” diameter)
- Round two opposite corners on each piece
This is important:
- Makes zipper installation smoother
- Gives a polished, professional look
Step 5: Install the Zipper
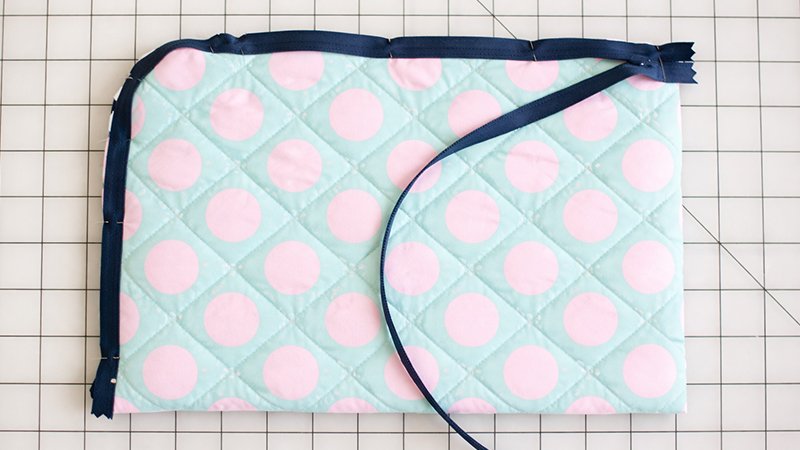
Take your time here—this step is easier than it looks.
Preparation
- Set seam allowance to ¼ inch
- Switch to your zipper foot
Attach First Side
- Open the zipper
- Place the zipper face down along the curved edge
- Clip small notches (about ⅛”) into the zipper tape
→ Helps it bend around curves - Pin in place
- Sew (or baste) at ¼” seam allowance
Attach Second Side
- Repeat the same steps with the other quilted piece
Tip: Keep edges aligned so both sides match perfectly.
Step 6: Add Binding to the Zipper
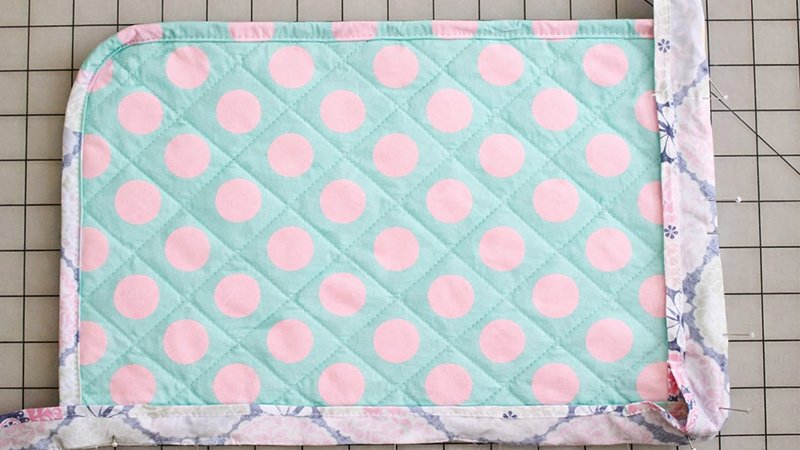
This step makes the inside neat and professional.
Prepare Binding
- Take 2 bias strips
- Fold each in half lengthwise (wrong sides together)
- Press with iron
Attach Binding
- Place folded strip over zipper tape (raw edges aligned)
- Sew using a zipper foot at ¼” seam allowance
- Clip small notches along curves
Finish Binding
- Fold binding toward the lining side
- Press flat
- Pin from the front
- Topstitch about 3/16” from the zipper
Step 7: Assemble the Case
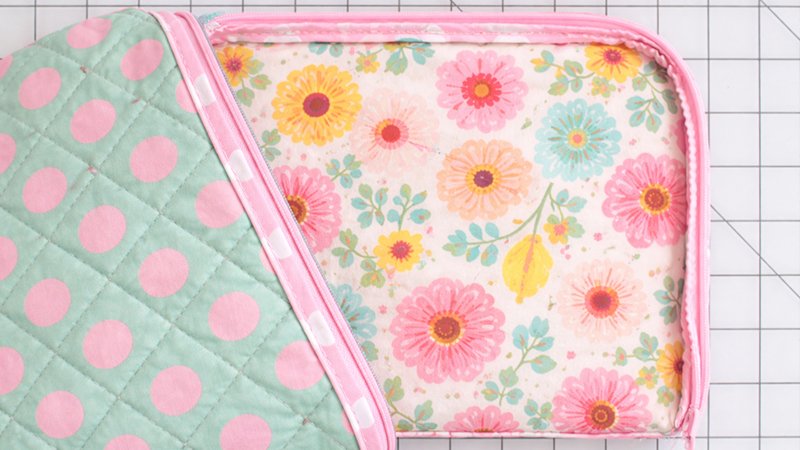
- Fold the case so:
- Outer fabrics face each other
- Lining is on the outside
- Pin around the remaining edges
- Sew all edges:
- Use ¼” seam allowance
- Pivot carefully at corners
Step 8: Finish the Interior Seams
Prepare Final Binding
- Take the remaining bias strip
- Fold one long edge inward
- Press
Attach Binding
- Pin the raw edge of the binding to the inside seams
- Sew along the seam line
- Wrap binding over raw edges
- Stitch down close to the folded edge
This fully encloses raw seams for a clean interior.
Step 9: Final Touches
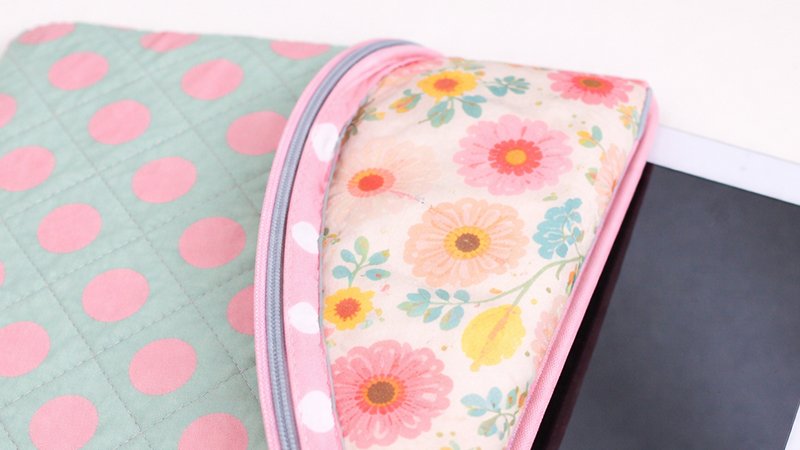
- Trim any excess threads
- Turn the case right side out
- Gently push out corners
- Press lightly if needed
You’re Done!
You now have a beautiful, quilted iPad case that is:
- Soft yet protective
- Stylish and customizable
- Completely handmade
Extra Ideas
- Add a wrist strap
- Use a contrasting thread for quilting
- Try different fabrics (floral, modern, etc.)
- Make matching accessories
Final Tip
Once you make one, you’ll want to make more—they’re perfect gifts!
Happy sewing! ✂️