Hello Sewing Friends!
Spring has a way of bringing everything back to life—fresh colors, soft textures, and that irresistible urge to decorate and create. And if you’re anything like me, no seasonal setup feels complete without a beautiful handmade banner hanging somewhere in your home.
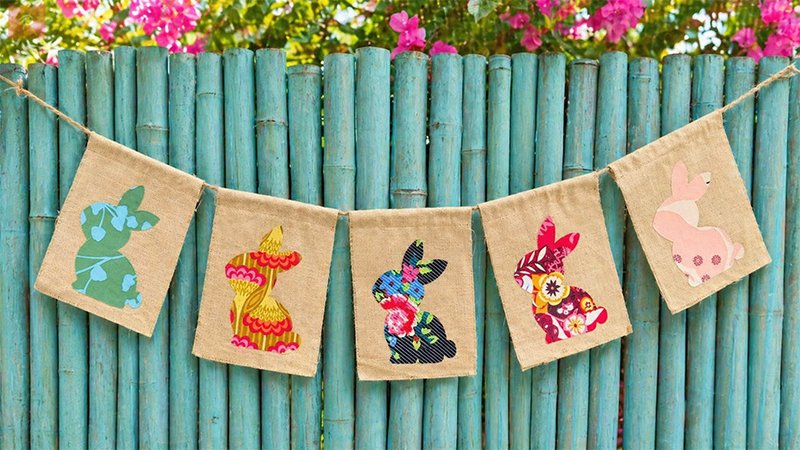
Today, I’m walking you through a delightful and beginner-friendly project: the Easy Spring Bunny Bunting. This project is perfect if you want something charming and festive without spending hours at the sewing machine.
In fact, it requires very minimal sewing, making it ideal for a relaxed afternoon craft—whether you’re working solo or hosting a cozy crafting session with friends.
Why This Project Is Worth Making
This bunny bunting combines rustic simplicity with soft springtime charm. The raw, frayed edges give it a farmhouse-style look, while the bunny appliqués add a playful, seasonal touch. Best of all, you don’t need advanced sewing skills—just a few basic tools and a bit of creativity.
It’s perfect for:
- Mantels
- Doorways
- Windows
- Nurseries
- Easter or spring party decor
Materials You’ll Need
Before you begin, gather the following supplies:
Fabric & Main Components
- 1/3 yard medium-weight fabric (light canvas or burlap works best for a rustic look)
- Spring-themed fabric scraps (each at least 4½” x 6½”)
Adhesive & Template
- Heat ‘n Bond Ultrahold (or similar iron-on adhesive)
- Bunny template (printed or hand-drawn)
Hanging Supplies
- Jute twine or yarn (for a natural look)
Tools
- Rotary cutter, ruler, and cutting mat
- Fabric scissors
- Iron
- Sewing machine (optional but recommended for casing)
- Safety pin or bodkin (for threading)
- Pins
Step 1: Make the Bunting Flags
These fabric flags form the base of your banner.
1. Cut Your Fabric
- Cut rectangles measuring 5″ x 9½”
- Make 5 flags for a standard banner (or more if needed)
2. Create the Frayed Edges
- Gently pull threads from the long sides of each rectangle
- Continue until you achieve a soft, even frayed edge
This gives the bunting a rustic, handmade look without hemming.
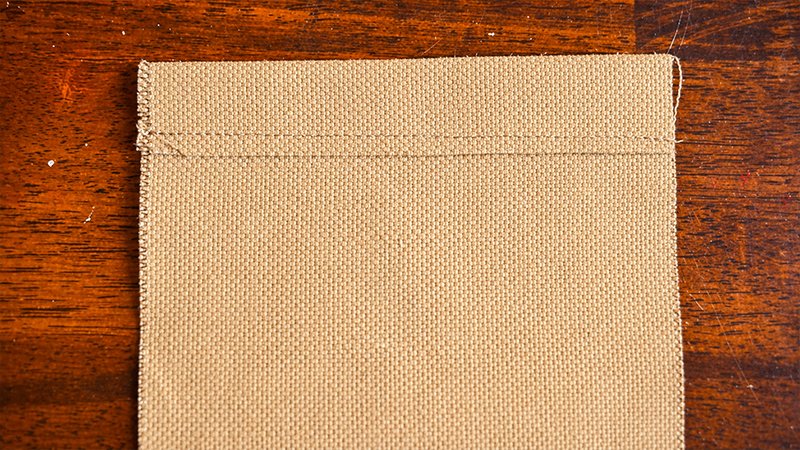
3. Create the Top Casing
- Fold the top short edge down by 1 inch (toward the wrong side)
- Press with an iron
- Pin in place
4. Sew the Casing
- Stitch along the folded edge to create a tunnel
- This will hold your twine later
Step 2: Prepare the Bunny Shapes
This is where your bunting gets its personality.
1. Trace the Template
- On the paper side of the adhesive, trace your bunny shapes
- Leave about ⅜ inch space between shapes
Important: The image will be reversed when finished—plan direction accordingly.
2. Rough Cut
- Cut around each bunny, leaving extra space
- Do NOT cut precisely on the line yet
3. Fuse to Fabric
- Place adhesive (glue side down) onto the wrong side of your fabric scrap
- Press with a hot iron according to adhesive instructions
4. Final Cut
- Now cut precisely along the traced line to get clean bunny shapes
5. Remove Paper Backing
- Peel off the paper layer
- The back should feel slightly tacky (this is the adhesive)
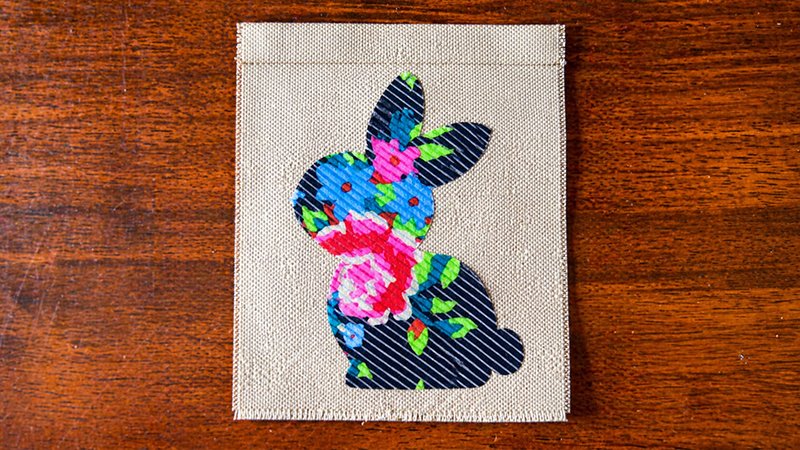
Step 3: Attach Bunnies to Flags
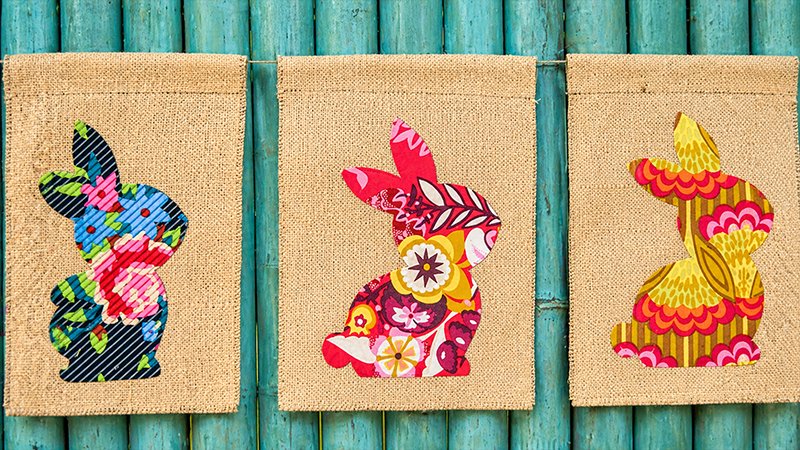
1. Position Each Bunny
- Place one bunny per flag
- Center horizontally
- Position about ¾ inch above the bottom edge
2. Fuse in Place
- Press with a hot iron until securely attached
3. Optional Stitching
- You can sew around the edges for extra detail and durability
- A simple straight stitch or zigzag works great
Step 4: Make the Braided Twine
Braiding gives your bunting strength and a polished look.
1. Measure and Cut
- Cut 3 strands of twine, about 5½ feet each
- Add extra length to account for braiding and knots
2. Secure One End
- Tie a knot at one end
- Pin it to something stable (like an ironing board or cushion)
3. Prevent Tangling
- Wrap each strand into a small bundle
- Secure with rubber bands
4. Braid
- Braid loosely until you reach the end
- Tie another knot to finish
Step 5: Assemble the Bunting
1. Thread the Twine
- Attach a safety pin or bodkin to one end
- Slide it through each flag casing
2. Adjust Spacing
- Spread flags evenly along the twine
- Adjust until you’re happy with the layout
Final Thoughts
This Spring Bunny Bunting is a simple yet beautiful way to welcome the season into your home. It’s quick, customizable, and perfect for using up fabric scraps you already have.
If you enjoyed this project, you might also love:
- A bunny-themed embroidery hoop art
- Handmade Easter soft toys
- Fabric garlands for other seasons
Happy sewing—and enjoy bringing a little handmade spring magic into your space!