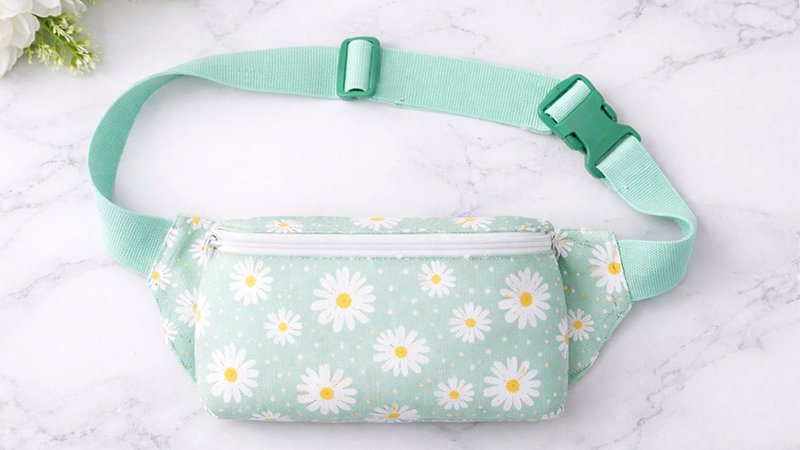
The Zip Hip Bag—also known as a fanny pack, sling bag, or waist wallet—is a practical and stylish accessory perfect for travel, theme parks, errands, or everyday use. It keeps your essentials secure while leaving your hands free.
When I first started making these, my kids thought they were anything but fashionable. But after a few days at a water park resort—where I ended up carrying everyone’s phones, hotel keys, and sunscreen—the bag quickly became a family favorite.
By the end of the trip, even my teenage daughter admitted my handmade version looked better than store-bought ones.
This design uses a foam stabilizer sandwiched between fabric layers and quilted, giving the bag structure and a professional finish. If you prefer a sleeker look, you can use vinyl or cork fabric, which eliminates the need for lining and quilting.
Why You’ll Love This Bag
- Features two zippered compartments:
- A main front pocket for everyday items
- A hidden back pocket for valuables like cash or cards
- Comfortable 1 ½” wide elastic waistband
- Adjustable fit for waist sizes 25”–40”
- Lightweight yet durable
- Customizable with different fabrics and finishes
Materials and Supplies
Gather the following before starting:
Fabrics
- Exterior fabric: 1 fat quarter (cotton, vinyl, or cork)
- Lining fabric: 1 fat quarter (not needed for vinyl/cork)
Stabilizer
- Foam interfacing: 13 ½” x 11”
Notions
- Zippers:
- One 10” zipper
- One 10 ½” zipper
- (#4.5 handbag zippers recommended)
- Bias binding: 1 yard (2¼”–2½” wide)
- Elastic: 1 yard (1½” wide)
- Hardware:
- 1 buckle (1½” opening)
- 1 triglide slide (1½” opening)
Cutting Instructions
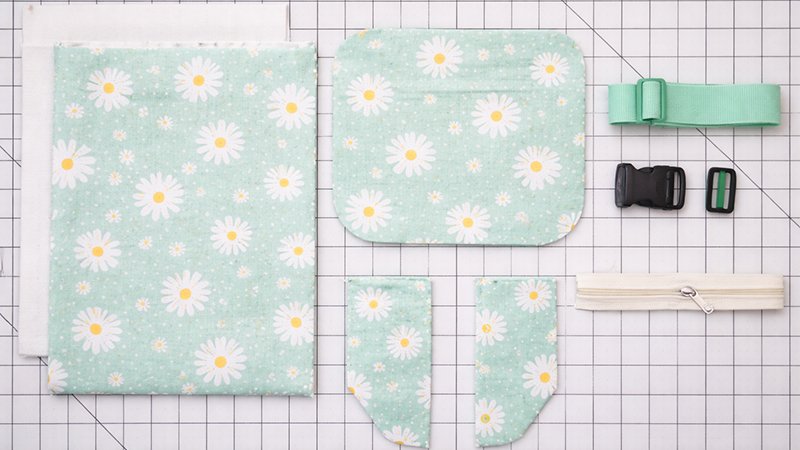
All measurements are height x width
From Exterior Fabric
- 1 rectangle: 13 ½” x 11”
- 2 side flaps (mirror images using template)
From Lining Fabric
- 1 rectangle: 13 ½” x 11”
- 2 side flaps (mirror images)
- 2 divider pieces (template)
If Using Vinyl or Cork (Skip Quilting Step)
Cut:
- 1 piece: 2¾” x 10”
- 1 piece: 5¼” x 10”
- 1 piece: 4½” x 10½”
- 2 side flaps
Step-by-Step Instructions
Step 1: Create the Quilted Panel (Cotton Only)
- Lay your lining fabric wrong side up.
- Place the foam stabilizer on top.
- Add the exterior fabric right side up.
- Baste around edges (⅛” seam allowance).
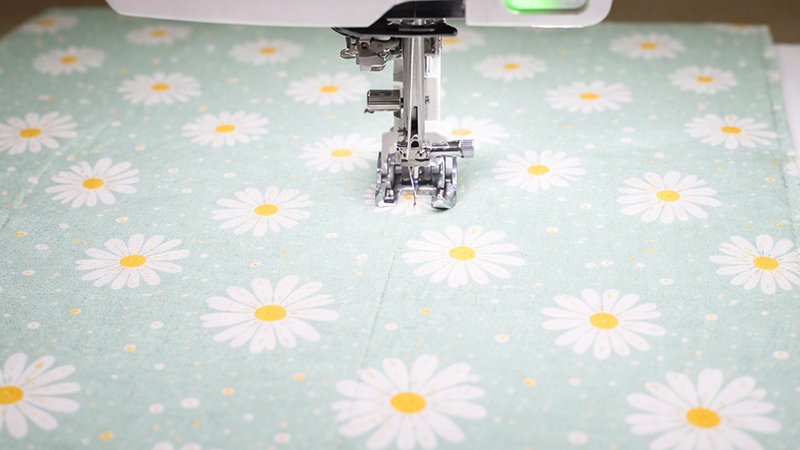
- Quilt the entire panel:
- Use straight or wavy lines
- A walking foot helps feed layers evenly
- After quilting:
- Cut into:
- 2¾” x 10”
- 5¼” x 10”
- 4½” x 10½”
- Baste edges to secure layers
- Cut into:
Step 2: Assemble the Back Zipper Panel
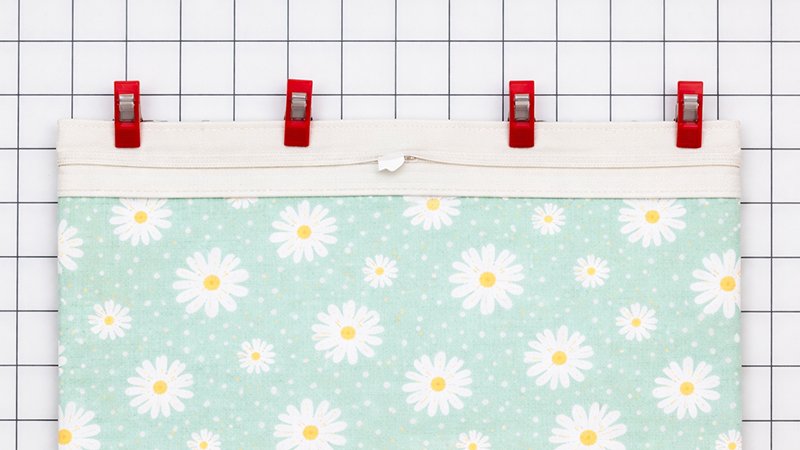
- Take the 5¼” x 10” panel.
- Place zipper face down along the top edge.
- Sew with ¼” seam allowance.
- Reduce bulk:
- Trim about ⅛” of foam and lining behind zipper tape
- Do NOT cut zipper tape
- Fold zipper upward and topstitch.
- Attach the 2¾” x 10” panel to the other side of zipper:
- Repeat same steps
Step 3: Add the Divider
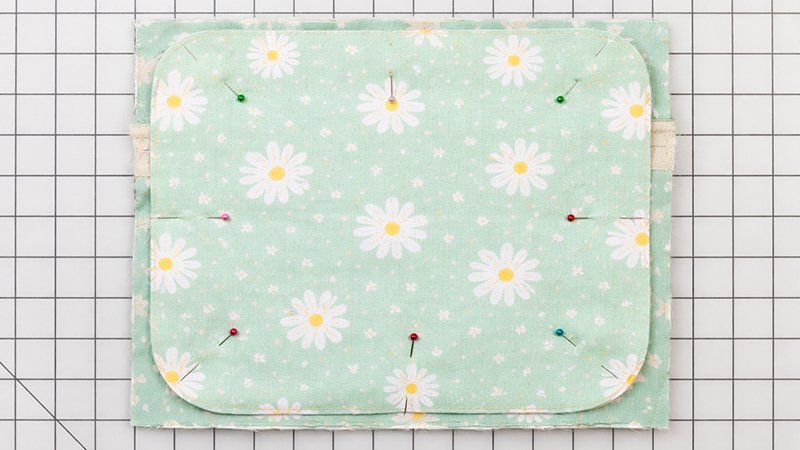
- Place divider pieces wrong sides together.
- Baste them as one unit.
- Center divider on lining side of back panel.
- Trim panel to match divider shape.
- Baste entire unit around edges.
- Topstitch along zipper edge again to secure divider.
Step 4: Prepare Side Flaps
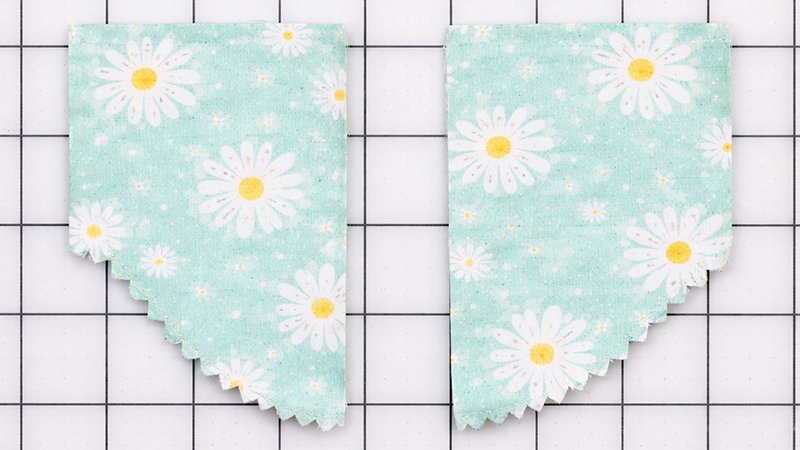
- Place exterior and lining flap pieces right sides together.
- Sew:
- Top straight edge
- Curved bottom edge
- Clip curves or use pinking shears.
- Turn right side out.
- Press and topstitch edges.
Step 5: Create the Front Zipper Panel
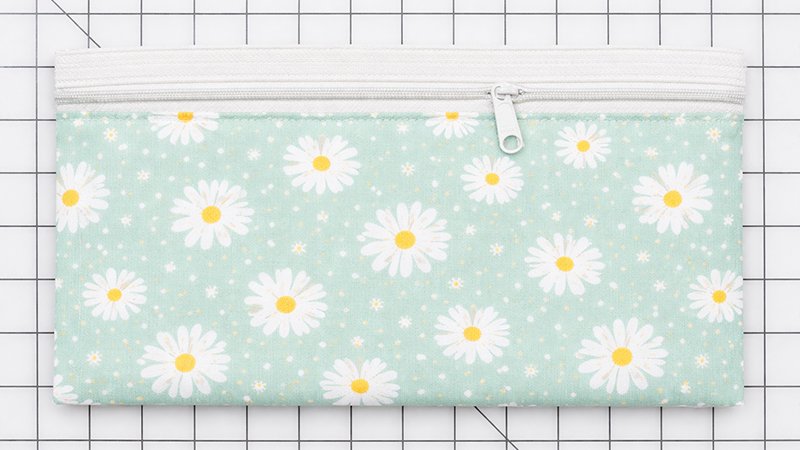
- Take 4½” x 10½” panel.
- Attach zipper using same method as Step 2:
- Sew
- Trim bulk
- Topstitch
Step 6: Assemble the Bag Body
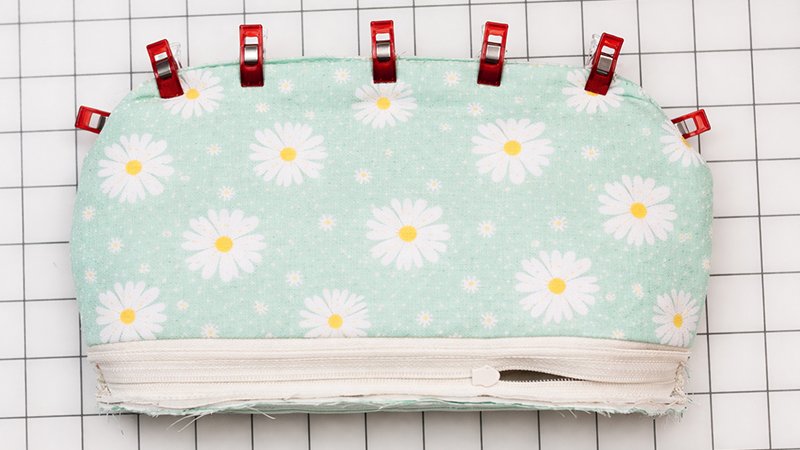
- Mark center points on:
- Front panel
- Back panel (top and bottom)
- Place panels right sides together, align centers.
- Clip zipper tape every ½ inch (¼” deep cuts):
- Helps curve smoothly
- Sew:
- Top seam first
- Then curved bottom seam
- Use zipper foot
Step 7: Insert Side Flaps
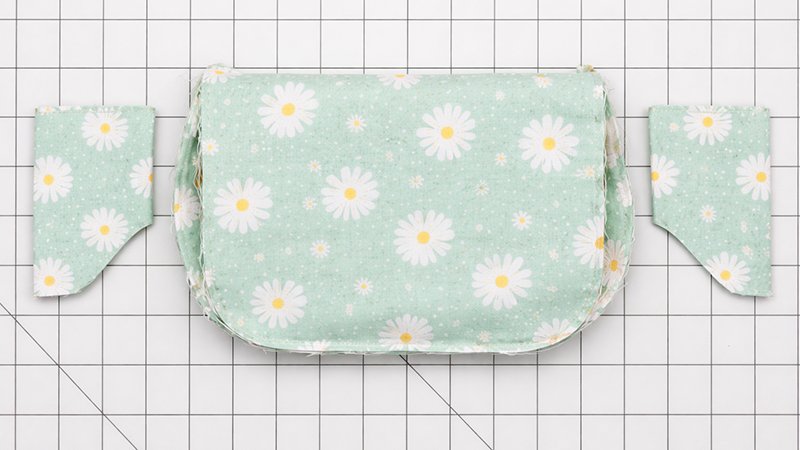
- Keep bag inside out.
- Insert side flaps into openings:
- Small end goes inside
- Ensure front zipper is half open.
- Pin side seams.
- Sew with ¼” seam allowance.
Step 8: Finish Interior
- Use bias binding to cover raw seams:
- Fold binding in half
- Sew along edges
- Join ends neatly for a clean finish.
- Turn bag right side out through zipper.
- Lightly press.
Step 9: Make the Adjustable Belt
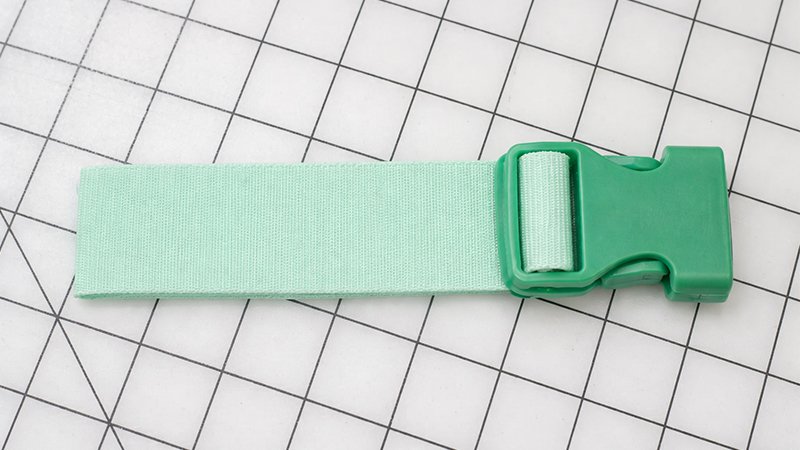
Cut Elastic
- One piece: 8”
- One piece: 28”
Attach Buckle (Short Side)
- Thread 8” elastic through female buckle end.
- Fold back.
- Sew securely (box stitch recommended).
Attach Adjustable Side
- Thread long elastic through:
- Triglide
- Male buckle
- Loop back through triglide.
- Stitch end to secure.
Attach to Bag
- Insert elastic ends into side flaps.
- Sew securely with back-and-forth stitches.
Final Tips
- Keep zipper slightly open before final assembly
- Use clips instead of pins for thick layers
- Go slowly over bulky seams
- Try different fabrics for unique styles
Finished Result
You now have a professional-looking, durable, and stylish Zip Hip Bag—perfect for travel, gifts, or everyday use.