Pattern Description:
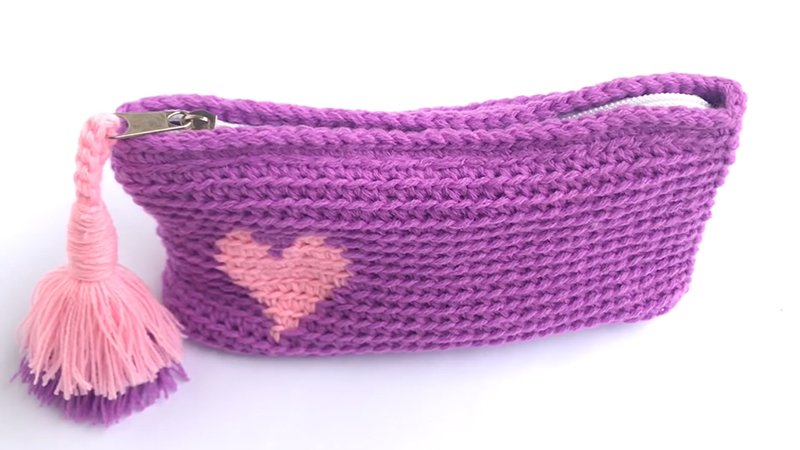
The Tapestry Crochet Zipper Pouch Mila is a compact and stylish accessory ideal for storing small essentials such as cards, keys, and cosmetics.
The pouch is crocheted in continuous rounds with no joining, creating a seamless tube with clean colorwork.
Using modified single crochet (msc) in the back loop only, the pouch showcases crisp tapestry design elements guided by a color chart.
Once crocheted, the flat top is finished neatly and later prepared for sewing in the zipper and lining.
Materials Needed & Measurements:
Materials
- Yarn: Thin cotton yarn or any light-weight fiber suitable for tapestry crochet. Sample uses Madame Tricot Paris Almina 8/4 mercerized cotton, 100% cotton, 50 g = 169 m.
- Colors:
- Color A: Black (9999)
- Color B: Beige (5309)
- Color A: Black (9999)
- Hook: Size recommended on yarn label; sample uses 2.0 mm hook.
- Other Tools:
- Stitch marker (essential for tracking the beginning of each round)
- Scissors
- Tapestry needle
- Optional: Sewing needle, zipper, and fabric for lining.
- Stitch marker (essential for tracking the beginning of each round)
Measurements
- Finished Size: Approximately 11 cm × 8 cm.
Abbreviations (US Terms)
| Abbrev. | Meaning |
| ch | chain |
| sl st | slip stitch |
| sc | single crochet |
| msc | modified single crochet |
| prev | previous |
| st | stitch |
Notes on Technique
- Modified Single Crochet (msc):
This stitch is worked like a standard sc in the back loop only, except you yarn under instead of yarn over when completing the stitch. This technique gives tapestry crochet a tighter, smoother surface. - Continuous Rounds:
Do not join at the end of each round. Instead, continue directly into the next round, working in a spiral. A stitch marker is mandatory to maintain round accuracy. - Colorwork:
Follow the tapestry chart for Rounds 2–23. Each square equals one stitch, and each row equals one round. Read all rounds right to left. - Carrying Yarn:
Carry the unused color along the inside of the work. To change colors cleanly, complete the last yarn-under of the msc with the new color.
Instructions for Making the Tapestry Zipper Pouch Pattern:
Round 1 – Foundation
- Using Color A (black), ch 35.
- Begin in the 2nd ch from hook, work 1 sc.
- Continue sc across the chain to the end.
- At the final chain, work 3 sc in the same stitch to turn.
- Rotate your work and crochet along the opposite side of the chain, placing 1 sc in each st.
- At the final ch on this side, work 1 sc, then another sc in the same st (this gives the second corner 2 sc, matching the opposite end’s increase).
- You should now have a total of 70 sc.
- Do not join; simply place a marker in the next stitch to mark the start of Round 2.
Rounds 2-23 – Body & Tapestry Colorwork
All stitches in these rounds are msc worked in the back loop only.
- Round 2:
- Insert the hook into the back loop of the first stitch of Round 1.
- Begin your first msc with black, then before completing it, introduce beige:
- Place beige behind the hook, in front of the black strand.
- Yarn under with black to complete the stitch. The beige is now secured and ready for use.
- Working msc:
- Insert hook into next back loop, yarn over or under with the active color as needed:
- Yarn over to draw up a loop (2 loops on hook).
- Yarn under the same color to complete the stitch.
- Insert hook into next back loop, yarn over or under with the active color as needed:
- Changing Colors:
- Change color on the last pull-through of the stitch before the color change. Example:
- To switch from black to beige:
- Work the stitch until 2 loops remain.
- Lift beige, yarn under beige, and pull through to finish the msc in beige.
- To switch back, repeat the same process in reverse.
- Rounds 2–23:
- Continue msc in each st, following the color chart carefully.
- Maintain tight, even tension for crisp motifs.
Finishing Round – Evening the Edge
After Round 23:
- Work 4 sl st in back loops only to level the final round.
- Fasten off neatly and weave in ends.
Your tapestry pouch body is complete. Install a zipper and add a fabric lining for a polished finish.