Pattern Description:
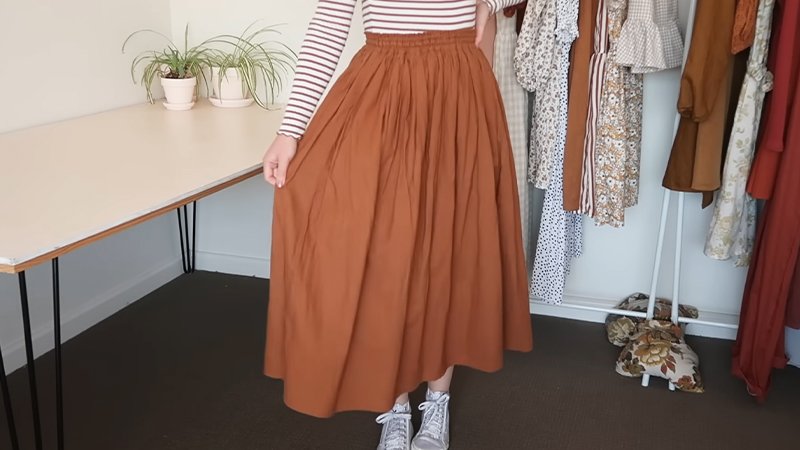
This free midi skirt pattern creates a classic, tailored silhouette inspired by high-end pleated skirts.
Featuring crisp box pleats, a structured custom-fit waistband, and an invisible zipper, it delivers a polished and versatile look suitable for a variety of fabrics.
The design uses an easy, mark-free pleating method that relies only on pins, allowing you to achieve uniform pleats while customizing the skirt length, fullness, and overall fit.
Materials Needed & Measurements:
Materials Needed
- Fabric: Black buffalo check cotton fabric. The pattern can be made in other fabrics, such as plaid or metallic floral.
- Zipper: A 7-9″ invisible zipper in a coordinating color.
- Interfacing: Fusible interfacing for the waistband to provide stability.
- Pattern Paper: You will need pattern paper.
- Notions: Pins, a needle, and matching thread are required for construction and hand-stitching the waistband and hem.
Measurements & Calculations
1. Fabric Width Calculation:
- Measure your waist.
- Determine the desired number of pleats (e.g., 10 pleats).
- Calculate Pleat Width: Waist / # of desired pleats (Example: 28.5″ / 10 = 2.85″ pleats).
- Calculate Base Fabric Width: Waist X 3 (Box pleats require three times the width of the pleat face).
- Add Seam Allowance: Add 2″ for the side seam allowance.
- Total Fabric Needed (Width): Base Fabric Width + 2″ (Example: 87.5″ + 2″ = 89.5″ of fabric).
2. Pattern Piece Dimensions:
- Pattern Width: The pattern piece must measure HALF of the total needed width, as you cut a front piece and a back piece. (Example: 89.5″ divided by 2 is 44.75″).
- Pattern Length: Cut your fabric to your desired skirt length, adding 2″ for seam allowance on the hem.
3. Waistband Dimensions:
- Waistband Width: Your waist measurement (Example: 29″).
- Waistband Length (Height): (Desired thickness X 2) + 1″ for seam allowance. (Example resulted in 5 1/2″ in length/height).
4. Estimated Yardage: 2 1/2 yards total, which includes 1/4 yard for the waistband.
Instructions for Making the Midi Skirt Pattern:
Calculating Fabric Dimensions
Before creating the pattern piece, you must calculate the precise fabric width required for your customized size.
- Waist Measurement: Begin by measuring your waist.
- Determine Pleat Width: Divide your waist measurement by the desired number of pleats to find the pleat width (Example: 28.5″ waist / 10 desired pleats = 2.85″ pleats).
- Calculate Base Fabric Width: Multiply your waist measurement by three, as box pleats require three times the width of the pleat face to construct them (Example: 28.5 x 3 = 87.5″).
- Add Seam Allowance: Add 2″ to the base width for the side seam allowance (Example: 87.5″ + 2″ = 89.5″ total fabric width needed).
- Total Yardage: The project required 2 1/2 yards total, including 1/4 yard for the waistband, though grabbing extra fabric (3 yards) is recommended.
Creating and Marking the Pattern
To make the pattern, you will need pattern paper, such as the paper used on a doctor’s exam table.
- Pattern Piece Size: Measure out a piece of pattern paper that measures HALF of your total needed width (Example: 89.5″ divided by 2 equals 44.75″). You will cut two of these pieces from your fabric—one for the front and one for the back.
- Mark Seam Allowance: On each end of the paper, mark a 1/2″ seam allowance.
- Draw Pleat Lines: Draw out your pleats. For each pleat, you need the pleat length marked to the right and left of the pleat face.
- Mark Fold Lines: Draw dotted lines to represent the fold lines. You will fold every line to the left of the pleat to the right, and every line to the right of the pleat to the left.
Cutting and Pleating the Fabric
This process uses the “No Mark Pleat Method” that requires only pins to fold the fabric.
- Cut Fabric Pieces: Lay your finished pattern paper out on the wrong side of the fabric.
- Pin Marking: Place a pin on EVERY line drawn on your pattern, but do not pin the dotted lines.
- Determine Length: Cut your fabric to your desired skirt length, adding 2″ for the seam allowance on the hem. Cut two of these fabric pieces.
- Flip Fabric: While the pattern paper is still pinned to the fabric, flip the whole rectangle over so you are looking at the right side of the fabric.
- Fold Pleats: Match each pin to the corresponding pin. The left side of the pleat face folds to the right, and the right side of the pleat face folds to the left.
- Repin and Remove Paper: As you match the pins, repin the pleats securely in place. Gently slide the pattern paper out of place as you finish each pleat; the paper will be completely unpinned once the entire piece of fabric is pleated. Repeat this for both the front and back pieces.
Skirt and Waistband Construction
- Baste and Sew Seams: Baste the waistline edge at 1/2″ on both pleated pieces. Sew the side seams together at 1/2″.
On the side designated for the zipper, stop sewing about 5–6″ from the top to leave space for the zipper, and back stitch. Iron and finish the seam allowances (a zig zag stitch can be used).
- Cut the Waistband: The waistband is a simple rectangle. Calculate the width using your waist measurement (Example: 29″).
Calculate the length (height) using: (Desired thickness X 2) + 1″ for seam allowance (Example: 5 1/2″ length for a 29″ X 5 1/2″ piece).
- Add Interfacing: It is highly suggested to cut a piece of fusible interfacing sized to half of the waistband piece. Iron this interfacing onto half of the piece (so when folded long ways, half of the piece has interfacing) to provide stability.
- Attach Waistband: Iron the waistband in half, wrong sides together (WST). Pin the interfaced edge of the waistband (one edge) right sides together (RST) to the skirt waistline, ensuring centers and edges line up. Sew at 1/2″, leaving the other edge loose.
- Finish Waistband: Iron the loose side of your waistband at 1/2″. Flip the waistband over to the inside of the skirt and pin it in place so it just barely covers the unfinished seam allowance.
Using a needle and matching thread, whip stitch along the edge of the waistband end to end, or stitch in the ditch. Iron the finished waistband.
Zipper and Hemming
- Insert Zipper: Insert a 7-9″ invisible zipper in a coordinating color into the opening left in the side seam. Follow the instructions included with the zipper. Finish the top of the zipper/seam allowance edge (a zig zag stitch is suggested).
- Secure Zipper Tape: Pin the loose zipper tape sticking over the top of the skirt to the back of the seam allowance. Fold the seam allowance back over, and hand tack along the edges of the zipper edge.
- Hem Skirt: Hem the skirt by folding and ironing the bottom edge at 1/2″, and then folding and ironing again at 1 1/2″. Pin the hem in place. Hand tack the hemline using a blind hem stitch, or use a machine.