Pattern Description:
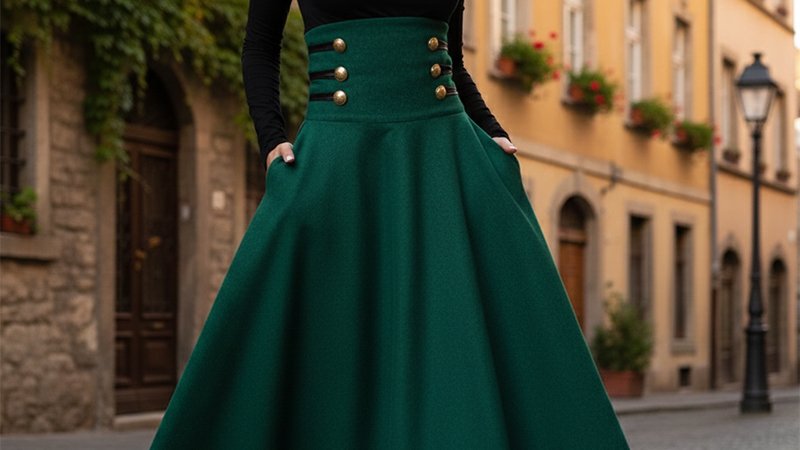
This high-waisted skirt pattern creates a flattering, structured silhouette that sits above the natural waistline for a vintage-inspired look.
The design features a fitted waistband, gentle A-line flare, and customizable length. It is drafted using waist, hip, and length measurements, making it adaptable for various body types.
Simple cuts and clean seams make it beginner-friendly while maintaining a polished finish.
Materials Needed & Measurements:
Materials Needed:
- Woven fabric (cotton, linen, twill, or similar)
- Matching thread
- Interfacing for waistband
- Invisible zipper (7″–9″)
- Sewing machine & basic sewing tools
- Scissors or rotary cutter
- Measuring tape
- Pins or clips
- Iron and ironing board
Measurements Required:
- Waist circumference
- Hip circumference
- Skirt length (from waist to desired hem)
- Waistband height (usually 2″–3″)
- Seam allowance preference (commonly ½”)
Instructions for Making the High-Waisted Skirt Pattern:
Take Accurate Body Measurements
- Before drafting the pattern, start with a complete set of measurements to ensure the skirt fits comfortably and sits securely at the high waist.
- Measure your waist circumference, placing the tape at the narrowest part of your torso. Then measure the hips, positioning the tape around the fullest area.
- Record the desired skirt length, beginning at the high-waist level and dropping down to your preferred hemline.
Note the waistband height, usually between two and three inches depending on the look you want. Write all these figures on your pattern sheet.
Prepare Your Pattern Paper
- Spread a wide piece of pattern paper or any large sheet that allows clean lines and enough room for adjustments.
- Use a long ruler and set square to ensure the lines remain accurate. Mark a vertical line that represents the skirt length.
- At the top of this line, draw a horizontal line to act as your waistline, then square down from each end. This becomes the structural framework of the skirt.
Draft the Waistline and Hipline
- Divide your waist measurement by four and add ½ inch for seam allowance plus 1 inch for shaping. From the top of the vertical line, measure and mark this value on the waistline.
- Five to seven inches below the waistline, draw another horizontal line. This represents the hipline. Divide the hip measurement by four, add your seam allowance, and mark it on this line.
- Connect the waist and hip points with a smooth curve or straight line depending on how structured or relaxed you want the skirt to appear.
Shape the High Waistband
- Draw a rectangular piece directly above the waistline, equal in length to your waist measurement plus seam allowance.
- The height should match your chosen waistband height. To create a neat contour, subtract ¼ inch from each side at the top edge, then connect the corners with a gentle slant.
- This prevents gaping and ensures the waistband hugs the body. Add notches at the center and side points so the waistband aligns perfectly with the skirt during sewing.
Add Darts for a Smooth Fit
- Darts are essential in high-waisted styles because they remove excess fabric and shape the skirt to the natural curve of the torso.
- On the waistline of the front piece, place a dart one-third of the way from the center. The dart should measure around 1 inch wide and extend 3 to 4 inches downward.
- For the back piece, place two darts equally spaced apart, also about 1 inch wide and 4 to 5 inches long. Mark them clearly with center lines and legs for easy folding during sewing.
Draft the Side Seams and Skirt Outline
- From the hipline down to the hem, drop a straight vertical line to create a sleek, fitted silhouette.
- If you prefer a gentle A-line effect, angle the line outward by ½ inch to 1 inch on each side.
- This adds subtle flare without overwhelming the shape. Extend the hemline to the full width required, then connect the hem points to the hipline for a balanced look. Add seam allowance- typically ½ inch on all sides and 1 inch at the hem.
Create the Back Opening for the Zipper
- Since high-waisted skirts need a secure closure, mark a center-back seam on the back skirt panel. Extend this line the full length of the skirt.
- At the top, mark a 7-9 inch opening where the invisible zipper will be installed.
- Add an additional ½ inch seam allowance along the center-back edges to accommodate the zipper tape cleanly.
Label, Cut, and Prepare the Pattern Pieces
- Once all drafting steps are complete, label each piece clearly: Front Skirt, Back Skirt, Waistband, and Facing if you choose to include one.
- Indicate grainlines, fold placements, and notches. Cut out the paper pieces and lay them onto your pre-washed fabric. Pin securely, staying aligned with the grain.
- Cut carefully around every piece, marking darts, notches, and zipper placement.
Final Checks Before Sewing
- Before removing the pattern entirely, double-check every marking. Ensure the waistline of the skirt matches the length of the waistband, the darts are clearly transferred, and the side seams of the front and back pieces align perfectly.
- These checks prevent mistakes during sewing and result in a crisp, tailored high-waisted skirt once assembled.