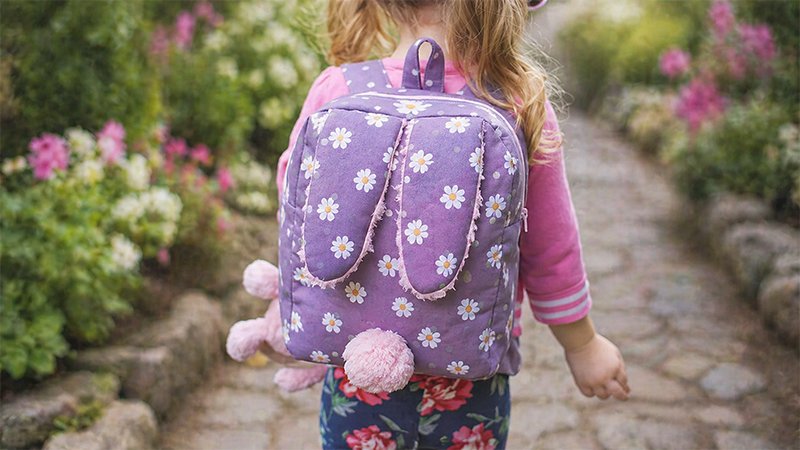
Whether you’re preparing for Easter or making a year-round companion for your child, this Bunny Toddler Backpack is a delightful and practical project. Designed for intermediate sewists, this backpack combines structure, softness, and adorable bunny features.
Materials & Supplies
Before you begin, gather all materials to ensure a smooth workflow.
Fabrics
- Main Fabric: ¾ yard
- Quilting cotton works well, but home décor weight fabric is recommended for added durability.
- Lining Fabric: ½ yard (100% quilting cotton)
Specialty Materials
- Fleece or Faux Fur: 6″ × 6″ scrap (for bunny ears)
- Fusible Interfacing: 1¾ yards (e.g., Pellon SF101)
- Fusible Fleece: ¾ yard
- Alternative: Annie’s Soft & Stable or Peltex 71F for a firmer structure
- Strap Hardware:
- Two 1.5″ strap adjusters or D-rings
- Zipper: 14″ non-separating zipper
- Stuffing: Polyester fiberfill (for the tail)
- Plastic Canvas: 3.25″ × 5.5″ (for base support)
Cutting Instructions
Important:
- Print pattern at 100% scale
- Verify with the 1″ test square
Main Fabric Pieces
- Straps: 2 pieces — 6″ × 24″
- Strap Loops: 2 pieces — 6″ × 5″
- Handle: 1 piece — 3″ × 6″
- Zipper Gussets: 2 pieces — 2.25″ × 15″
- Bottom/Side Gusset: 1 piece — 4.5″ × 20″
Lining Fabric Pieces
- Zipper Gussets: 2 pieces — 2.25″ × 15″
- Bottom/Side Gusset: 1 piece — 4.5″ × 20″
- Bottom Support: 2 pieces — 4.5″ × 6.5″
Interfacing & Fleece
- Cut matching pieces for:
- Straps
- Strap loops
- Handle
- Gussets
- Tip: Cut fusible fleece slightly smaller (e.g., 1.5″ wide for straps) to reduce seam bulk
Preparation
- Use a ½″ seam allowance unless stated otherwise
- RST = Right Sides Together
Applying Interfacing & Fleece
- Fuse interfacing to the wrong side of fabric pieces
- Attach fusible fleece to the right side of the interfacing
- This prevents bubbling and keeps the fabric smooth
- Trim fleece from seam allowances to reduce bulk
Step-by-Step Construction
1. Make Straps, Loops & Handle
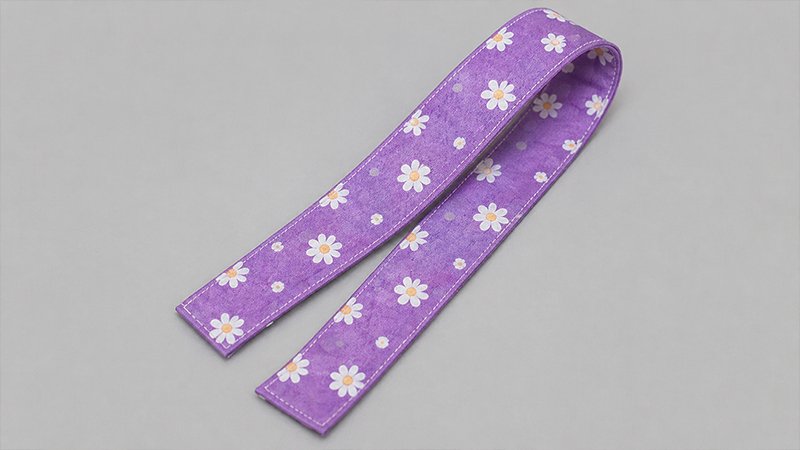
- Fold each piece in half lengthwise and press
- Open and attach fusible fleece along one side of the center fold
- Fold long edges inward to the center
- Fold in half again and press
- Stitch along both long edges and one short edge
Straps should look clean and sturdy with enclosed raw edges
2. Attach Straps & Hardware
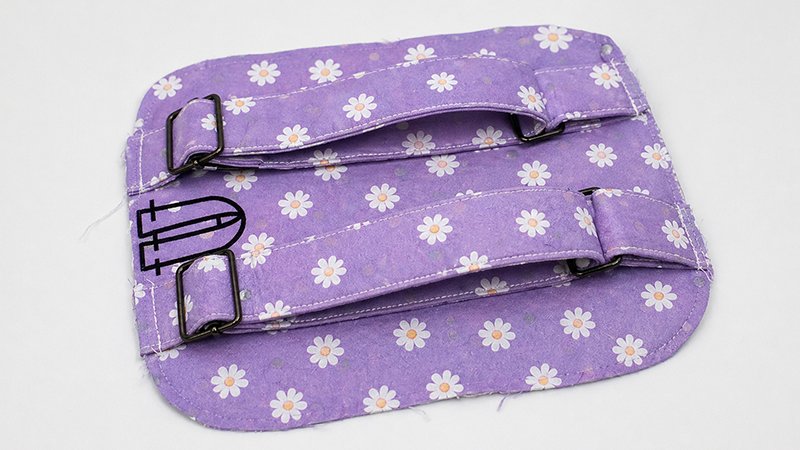
Strap Loops:
- Fold each loop in half through a D-ring or adjuster
- Stitch to the bottom of the back panel (follow pattern markings)
Straps:
- Thread one end through the adjuster center bar
- Fold over 1.5″ and stitch securely
- Thread the opposite end through the loop and the adjuster
- Attach the strap top to the upper back panel
Repeat for both straps
Center and stitch the handle between the straps
3. Create Bunny Features
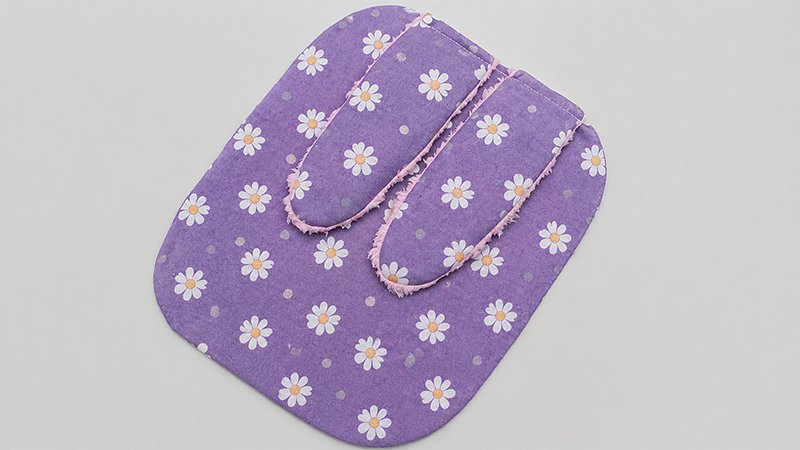
Ears:
- Pair one main fabric ear + one fleece/fur piece (RST)
- Stitch curved edges with ¼″ seam allowance
- Turn the right side out and press carefully
- Attach ears to front panel (as marked)
Tail:
- Sew a basting stitch around the circular edge
- Pull threads to gather into a pouch
- Stuff firmly
- Hand stitch closed
- Attach securely to the front using heavy-duty thread
4. Assemble Gusset & Zipper
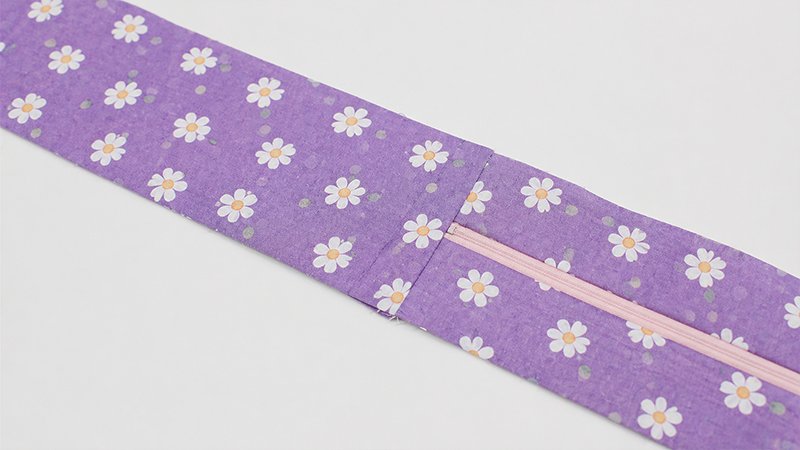
Zipper Assembly:
- Place the zipper face down on the main fabric gusset (RST)
- Ensure zipper ends sit ½″ from edges
- Stitch using ¼″ seam allowance
- Repeat for the other side
Create Gusset Loop:
- Sew zipper gussets to the bottom/side gusset
- Form a continuous loop
Attach to Bag:
- Pin gusset to back panel, matching notches
- Clip curves for smooth shaping
- Stitch in place
Repeat for the front panel
Leave the zipper OPEN for turning later
5. Add Bottom Support
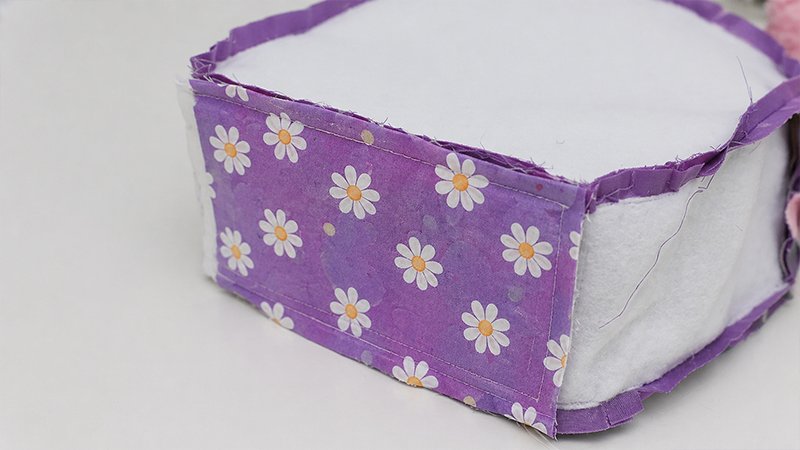
- Sew lining support pieces together (3 sides)
- Insert plastic canvas
- Close opening
- Center on the bottom gusset
- Stitch seam allowances to secure
6. Construct Lining
- Assemble lining panels the same as the outer bag
- Press one long edge of the zipper gusset pieces ¼″ inward
- When joining, leave a ½″ gap between folded edges
7. Final Assembly
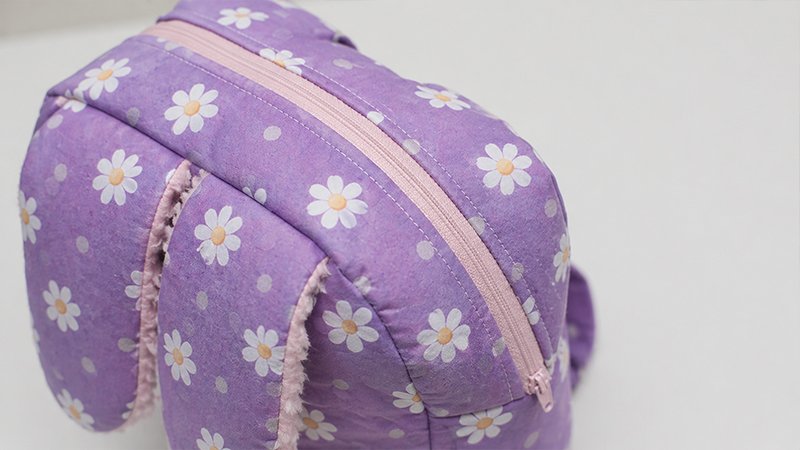
- Turn the outer bag right side out
- Keep lining the wrong side out
- Insert lining into outer bag
- Align zipper edges
- Pin lining to zipper (wrong side)
Finishing:
- Hand-stitch the lining to the zipper neatly
- Topstitch along zipper edges for durability
Finished!
You’ve created a charming, functional Bunny Toddler Backpack—perfect for little adventures, treats, and treasures.