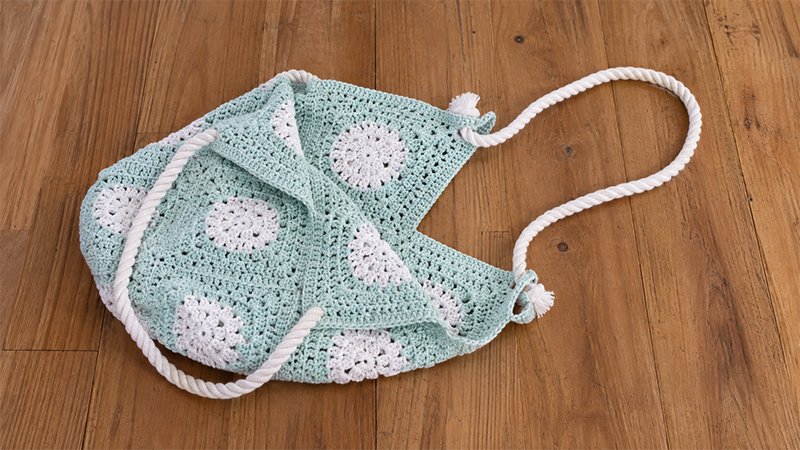
The Caldwell Crochet Market Bag is a stylish, functional accessory designed for modern market trips and everyday errands.
Crafted using 13 textured granny squares, this market tote pairs openwork stitches with structural puff details for a vintage-inspired aesthetic.
Worked in breathable worsted-weight cotton yarn, the bag balances flexibility with durability to safely hold your market finds.
Once the classic squares are stitched together, a simple folded layout shapes the body, finished with a sturdy single-crochet top edging.
Completed with thick cotton rope handles, this bag offers a comfortable shoulder carry and timeless appeal.
Materials & Specifications
-
Skill Level: Intermediate
-
Dimensions: Roughly 15 inches wide by 13 inches tall (body height, excluding handles)
-
Crochet Hook: Size H/8 (5.0 mm)
-
Yarn Needed: Category 4 worsted-weight cotton yarn
-
Accent Shade: Approximately 2.8 oz / 2 skeins
-
Main Shade: Approximately 5.9 oz / 4 skeins
-
-
Tools: Tapestry needle, scissors
-
Handles: Two 36-inch pieces of 1/2-inch thick cotton rope
Stitch Guide & Techniques
-
Initial Puff Stitch (Round 1): Yarn over, insert hook into circle, pull up a loop (4 times total to get 9 loops on hook). Yarn over and pull through all 9 loops.
-
Standard Puff Stitch (Rounds 2–6): Yarn over, insert hook into space, pull up a loop (3 times total to get 7 loops on hook). Yarn over and pull through all 7 loops.
-
Back Loop Only (BLO): Insert hook only into the back ridge of the stitch to create a textured edge.
-
Single Crochet Two Together (Sc2tog): Standard single-crochet decrease across two stitches.
Pattern Directions
1. Creating the Squares (Make 13)
-
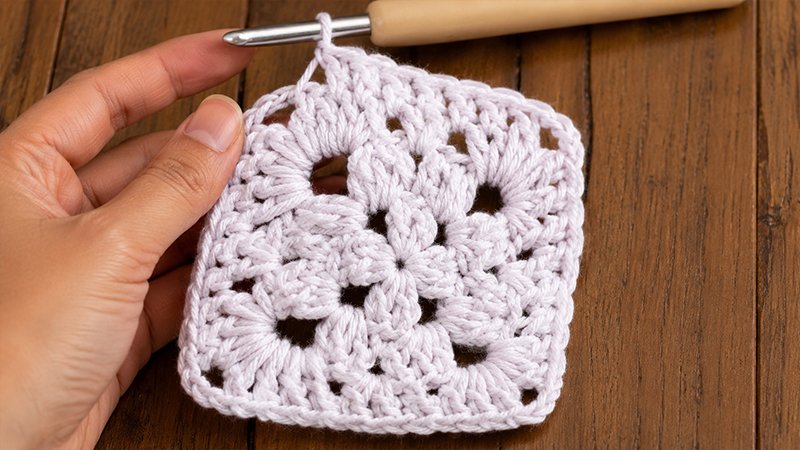
Round 1: Form a magic ring. Work [1 Initial Puff Stitch, chain 3] four times into the ring. Pull tail to close the loop tightly. Slip stitch into the top of the first puff to join.
-
Round 2: In each chain-3 space around, work (1 Standard Puff, chain 3, 1 Standard Puff, chain 1). Into the top of each puff stitch from the previous row, work (1 double crochet, chain 1, 1 double crochet). Join with a slip stitch into the starting puff.
-
Round 3: In the first corner space, work (Puff, chain 3, Puff, chain 1, double crochet, chain 1, double crochet). Work (double crochet, chain 1, double crochet) into the next chain-1 space. In the next corner, work (double crochet, chain 1, double crochet, Puff, chain 3, Puff, chain 1, double crochet, chain 1, double crochet). Work (double crochet, chain 1, double crochet) in the chain-1 space. Repeat from * to * around. End with (double crochet, chain 1, double crochet) in the initial corner space, then slip stitch to join.
-
Round 4: In the starting corner, work (Puff, chain 3, Puff, double crochet). Work (double crochet, chain 1, double crochet) in each of the next three chain-1 spaces. In the corner space, work (double crochet, Puff, chain 3, Puff, double crochet), then (double crochet, chain 1, double crochet) in each of the next three spaces. Repeat from * to * around. End with 1 double crochet in the initial corner space and slip stitch to join.
-
Round 5: In the starting corner, work (Puff, chain 3, Puff, double crochet, chain 1, double crochet). Work (double crochet, chain 1, double crochet) in each of the next three spaces. In the corner, work (double crochet, chain 1, double crochet, Puff, chain 3, Puff, double crochet, chain 1, double crochet), then continue working (double crochet, chain 1, double crochet) in each side space. Repeat around. End with (double crochet, chain 1, double crochet) in the first corner space and slip stitch to join.
-
Round 6: In the starting corner, work (Puff, chain 3, Puff, double crochet). Work (double crochet, chain 1, double crochet) across the five side spaces. In the corner, work (double crochet, Puff, chain 3, Puff, double crochet), then repeat across side spaces. Continue around, ending with 1 double crochet in the starting corner space. Join with a slip stitch, cut yarn, and weave in all loose ends.
2. Assembly & Shaping
-
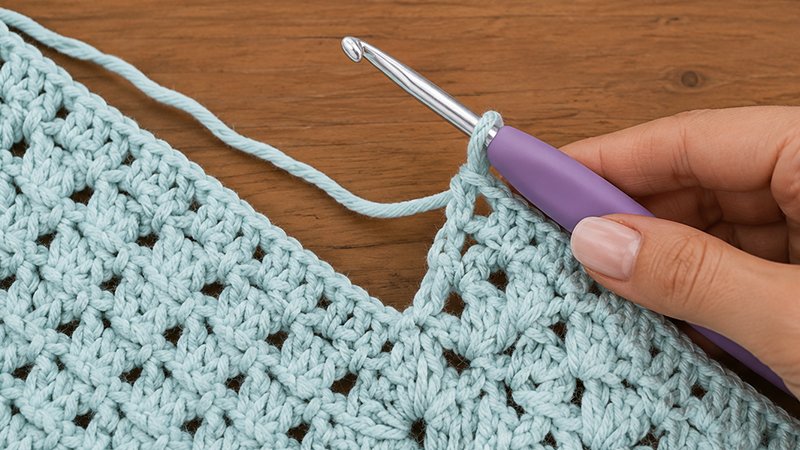
Arrange the 13 completed squares in a cross-like formation (3 squares wide, 5 squares long with central side extensions).
-
Using a yarn needle and an invisible mattress stitch or whipstitch, join the flat edges together.
-
Fold the joined layout in half to bring the lower squares up to align with the upper edges.
-
Stitch the remaining outer side seams together to form the deep pouch of the tote.
3. Edging & Top Border
-
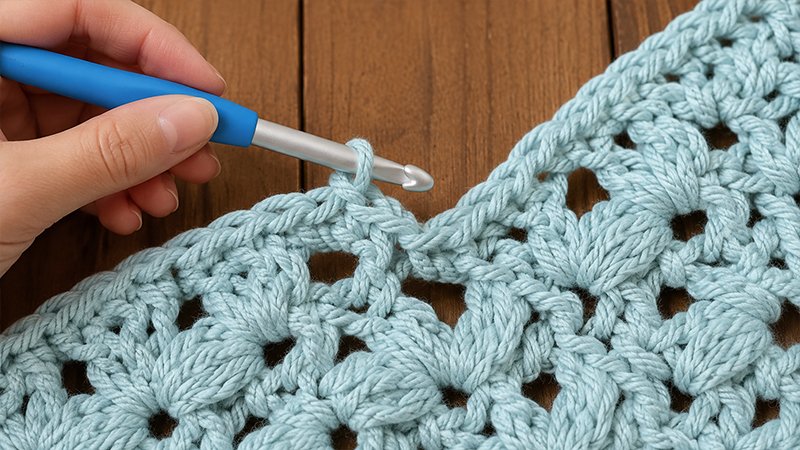
Round 1: Attach yarn into a corner chain-space on the upper rim. Work single crochets evenly around the upper perimeter of the bag opening, placing 2 single crochets in side corners, 5 single crochets in outer top peaks, and placing 1 single crochet into every stitch and chain space along the sides (approximately 20 stitches per square edge). Slip stitch to join.
-
Round 2: Chain 1. Working strictly in the Back Loop Only (BLO), single crochet along the edge, placing 3 single crochets into each outer peak to form corners, and working a single crochet decrease (sc2tog) at the inner valleys to keep the edge flat. Slip stitch to join.
-
Round 3: Slip stitch into every stitch around the entire rim to stabilize the opening. Fasten off and weave in ends.
4. Rope Handles
-
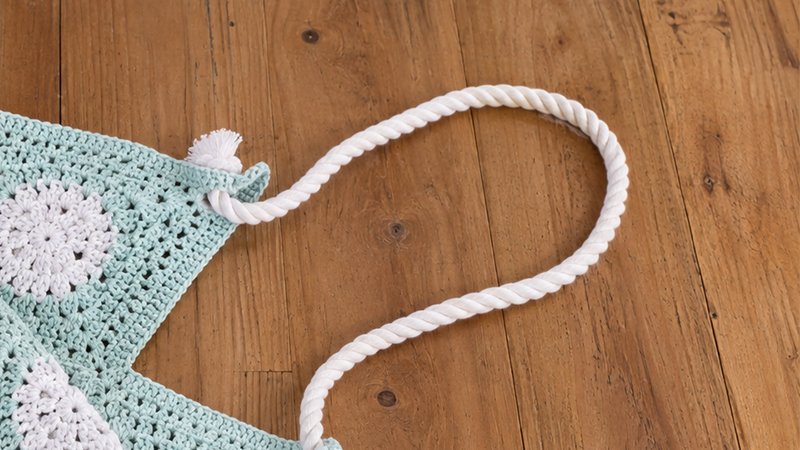
Thread one 36-inch piece of cotton rope from the inside to the outside through the two top corner openings on one side of the bag.
-
Tie a firm overhand knot on the outer face of each end so the rope cannot pull back through.
-
Repeat the process with the second length of rope on the opposite side of the bag.