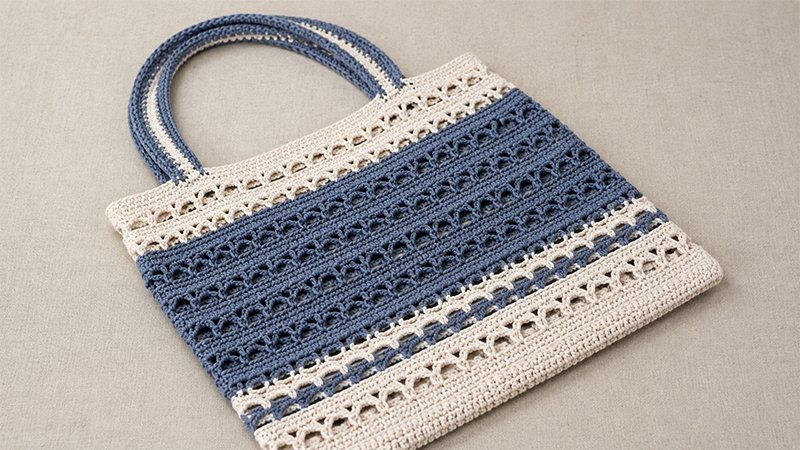
The Dockside Bag is an easy-to-follow, highly functional tote project designed with an eye-catching textured repeat.
Worked from the bottom up, the base establishes a sturdy foundation before building the main body using simple single crochets and breezy chain loops.
By switching colors, you can easily create striking multi-tone stripes, or stick to a single shade for a minimalist look.
Simple folded handles finish off the top for a comfortable carry. Grab your hook, pick your favorite worsted cotton yarn, and get ready to craft a durable, stylish everyday bag.
Required Materials
-
Yarn: Worst-weight cotton yarn (#4)
-
Color A: ~340 yards
-
Color B: ~190 yards
-
-
Hook: US I/9 (5.5 mm)
-
Notions: Scissors, yarn needle, tape measure, stitch markers
Pattern Details & Abbreviations
-
Gauge: 7 rows × 8 single crochets = 2 inches
-
Finished Size: ~17 inches tall × 16 inches wide (excluding handles)
-
Abbreviations:
-
ch: Chain
-
sc: Single crochet
-
scblo: Single crochet back loop only
-
st(s): Stitch(es)
-
sl st: Slip stitch
-
ch-sp: Chain space
-
sk: Skip
-
Rnd(s): Round(s)
-
Color Guide
-
Base to Rnd 13: Color A
-
Rnd 14: Color B
-
Rnds 15 to 17: Color A
-
Rnds 18 to 37: Color B
-
Rnds 38 to 47: Color A
Step-by-Step Construction
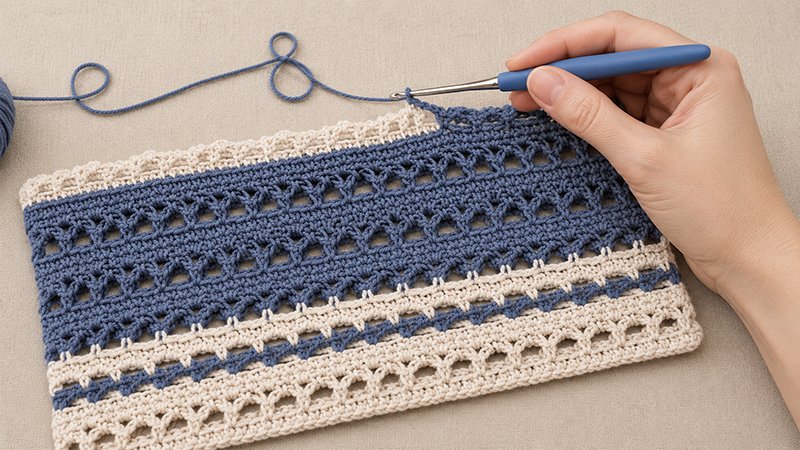
1. The Rectangular Base
-
Chain 8.
-
Row 1: Single crochet in the second chain from the hook and in each remaining chain, chain 1, turn. (7 stitches)
-
Rows 2 to 50: Single crochet in each stitch across, chain 1, turn. (7 stitches) The finished strip should measure roughly 13 inches un-stretched.
2. Transitioning to the Round
-
Rnd 1: Work single crochets evenly down the side edge, make 2 single crochets in the corner, continue along the foundation chain, place 2 single crochets in the next corner, work along the opposite long edge, place 2 single crochets in the final corner, single crochet across the top edge, and place 2 single crochets in the last corner. Join with a slip stitch to the first stitch, chain 1. (116 stitches)
-
Rnd 2: Single crochet in the same stitch as the chain-1, single crochet around while working 2 single crochets into each of the four corners. Join with a slip stitch, chain 1. (120 stitches)
-
Rnd 3: Working only in the back loops, single crochet in the same stitch and each stitch around. Join with a slip stitch, chain 1. (120 stitches)
-
Rnds 4 to 5: Working through both loops, single crochet in each stitch around. Join with a slip stitch, chain 1. (120 stitches)
3. Textured Body Pattern
-
Rnd 6: Single crochet in the first stitch, chain 5, skip 2 stitches, single crochet in the next stitch, chain 5, skip 2 stitches, repeat from * to * around. Join with a slip stitch, chain 3. (40 single crochets)
-
Rnd 7: Single crochet into the chain-5 loop, chain 2, repeat from * to * around. Join with a slip stitch to the second chain of your starting chain-3, chain 1. (40 single crochets)
-
Rnd 8: Single crochet in the first stitch, work 2 single crochets into the chain space, single crochet in the next stitch, 2 single crochets in the chain space, repeat from * to * around. Join with a slip stitch, chain 1. (120 stitches)
-
Rnd 9: Single crochet in each stitch around. Join with a slip stitch, chain 1. (120 stitches)
-
Rnds 10 to 45: Repeat the sequence from Rnd 6 through Rnd 9.
-
Rnd 46: Single crochet in each stitch around. Join with a slip stitch, chain 1. (120 stitches)
-
Rnd 47: Single crochet in each stitch around. Join with a slip stitch, fasten off, and leave a yarn tail. (120 stitches)
4. Making the Handles (Make 2)
-
Chain 8.
-
Row 1: Single crochet in the second chain from hook and each chain across, chain 1, turn. (7 stitches)
-
Rows 2 to 90: Single crochet across each stitch, chain 1, turn. (7 stitches) The finished strip will measure roughly 23 inches un-stretched.
-
Assembly: Fold the strip in half lengthwise to form a thick tube. Join yarn to one end and slip stitch along the open edge to lock it closed. Fasten off and weave in the ends.
5. Final Assembly
-
Flatten the bag body evenly.
-
Measure 12 stitches inward from each outer side edge and mark with a stitch marker on both sides.
-
Position the base of each strap slightly above Rnd 44, aligning the inner edge of the strap with the stitch marker.
-
Securely sew both straps to the body using a yarn needle and leftover yarn tails.
-
Weave in any remaining yarn ends to complete the bag.