If you’re looking for a project that combines functionality and style, this Cross Body Zipper Tote is a perfect choice. It’s compact enough for essentials like your phone, wallet, and keys, yet stylish enough to use daily or gift.
This project is also ideal for using up 2½-inch jelly roll strips or fabric scraps, making it both practical and satisfying.
Materials You’ll Need
Prepare everything before you start sewing:
- Exterior Fabric: 9 strips (2½” × 9” each)
- Lining Fabric: 1 piece (18½” × 9”)
- Fusible Fleece Interfacing: 1 piece (18½” × 9”)
- Zipper: 9” or longer (metal recommended for style)
- Strap Loops: 2 pieces twill tape/ribbon (2½” long, ½”–1” wide)
- Strap: 60” rope, ribbon, twill tape, or handmade fabric strap
Tip: Handbag zippers are easier to work with due to wider tape.
Step 1: Create the Quilted Bag Body (Foundation Piecing)

This method attaches fabric directly to fleece for structure and ease.
- Fuse the fleece to the wrong side of your lining fabric using heat and steam.
- Place the piece fleece side up on your workspace.
- Take your first strip and align it along the top edge. Baste it in place (⅛” from edge).
- Place the second strip on top of the first, right sides together.
- Sew along the long edge using a ¼” seam allowance.
- Flip the strip open and press it flat.
- Continue this process:
- Add strip → sew → flip → press
- Repeat until all 9 strips cover the entire surface
- Trim excess fabric evenly.
- Baste along the bottom edge to secure all layers.
Step 2: Attach the Zipper
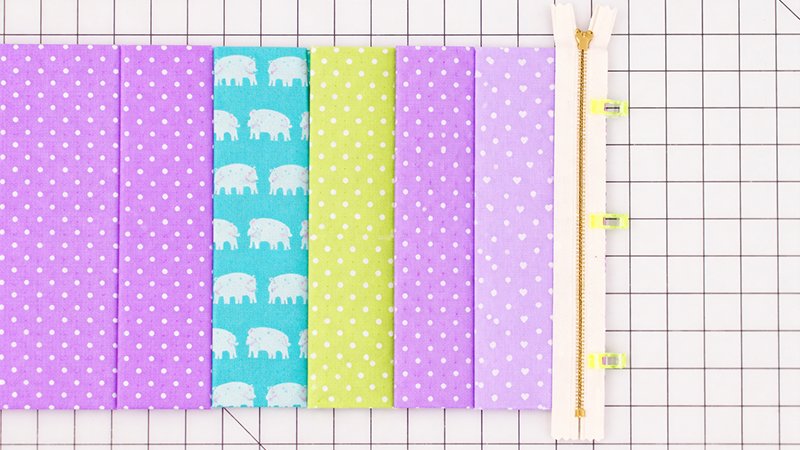
This method gives a clean, professional interior finish.
- Place the zipper right sides together with one short edge of the bag body.
- Stitch using a ¼” seam allowance.
- Carefully trim ⅛” off ONLY the fabric and fleece (do NOT cut zipper tape). This helps the zipper wrap neatly over the edge.
- Fold the zipper upward and press.
- Topstitch close to the seam (about ⅛”) for a neat finish.
- Fold the bag body in half and align the other side with the zipper.
- Repeat the same steps:
- Stitch
- Trim fabric
- Fold
- Topstitch
Step 3: Add Strap Loops
These will hold your crossbody strap.
- Fold each loop piece in half.
- Position them on each side of the bag:
- Place just above the zipper line
- Ensure most of the loop sits above the zipper
- Baste in place using a scant ¼” seam
- Sew only through the outer layer (avoid catching the lining unnecessarily)
Step 4: Sew the Sides & Shape the Base
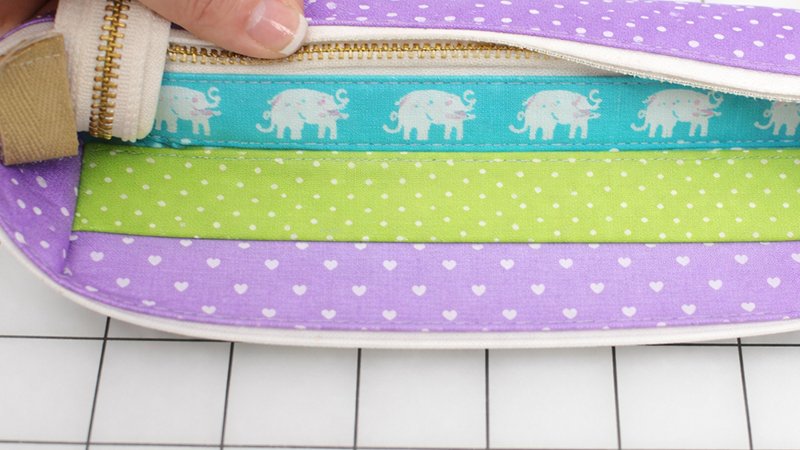
Now the bag starts to take shape.
- Turn the bag inside out
- IMPORTANT: Open the zipper halfway before sewing
- Otherwise, you won’t be able to turn it right side out
- Align side edges and pin
- At the bottom, pinch the fabric to form a 1-inch pleat
- This creates depth so the bag can hold items
- Sew both sides using a ¼” seam allowance
Zipper Tip:
- If using a metal zipper, sew slowly
- Hand-turn the wheel over zipper teeth
- Avoid hitting metal to prevent needle breakage
- Trim excess zipper ends using strong scissors (not fabric shears)
Step 5: Bind the Interior Seams (Optional but Recommended)
This step gives a polished, professional look.
- Cut two strips (1½” × 9”)
- Place a strip over each raw seam inside the bag
- Stitch along one side
- Fold binding over the raw edge
- Tuck ends neatly and stitch down close to the edge
Be cautious when sewing over zipper areas
Step 6: Attach the Strap
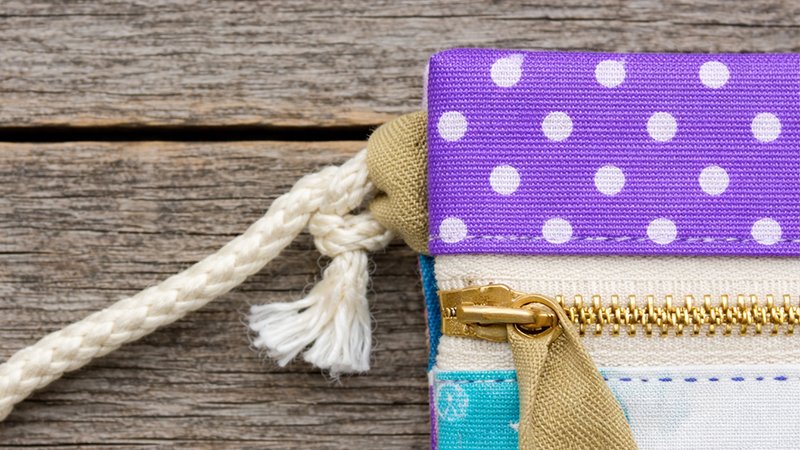
Choose your preferred style:
Option 1: Rope or Ribbon
- Thread through loops
- Tie knots at the ends for security
Option 2: Fabric Strap
- Sew strips together to reach 60” in length
- Fold long edges inward
- Fold in half lengthwise
- Press and topstitch both sides
Optional Embellishments
Make your bag unique:
- Add a zipper pull (ribbon, leather, or tassel)
- Create a thread tassel using embroidery floss
- Use decorative or metallic zippers for extra style
Final Thoughts
This Cross Body Zipper Tote is:
- Beginner-friendly
- Quick to sew
- Perfect for scrap fabric
- Great as a gift
Once you make one, you’ll likely want to make several—just like the original designer did!