Pattern Description:
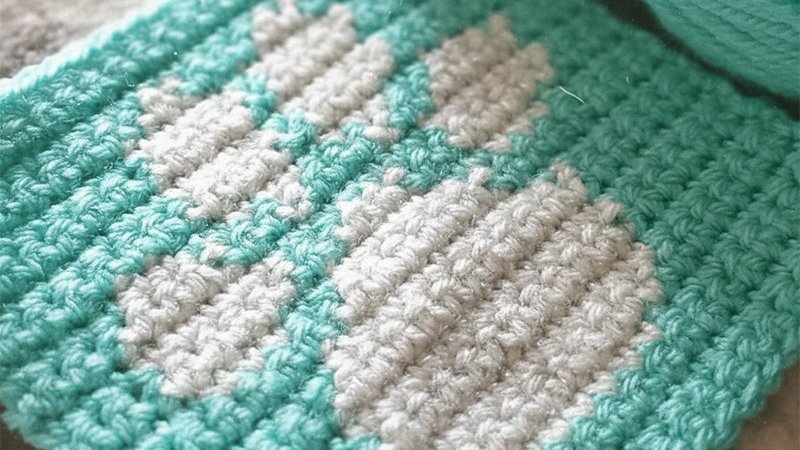
The Paw Print Tapestry is a charming crochet wall hanging worked using simple tapestry-crochet color changes. Featuring bold paw-print motifs, it adds a playful, pet-inspired touch to any room.
Made with single crochet stitches and carried yarn, the design creates a sturdy, graphic fabric suitable for home décor. It’s a fun project for confident beginners exploring colorwork.
Materials Needed & Measurements:
Materials Needed
- Medium/Aran-weight yarn in two contrasting colors
- 4.0 mm (US G-6) crochet hook
- Tapestry needle for weaving in ends
- Wooden dowel or stick for hanging (optional)
- Scissors
- Optional fringe materials
Measurements
- Approximate finished size: 8 inches wide × 13.5 inches long, including fringe
Abbreviations (US Terms)
- ch – chain
- sc – single crochet
- st(s) – stitch(es)
- BLO – back loop only
- MC – main color
- CC – contrast color
- yo – yarn over
- rep – repeat
- RS – right side
- WS – wrong side
- FO – fasten off
Instructions for Making the Paw Print Tapestry Pattern:
Foundation Row
- Using MC, ch 36.
- Row 1: Starting in the second ch from hook, sc in each ch across. (35 sts)
This establishes the width of the tapestry.
Main Body Setup
The tapestry uses simple one-stitch blocks of color. Rows alternate between MC and places where the paw motif begins. Work all rows in BLO sc, which helps the tapestry lay flat and gives a subtle horizontal texture.
- Row 2 (WS): Ch 1, turn. Sc in BLO across with MC. (35 sts)
- Row 3 (RS): Repeat Row 2.
Continue for several rows to create background space before the paw print begins.
Work 6 total rows of MC before starting the paw design.
Creating the Paw Print Motif
Below is a simplified verbal chart for the paw print. You will work each row from RS to WS alternately.
General Motif Placement
- The paw pad is centered.
- The four smaller toes appear above it.
- Each toe is separated by at least one stitch of MC.
Row-by-Row Instructions
Row 7 (RS): Work 12 MC, 11 CC for bottom pad start, 12 MC. (35 sts)
Row 8 (WS): Work 12 MC, 11 CC, 12 MC.
Row 9 (RS): Work 11 MC, 13 CC, 11 MC.
Row 10 (WS): Repeat Row 9.
Row 11 (RS): Work 12 MC, 11 CC, 12 MC.
Row 12 (WS): Repeat Row 11.
This completes the base paw pad.
Toe Section
Leave two full rows of MC only before starting the toes.
Rows 13-14: Work 35 MC sts.
Toes Begin
Each toe consists of a small oval made with CC.
- Row 15 (RS): 5 MC, 3 CC, 4 MC, 3 CC, 8 MC, 3 CC, 4 MC, 3 CC, 5 MC.
- Row 16 (WS): Mirror Row 15 exactly.
- Row 17 (RS): 5 MC, 3 CC, 4 MC, 3 CC, 8 MC, 3 CC, 4 MC, 3 CC, 5 MC.
- Row 18 (WS): Repeat Row 17.
This finishes the four upper toe motifs.
Top Background Rows
To frame the paw print neatly, work several rows in MC only.
Rows 19–26: Ch 1, turn, sc BLO across with MC. (35 sts)
Finishing the Tapestry Panel
Final Edge Row
To square the edges, work one final row of sc through both loops.
- Row 27: Sc across normally (no BLO).
FO and weave in all ends neatly.
Optional Border
A simple slip-stitch border can help neaten the square:
- Attach MC to any corner.
- Sl st evenly around entire piece, working 3 sl sts in each corner.
- FO and weave in ends.
Hanging Rod & Fringe
Rod Sleeve (Optional)
Fold the top edge of the tapestry to the back about 1 inch and whipstitch to form a sleeve for a wooden dowel.
Fringe
Cut lengths of yarn 8–10 inches. Fold strands in half, insert hook into each bottom stitch, pull loops through, and tighten to secure.
Final Notes
Block your tapestry lightly if needed to smooth edges. Insert dowel and hang as desired. Your Paw Print Tapestry is ready to display!