
Pattern Description:
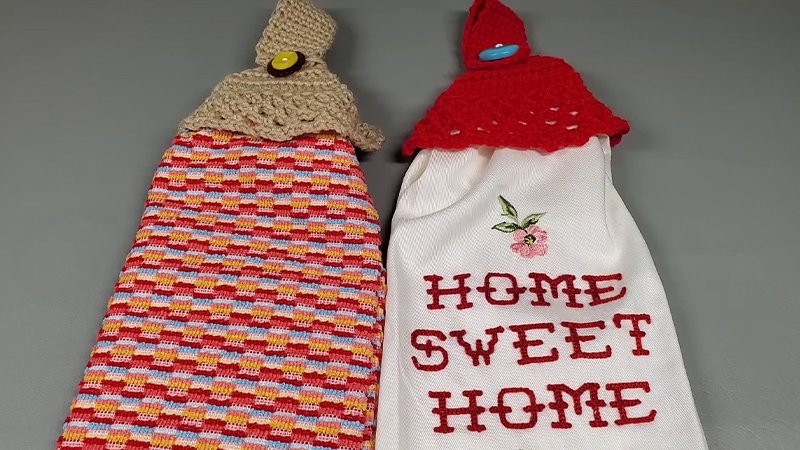
Make a charming scarecrow-themed towel topper, perfect for hanging over a kitchen or hand towel.
The topper is crocheted in warm autumn tones and features a little scarecrow face, hat, and dangling pieces that look like straw, a fun seasonal accent that’s both decorative and functional.
Materials Needed & Measurements:
- Yarn: Medium (“aran”/worsted) weight yarn in brown, gold/yellow, orange, and red.
- Crochet Hook: Size I (5.5 mm).
- Towel Ring: A small plastic kid’s bracelet or a 3-inch (≈ 7.5 cm) wire ring to slip the topper over the towel.
- Other Notions: Three buttons (for face and decorative detail), yarn needle for sewing in ends.
- Finished Size: The topper was designed to stretch to fit over a standard kitchen or hand towel via the ring – finished width roughly corresponds to the ring size (around 3″), and the crochet portion hangs down several inches as “straw” strips.
Abbreviations Used
- ch – chain
- sl st – slip stitch
- sc – single crochet
- hdc – half double crochet
- dc – double crochet
- inc – increase (2 sts in same st)
- dec – decrease (sc 2 sts together)
- st(s) – stitch(es)
- FO – fasten off
Instructions for Making the Scarecrow Towel Topper Pattern:
Preparing the Towel Ring
You may use a child’s plastic bracelet or a 3″ wire ring. This piece forms the anchor that holds the towel.
- With brown yarn, attach yarn to the ring using a sl st.
- Sc around the ring, placing your stitches snugly beside each other until the entire ring is covered.
- Join with a sl st, then ch 1. This covered ring becomes the lower base of the topper.
Forming the Scarecrow Face
The scarecrow’s head is worked directly above the ring.
- Row 1: Work 12 sc evenly spaced across the top edge of the covered ring. Turn.
- Row 2: Sc in each st across. (12 sts) Turn.
- Row 3: Inc in first st, sc in next 10 sts, inc in last st. (14 sts) Turn.
- Row 4: Sc across. (14 sts)
- Row 5: Repeat Row 3 to widen the head again. (16 sts)
- Rows 6-8: Sc across each row. Maintain 16 sts. This creates a slightly rounded rectangle that forms the main face base.
Shaping the Top of the Head
To gently taper the top of the head before adding the hat:
- Row 9: Dec over first 2 sts, sc in next 12 sts, dec over last 2 sts. (14 sts) Turn.
- Row 10: Sc across. (14 sts)
- Row 11: Repeat Row 9. (12 sts)
- Row 12: Sc across. (12 sts) FO brown yarn.
At this stage, stitch 2 buttons onto the face for eyes. Leave space between them for the nose later.
Making the Scarecrow’s Hat
Attach gold or yellow yarn at the top-right corner of the head.
- Hat Brim – Row 1: Sc across all 12 sts. Turn.
- Row 2: Inc, sc in next 10 sts, inc. (14 sts) Turn.
- Rows 3-4: Sc across. (14 sts)
FO gold/yellow if desired. This forms a wide, slightly floppy brim.
Shaping the Hat Crown
Switch to brown (or another hat color).
- Row 1: Attach yarn to first st of brim; sc across all 14 sts. Turn.
- Row 2: Dec, sc in next 10 sts, dec. (12 sts)
- Row 3: Sc across. (12 sts)
- Row 4: Repeat the dec row. (10 sts)
- Row 5: Sc across. (10 sts) FO.
You may stitch a small button or embroidered patch on the side of the hat for decoration.
Adding the Scarecrow’s Nose
Use orange yarn.
- Ch 3.
- Work 2 sc in 2nd ch from hook, 1 sc in last ch. (3 sts)
- FO leaving a tail. Sew the small triangle between the eyes.
Adding Straw Fringe
The playful straw strands give the topper its character.
Side Fringe
- Cut gold/yellow yarn into several 5–6″ pieces.
- Insert your hook along the side of the face or beneath the brim.
- Fold one yarn piece in half, pull loop through a stitch, and pull loose ends through loop to secure.
- Repeat along both sides.
Trim lengths unevenly for a rustic look.
Bottom Fringe
You may also add fringe below the face where it meets the ring to mimic straw sticking out of the scarecrow’s collar.
Backstrap for Attaching to a Towel Bar (Optional)
If you want a hanging tab:
- With brown yarn, ch 16.
- Sc in 2nd ch from hook and across.
- Continue working 3-4 more rows of sc for thickness.
- FO and sew the strip to the back of the hat’s crown.
- Add a button to the opposite end and a buttonhole (ch space) on the strip.
Finishing
- Weave in all loose ends.
- Adjust the straw fringe.
- Slide your towel through the ring; fold topper over towel bar or use the optional backstrap.


