Pattern Description:
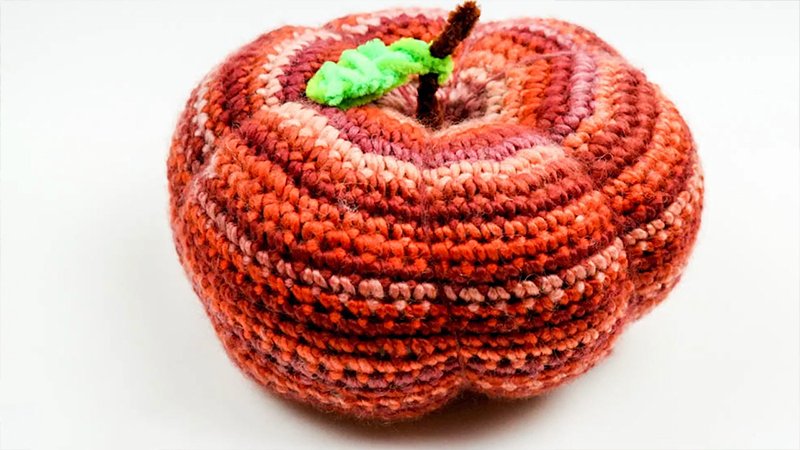
The Striped Pumpkins is a festive Halloween crochet project that combines texture, color, and creativity.
Using the half double crochet (Hdc) stitch and leftover scrap yarn, you’ll create rectangular panels that are seamed, stuffed, and shaped into multiple beautifully striped pumpkins.
With shades of green, purple, orange, and charcoal grey, these pumpkins capture the spirit of Halloween while serving as fun stash-busters and seasonal décor accents.
This pattern is perfect for creating pumpkin clusters or table displays and works well with various yarn textures for visual variety.
Materials Needed & Measurements:
Yarn:
- Approximately 80 yards per pumpkin of medium (4) worsted weight yarn
- Colour A: Yarn Bee Soft & Sleek – Dark Grey Heather (≈ 40 yds)
- Colour B: Red Heart Soft Yarn – Cinnabar (≈ 20 yds)
- Colour C: I Love This Yarn Solids – Mixed Berry (≈ 10 yds)
- Colour D: Yarn Bee Soft & Sleek – Green Apple (≈ 10 yds)
Crochet Hook: 6.0 mm (J-10)
Other Tools:
- Yarn needle
- Scissors
- Polyfill or other stuffing
- Small, thick sticks (one per pumpkin, for stems)
Total Yardage: Multiply 80 yards by the number of pumpkins you plan to make.
Gauge and Finished Measurements
- Gauge: 16 Hdc × 7 rows = 4″ × 4″
- Finished Pumpkin Size: Approximately 3″ tall × 4″ in diameter
- Rectangle Size: 5″ wide × 10″ long (length should be twice the width)
Instructions for Making the Striped Pumpkins Pattern:
Step 1: Foundation
- With Colour B (Cinnabar), ch 20 (or desired height).
- Row 1: Hdc in 2nd chain from hook and across. Turn. (19 Hdc)
Step 2: Establish Stripes
- Row 2: Colour A, ch 1, Hdc across. Turn.
- Row 3: Switch back to Colour B, ch 1, Hdc across.
- Continue alternating colors to form stripes.
- Rows 4-24: Repeat Row 2, following your stripe sequence.
- Repeat Steps 1-2 for each pumpkin you want to make.
Color-Changing and Yarn-Carrying Technique
- Changing Colors: Drop current color before pulling through the last loops, yarn over with new color, pull through all loops, ch 1, and turn.
- Carrying Yarn: Work over inactive strands to minimize weaving ends. Smooth carried yarn at row ends before changing colors.
Step 3: Finishing the Rectangle
After Row 24, fasten off and leave a 30″ tail for seaming. Weave in other ends.
Repeat for all rectangles (one per pumpkin).
Step 4: Seaming Each Pumpkin
Fold each rectangle in half lengthwise, wrong side facing out. Whip stitch edges together using the long tail (≈19 stitches). You now have a tube for each pumpkin.
Step 5: Shaping the Bottom
For each pumpkin:
- Stand the tube upright.
- Weave the yarn through every other row at the bottom. Pull tight to gather.
- Reinforce closure with extra stitches and a knot.
- Pull tail from bottom to top to help with overall shaping.
Step 6: Stuffing and Closing the Top
Fill each pumpkin with Polyfill. Weave yarn around the top edge, pull tight, and knot to close.
Step 7: Creating Pumpkin Ridges
For each pumpkin:
- Insert needle from top center to bottom center. Pull tight to create an indented ridge.
- Repeat 3-4 times around each pumpkin for 4-5 evenly spaced ridges.
Step 8: Finishing Touches
Insert a small stick into the top hole of each pumpkin. Sew slightly closed if needed and secure with glue if desired.
Final Notes
You now have a collection of striped crochet pumpkins! Arrange them as a Halloween centerpiece, mantel display, or cluster on a porch.
Mix yarn textures like velvet, tweed, or wool for variety. This pattern scales easily: make 3, 5, or 10 pumpkins for a full seasonal décor display.