Pattern Description:
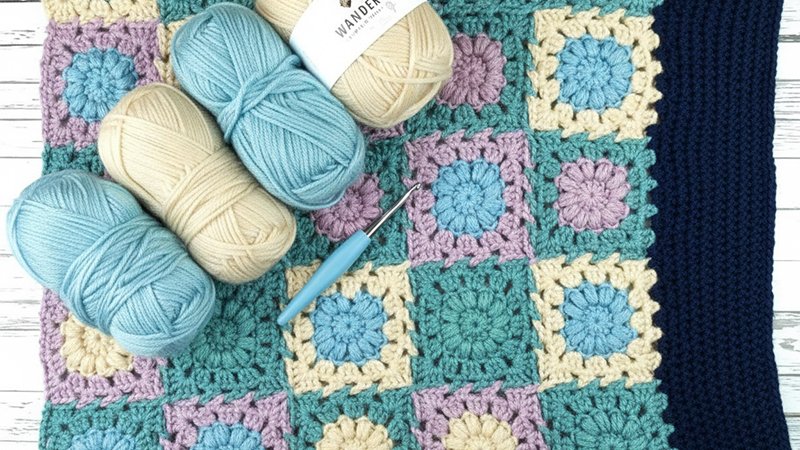
The Tessa Skirt crochet pattern features a variation on the traditional granny square, centered with a circular puff stitch.
This easily modifiable pattern is constructed using squares worked in a join-as-you-go technique.
Sizing is available for girls size 2 up to women’s size 5X. The design includes an elastic waistband to ensure a good fit.
Materials Needed & Measurements:
Supplies
- Yarn: Furls Wander Yarn (100g/120y). Recommended colors include Cobblestone, Meadow, Dragonfruit, and Thatch, or any colors of your choice.
- Hook: Size I crochet hook.
- Tools: Yarn/Tapestry Needle for weaving in ends.
- Waistband: Elastic strands (5 strands are needed). The strands should be slightly less than the waist measure, but long enough to stretch comfortably over the hips.
Gauge
For gauge, each square should measure approximately 4″ unstretched, unblocked.
Sizing and Measurements
The Tessa Skirt pattern covers a wide size range, from girls 2 up to women’s 5X.
- Sizing Range Details: Hip measurements range from 22″ (girls 2) to 62″ (women’s 5X).
- Squares per Row: The number of squares needed per row varies from 5 (girls 2) to 14 (women’s 5X).
- Yarn Usage: Yarn yardage is rounded up to the nearest 50 yards. Depending on size, the Waistband Color requires between 200 to 550 yards (2 to 5 balls), and the three other colors require between 150 to 350 yards per color (2 to 3 balls per color).
Important Fit Note: The skirt is designed with negative ease over the hips. It is recommended to try on the skirt after completing the first row of squares to ensure it fits over the hips, or stretch the first row to confirm it comfortably reaches the required hip measurement. The pattern is easy to modify for size.
Pattern Notes
The Tessa Skirt pattern is constructed using squares worked in a join-as-you-go technique, though any preferred joining technique may be used. The skirt is easily modifiable for size. You can adjust the number of rows of squares to achieve different lengths. For a higher waist, you can increase the number of rows of hdc on the waistband before adding the elastic.
Sizing and Fit Check
It is recommended that you try on the skirt once the first row of squares is complete to ensure it fits over the hips.
The skirt is designed with negative ease over the hips. If the recipient is unavailable, stretch the first row of squares to verify it can comfortably stretch to the required hip measurement.
Color Guidelines
When choosing colors for each square, you may follow these guidelines or create your own pattern:
- Never place two squares with the same outer color next to each other.
- Avoid placing more than two squares in a row with the same inner color.
- Feel free to make the color placement random.
Special Stitches
Puff Stitch (puff): Pull up a loop about ½” to top of row height (on subsequent stitches, you won’t need to pull the loop longer). yarn over (yo), insert hook in next st and pull up a loop. (yo, insert hook in same st and pull up a loop) twice. You should have 7 loops on your hook. yo and pull through all 7 loops. ch1 to close the puff.
Abbreviations:
- ch: chain
- st(s): stitch(es)
- sc: single crochet
- hdc: half double crochet
- dc: double crochet
- puff: Puff Stitch
Instructions for Making the Tessa Skirt Pattern:
Skirt Body (Square Instructions)
Note: It may be faster to complete all the center portions (Rounds 1-2) first, especially when using the join-as-you-go method.
- R1: With the inner color, ch4 (this counts as dc and the center ring; alternatively, use a magic ring and then ch3 for the first dc). Work 11 more dc in the 1st ch, join (12 dc).
- R2: Puff st around, join, tie off (12 puffs).
- R3: Switch to the outer color. Join to the top of any puff st, ch3 (counts as dc), 2dc in the same st, ch1, sk ch (the ch that closed the puff st). 3dc in the next puff st, ch1, sk ch, repeat from around, join (twelve 3-dc clusters separated by ch1 spaces).
- R4: Ch3, 2dc in same sp, ch2. (2hdc in next ch1 sp, ch2) twice, (3dc, ch2, 3dc, ch2) in corner. Repeat from around, ending by adding 3 more dc and ch2 in the starting corner sp, finish off.
- Joining (Join-As-You-Go): Repeat R1-R4 for additional squares. When you reach a ch2 space that needs to be joined to another square, substitute the ch2 by working ch1, removing your hook from your working loop, inserting your hook through the corresponding ch2 space on the other square, grabbing the loop, and pulling it through, then ch1. Important: Do not pull the loop too long, or large gaps will form between squares. When joining corners, if a square is already attached diagonally to your new square, insert your hook in the corner space of the diagonal square instead of the adjacent square.
- Length: Continue adding rows of squares until the skirt reaches the desired length.
Skirt Waistband
- R1: Join the waistband color to the right side of any corner join on the skirt edge. Ch2 (counts as hdc), hdc in the same sp. Work 2hdc in the left side of the same corner join. Ch1, #(3hdc in next sp, ch1) three times, 2hdc in each side of the corner join, ch1, repeat from * around, join.
- R2: Ch2 (counts as hdc), hdc 3. sk ch1, hdc 11, sk ch1, hdc 4, repeat from around. You should have worked in every hdc and ch1 space except for the ch1 spaces directly before and after the corner st(s).
- R3: ch2, hdc around, join.
- R4: Repeat step 3 twice more.
- Adding Elastic (Preparation): Cut 5 strands of elastic all the same length. The length should be slightly less than the waist measure, but long enough to stretch comfortably over the hips. Tie each strand into a circle.
- R5 (Elastic 1): Lay one elastic loop along the top of the st(s). Ch2, hdc around, working over the elastic cord, join.
- R6: Repeat step 6 twice more.
- R7 (Elastic 5): Lay your last elastic loop along the top of the st(s). Ch1, sc around, working over the elastic cord, join.
- Finishing: Finish off, weave in ends.