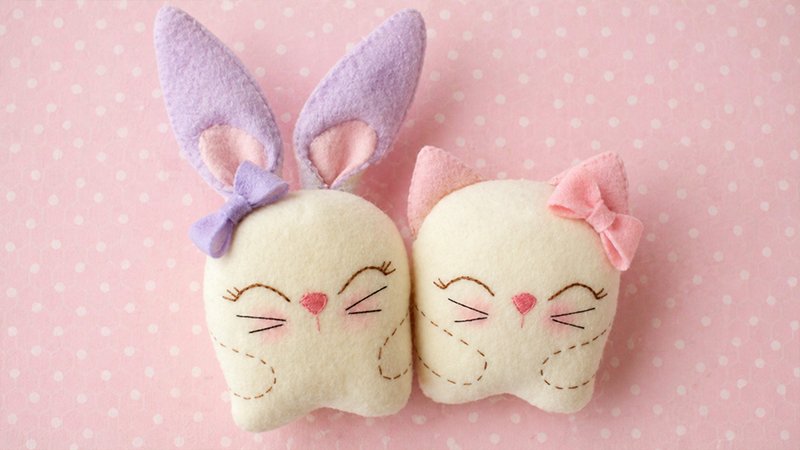
Welcome to the charming world of Japanese Kawaii crafting, where softness, simplicity, and cuteness come together! In this project, you’ll create two adorable plush companions: the Snuggle Bunny and the Snuggle Kitty, also known as “Snuglings.”
These plushies are designed to be:
- Easy to sew
- Beginner-friendly
- Soft, plump, and cuddly
They make perfect gifts for baby showers, children, or handmade toy lovers.
Finished Size
- Bunny: ~8 inches tall (ears upright)
- Kitty: ~5 inches tall
Materials & Tools Checklist
Felt Pieces
Prepare the following felt sizes:
- Body (both): 6 × 8 inches
- Bunny outer ears: 6 × 6 inches
- Bunny inner ears (pink): 6 × 6 inches
- Kitty ears: 4 × 4 inches
- Bow: 3 × 4 inches
- Kitty heart patch: small pink scrap
Tip: Super soft woven wool felt is ideal, but any high-quality felt works.
Filling & Structure
- Polyfil stuffing (for softness and shape)
- 2 pipe cleaners (12 inches each, Bunny ears)
Decorations
- ¾ inch pom-pom (Bunny tail)
- Pink colored pencil (cheeks)
Tools
- Embroidery thread/floss
- Sewing needles & pins
- Scissors
- Ruler
- Disappearing ink marker
- Wire cutters
- Clear-drying glue + Q-tips
Step 1: Prepare Pattern & Grid
- Print the pattern (no resizing needed).
- Pin pattern pieces onto felt and cut carefully.
- Keep the front body pattern pinned and:
- Lift edges slightly
- Mark grid points using disappearing ink
- Remove pattern and connect lines using a ruler.
This grid helps position:
- Face
- Arms
- Transfer ear placement dots onto the bunny ear pieces.
Step 2: Embroider the Face
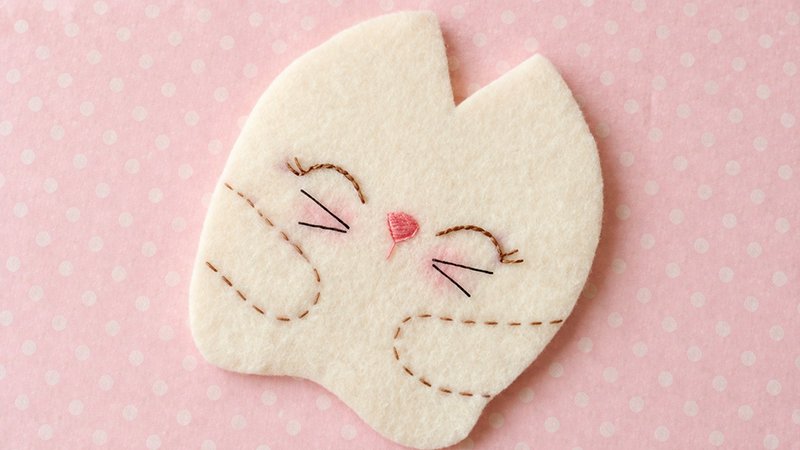
Use:
- 2 strands → eyes & arms
- 1 strand → snout, whiskers, seams
Stitch Guide:
- Eyes & snout outline → stem stitch
- Eyelashes → straight stitches
- Snout fill → satin stitch
- Whiskers → straight stitches
- Arms → running stitch
Kitty Only:
- Attach the heart patch to the back using an applique stitch
Keep stitches small and neat to avoid stuffing leaks.
Step 3: Sew Darts (Shape the Body)
Darts create a rounded 3D shape.
- Fold front piece (right sides together)
- Match the edges of the “V” dart
- Sew using whip stitch
- Repeat for back piece
Step 4: Assemble & Stuff Body
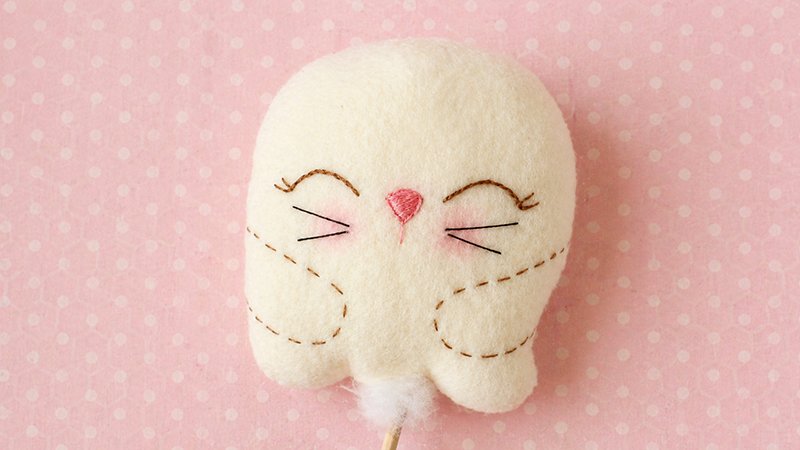
- Place front & back pieces:
- Wrong sides together
- Pin in place
- Sew around edges using blanket stitch
- Leave opening at the bottom
Stuffing:
- Fill firmly with Polyfil
- Ensure plush feels full and squishy
- Add extra stuffing near the base if needed
- Close opening with blanket stitch
Step 5: Make Bunny Ears (Poseable)
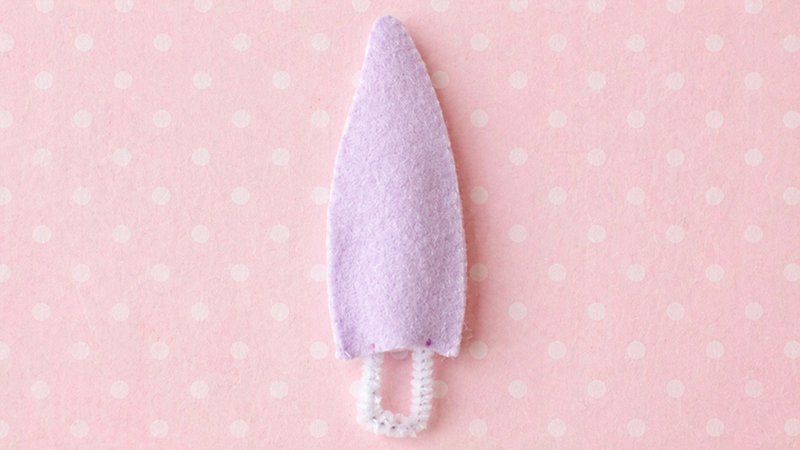
Step-by-step:
- Place the inner ear on the outer ear (wrong sides facing)
- Blanket stitch sides (leave bottom open)
Wire Frame:
- Fold the pipe cleaner in half
- Trim so it extends ~1 inch beyond the ear base
- Bend into shape to fit inside the ear
Safety:
- Twist ends tightly
- Flatten tips to avoid sharp edges
- Insert the wire into the ear
- Stitch the bottom closed
Shape Base:
- Fold the bottom corners toward the marked dots
- Stitch folds in place
Step 6: Make Kitty Ears
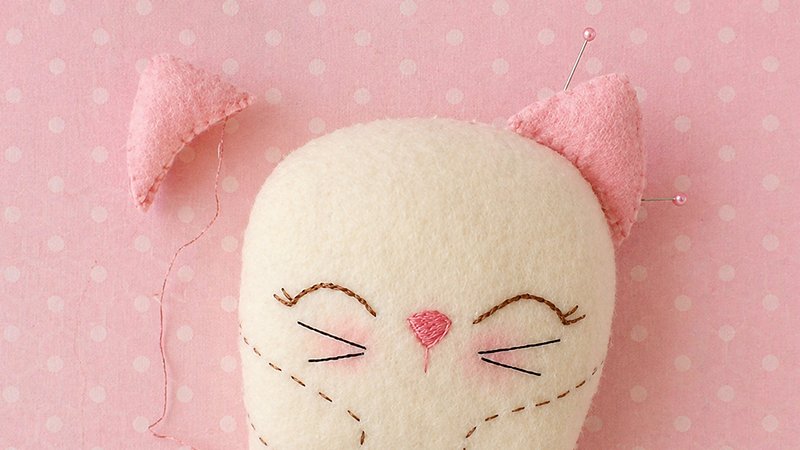
- Place front & back ear pieces together (wrong sides facing)
- Blanket stitch sides
- Add a small amount of stuffing
- Stitch the bottom closed
Step 7: Attach Ears & Tail
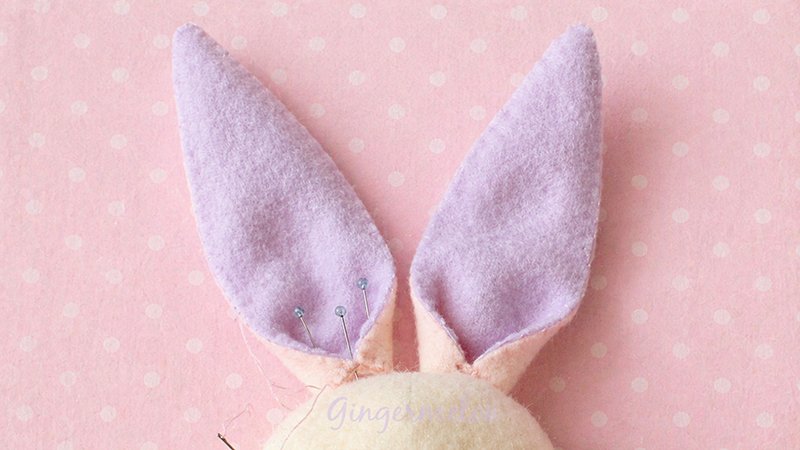
Ears:
- Pin onto the head seam
- Sew using ladder stitch (front & back)
- Reinforce if needed
Bunny Tail:
- Mark’s position on the back
- Apply glue
- Press the pom-pom firmly for 1–2 minutes
Step 8: Create the Bow
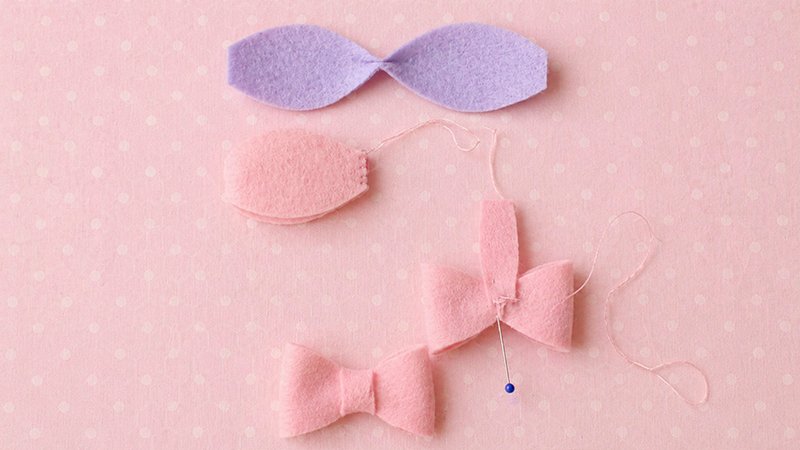
- Fold the bow piece lengthwise (right sides together)
- Stitch center tightly to create a pinch
- Fold widthwise
- Blanket stitch ends
- Rotate so the seam is centered
Finish:
- Wrap the center strip around the bow
- Stitch at the back
- Attach the bow to the head with hidden stitches
Final Touch: Kawaii Cheeks
- Lightly color cheeks using pink pencil
- Blend with a finger or a Q-tip
- Build layers for a soft glow
Tips for Best Results
- Use small, even stitches
- Stuff firmly but not overly tight
- Always secure knots well
- Test placement before sewing permanently
Share your creations online to inspire others!
Now you’re ready to create your own soft, squishy Kawaii companions. Enjoy the process and happy crafting!