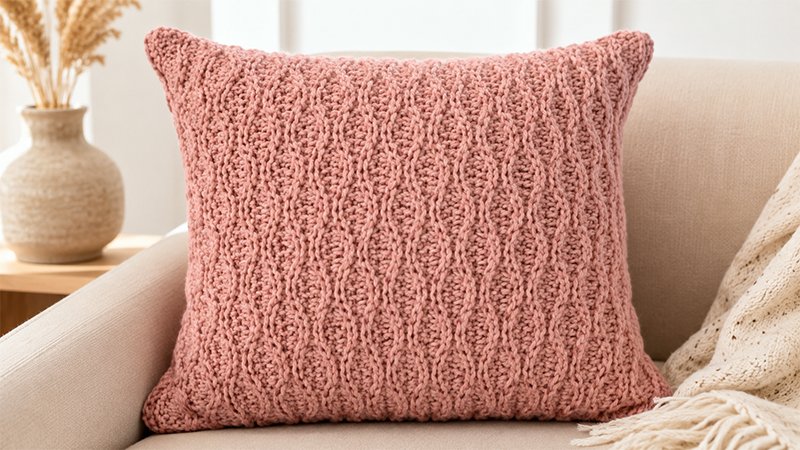
This elegant, texturized pillow features a beautiful faux-cable wave effect created entirely by alternating basic stitches. Named in honor of the designer’s mother (“Ma Blue”), this pattern is completely reversible.
One side showcases a structured, classic cable appearance, while the “wrong” side offers a gorgeous, deeply textured ripple effect. You can choose to display your favorite side or mix and match the panels for a truly reversible home decor piece.
Project Details & Requirements
-
Skill Level: Advanced Beginner (requires comfortable mastery of tension and working in specific yarn loops).
-
Finished Dimensions: Approximately 18″ × 18″ (45 cm × 45 cm).
-
Gauge: 3 hdc × 2 rows = 1″ square (using a 6.5mm hook).
Materials Needed
-
Yarn: Approximately 480 yards of Category 5 (Bulky weight) yarn.
-
Hook: Size K-10.5 (6.5mm) crochet hook.
-
Notions: Tapestry needle, scissors, and a standard 18″ × 18″ pillow insert.
Crucial Tip on Tension: The stitch pattern used here tends to pull tight. To keep your panels soft and stretchy, maintain a very loose tension. If your work feels stiff or is measuring too small, consider switching to a 7.0mm or 8.0mm hook.
Key Stitch Abbreviations (US Terms)
-
ch: Chain stitch
-
st / sts: Stitch / Stitches
-
sl st: Slip stitch
-
blo: Back loop only
-
hdc: Half double crochet
-
sc: Single crochet
Step-by-Step Pattern Instructions
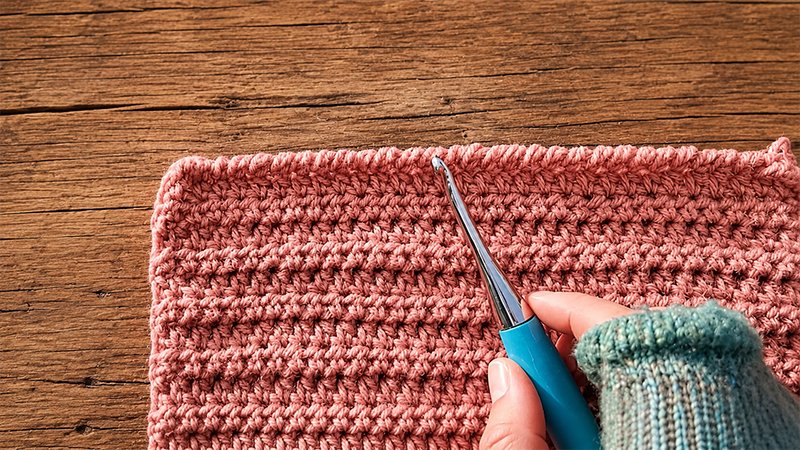
Note: The turning chain-1 (ch 1) at the start of rows does not count as a stitch.
Panel Construction (Make 2)
Row 1 (Foundation Row): Start by making a loose foundation chain of 53. Skip the first chain from your hook. In the 2nd chain, work 1 sl st, then work 1 sl st into each of the next 3 chains (4 slip stitches total).
-
*Work 1
hdcinto each of the next 4 chains, then 1sl stinto each of the next 4 chains.* -
Repeat the instructions between the asterisks (*) all the way across the row.
Ch 1, turn your work.
Row 2 (Setting the Wave): Important: For this row and all remaining rows of the panel, you will work exclusively into the back loops (blo). Locate the back loops of the previous row. Work 1 sl st into each of the first 4 stitches.
-
*Work 1
hdcinto each of the next 4 stitches, followed by 1sl stinto each of the next 4 stitches.* -
Repeat from * to * across the row.
Ch 1, turn.
Row 3 (Shifting the Pattern): Work 1 hdc into the back loops of the first 4 stitches.
-
*Work 1
sl stinto each of the next 4 stitches, followed by 1hdcinto each of the next 4 stitches.* -
Repeat from * to * across the row.
Ch 1, turn.
Row 4 (Consolidating the Texture): Repeat Row 3 exactly to build the height of your textured ridges. Ch 1, turn.
Rows 5–46 (Building the Panel): Keep repeating the sequence of Rows 1 through 4 sequentially. Continue until you have completed 46 rows total, or until your panel forms a perfect square measuring roughly 18″. Fasten off your yarn, weave in the loose ends, and repeat the process to create your second identical panel.
Pillow Assembly & Finishing
1. Panel Alignment
Decide which texture you prefer to show on the outside. Because this design is reversible, you can align them with both traditional “right” sides facing out, both “wrong” sides facing out, or one of each for a dual-look pillow. Lay the two panels perfectly flat on top of each other.
2. Stitching the Border
You will join the pieces by crocheting a single crochet border counterclockwise around the edges, working through the layers of both panels simultaneously.
-
The First Three Sides: Face the front panel toward you. Join your yarn with a slip stitch in the bottom-right corner. Insert your hook through both thicknesses and work 1
scinto every stitch up the right-hand side. When you reach the top corner stitch, work 3scinto that single corner space to smoothly round the edge. Continue across the top edge with 1scin each stitch, placing another 3scin the top-left corner. Crochet 1scin each stitch down the left side, finishing with 3scin the bottom-left corner.
3. Stuffing and Sealing
Slide your 18″ × 18″ pillow insert inside the pocket you have created, smoothing out the corners of the insert so they fill out the crochet panels evenly. Hold the remaining bottom edges together and crochet 1 sc in each stitch across the bottom to seal the pillow. Place 3 sc in the final corner, then join your yarn with a sl st to the very first border single crochet you made.
Finishing Touches: Clip your yarn, pull it through to secure, and use your tapestry needle to cleanly weave the remaining ends into the inside of the pillow. Your texturized cable pillow is ready to enjoy!