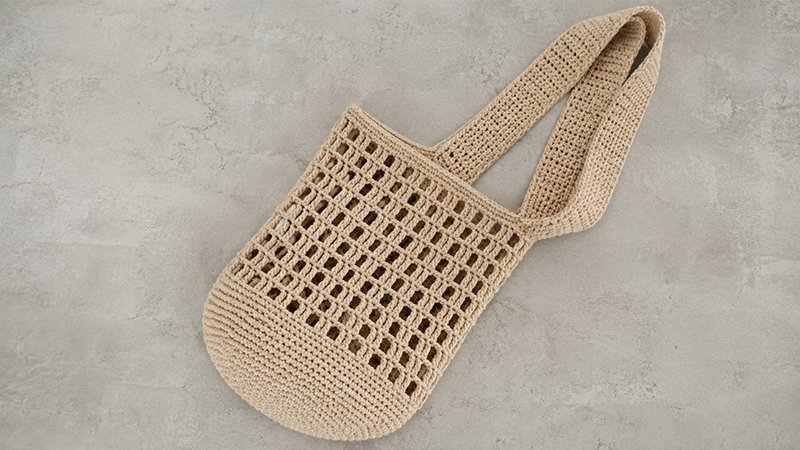
The Blooming Grocery Bag is a charming, sturdy summertime tote featuring vibrant flower-inspired mesh panels.
Designed with a structured base and airy sides, it effortlessly transforms a standard trip to the farmer’s market into a stylish, eco-friendly outing.
By combining double strands of durable cotton-blend yarn with open, breathable stitches, this tote works up surprisingly fast without sacrificing strength or shape.
Whether you are packing fresh produce, flowers, or beach day essentials, this charming floral-inspired market sack offers the perfect blend of practical durability and playful seasonal flair.
Materials & Tools
-
630 yards Bulky Weight (#5) Cotton-Nylon Blend Yarn (worked held double throughout)
-
6.5 mm Crochet Hook
-
Stitch Marker
-
Tapestry Needle
-
Scissors
Pattern Notes
-
Stitch Terms: Standard US terminology (Sc = Single Crochet, Dc = Double Crochet, Sl st = Slip Stitch, Ch = Chain, Sp = Space).
-
Double Strand: Hold two strands of yarn together for the entirety of the project to ensure structural integrity.
-
Spiral Rounds: The bottom base is worked continuously in a spiral. Place a marker in the starting stitch of each round and move it up as you progress.
-
Gauge: Rounds 1 through 6 should form a flat circle measuring roughly 4 inches across.
Bag Base (Continuous Spiral)
-
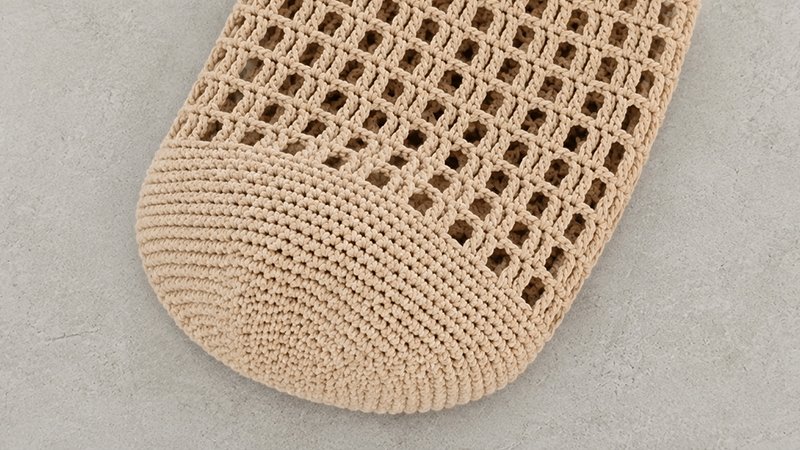
Round 1: Form a adjustable ring, work 6 sc into the ring. Do not join. (6 stitches)
-
Round 2: Work 2 sc into every stitch around. (12 stitches)
-
Round 3: *1 sc in the next stitch, 2 sc in the following stitch; repeat from * around. (18 stitches)
-
Rounds 4–14: Continue expanding the base in this standard flat circle sequence (adding 1 plain single crochet between increases on every round) until you reach Round 14, ending with *1 sc in each of the next 12 stitches, 2 sc in the following stitch; repeat from * around. (84 stitches)
-
Rounds 15–22: Work 1 sc into each stitch around without increasing to build up the lower border. (84 stitches)
Floral Lattice Body
-
Round 23: Ch 3 (counts as first dc), work 2 dc in the same stitch to form a petal base. *Ch 3, skip 3 stitches, work 3 dc into the next stitch; repeat from * around to the final 3 stitches, ch 3, skip the last 3 stitches, and slip stitch into the top of the opening ch-3.
-
Rounds 24–33: Slip stitch into the middle dc of the first group, ch 3 (counts as dc), work 2 dc in the same stitch. *Ch 3, skip to the middle dc of the next 3-dc cluster, work 3 dc into that middle stitch; repeat from * around, ending with ch 3 and a slip stitch into the top of the initial ch-3.
-
Round 34: Ch 1 (does not count as a stitch). Sc in the first stitch and into the next 2 dc stitches. *Place 3 sc directly into the ch-3 space, then 1 sc in each of the next 3 dc stitches; repeat from * around. Do not join; resume working in a spiral. (84 stitches)
-
Round 35: Work 1 sc in every stitch around. Sl st into the next stitch to level the round edge. Do not break yarn. (84 stitches)
Integrated Shoulder Strap
-
Row 1: Ch 1, sc in the same space and in each of the next 7 stitches. Ch 1, turn. (8 stitches)
-
Row 2: Sc in each stitch across. Ch 1, turn. (8 stitches)
-
Extension: Repeat Row 2 until your strap reaches approximately 36 inches in length (or your preferred drop length).
Assembly & Finishing
Cut yarn leaving an 8-inch tail. Fold the bag perfectly flat to locate the exact center point directly opposite the base of the strap.
Using a tapestry needle and the tail, neatly whip stitch the strap end to those 8 corresponding stitches on the opposite rim. Secure all loose ends by weaving them thoroughly through the inside stitches.