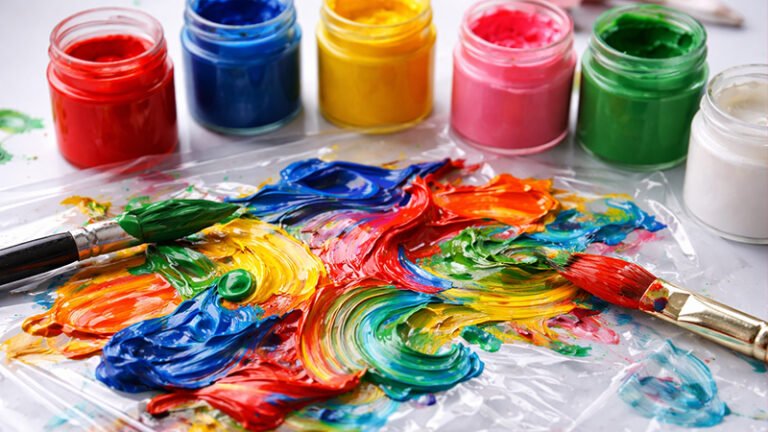
The intersection of chemistry and creativity is where many artists find their most profound breakthroughs. However, for those navigating the dual worlds of acrylics and oils, the technical requirements can be daunting.
As an artist or DIY enthusiast, you may feel compelled to combine these two mediums to capture unique textures or utilize specific painting techniques in a single project.
But before you reach for your palette, you must understand the fundamental scientific principles that govern these materials.
This comprehensive guide serves as the gold standard for understanding how to—and, more importantly, how not to—combine these two distinct mediums.
By mastering the relationship between water-based and oil-based paints, you can ensure the structural integrity and longevity of your work.
Understanding the Relationship Between Water and Oil
The central question that plagues many studios is whether these paints can be physically blended together. To provide a definitive answer: No, you cannot directly mix acrylic and oil paint on the palette.
The Fundamental Conflict
The primary reason for this incompatibility lies in their chemical compositions. Acrylic paints are water-based, while oil paints are, as the name implies, oil-based.
Basic science dictates that water and oil do not mix; instead, they repel one another. If you attempt to blend them, the oil will separate because it is not as dense as water.
What Happens When You Try?
If you ignore this rule, the two types of paint will fail to combine, leaving you with a dispersion of the two mediums rather than a homogenous mixture.
Even with extensive mixing time, they will never fully integrate. The result is a compromised paint film that lacks durability, fails to adhere to the surface, and will likely peel or crack over time.
The Golden Rule of Layering: Order is Everything

While you cannot mix them, you can use them together on the same canvas if you follow a strict order of operations. In the art world, this is often a matter of technical survival for the painting.
The Only Safe Method: Acrylic First
The only successful way to utilize both mediums is to paint with acrylic first, allow it to dry completely, and then apply oil paint over the top. Because acrylics dry into a flexible, water-resistant plastic polymer, they provide a stable foundation that can accept oil layers.
The Fatal Error: Acrylic Over Oil
Never apply acrylic paint over a layer of oil paint. Acrylic paint cannot adhere properly to an oily surface. If you attempt this, the acrylic layer will eventually flake, peel, or crack.
This failure might occur immediately or manifest weeks later as the oil beneath continues its slow oxidation process.
Deep Dive: Properties and Characteristics of Acrylic Paints
To use acrylics effectively as a base for oil, one must understand their unique synthetic nature. Acrylic paint is a synthetic polymer consisting of acrylic resins suspended in water with pigments.
Key Performance Properties
- Water-Solubility: When wet, acrylics can be easily thinned or cleaned with water.
- Rapid Drying: Once the water evaporates, the resins fuse into a durable bond. This typically takes 10 to 20 minutes for the surface to feel dry.
- Flexibility and Durability: Once dry, the paint becomes a water-resistant, flexible plastic surface that is resistant to cracking or chipping.
- Safety: Acrylics are non-toxic, produce zero fumes, and are non-flammable, making them ideal for indoor or home use.
Specialized Acrylic Types for Layering
Choosing the right consistency of acrylic is vital for your underpainting:
- Heavy Body: Thick and creamy, perfect for creating textured effects that can be felt through subsequent oil layers.
- Fluid and High Flow: Thinner consistencies used for detailed work, smooth borders, or glazing.
- Low Viscosity: These thin paints are unique because they can sometimes be mixed with oils more easily than thicker varieties, though they still carry risks of poor adhesion.
Deep Dive: Properties and Characteristics of Oil Paints
Oil paints are the “old masters” of the art world, dating back to the 12th century. Their composition is vastly different, utilizing pigments suspended in oil—most commonly linseed, but also poppyseed, walnut, or safflower oil.
Why Artists Choose Oil
- Richness of Color: Oils provide a depth and vibrancy of color, along with tonal transitions, that acrylics often struggle to match.
- Extended Working Time: Because oils dry through oxidation rather than evaporation, they remain wet for much longer, allowing for extensive blending and corrections.
- Consistency: Unlike acrylics, which often appear darker once dry, oil colors remain true and do not change in texture after drying.
- Longevity: A well-constructed oil painting can last between 30 and 100 years, whereas acrylics have a shorter proven lifespan of 2 to 15 years in comparison.
Practical Considerations
Oils are more demanding than acrylics. They are toxic, often releasing fumes that require a well-ventilated space. Furthermore, they cannot be cleaned with water; they require solvents such as turpentine or white spirits.
The Technical Failures of Direct Mixing
When you attempt to blend these two mediums, you aren’t just making a mess; you are creating a chemical disaster for your canvas.
- Chemical Separation: As the oil and water-based polymers fight for space, the binders will eventually spread out and may stain the underlying paper or surface over months or years.
- Structural Cracking: Because acrylics dry in minutes and oils take days (or months to fully cure), the uneven tension between the layers causes the paint film to shatter or crack.
- Adhesion Failure: The mixture simply will not stick to the surface reliably and can be easily peeled off once dry.
Step-by-Step Tutorial: Mastering the Acrylic-to-Oil Transition
To achieve the depth and richness that comes from combining these mediums, follow this professional workflow.
1. The Planning Phase: Choosing Colors and Sketching
Start by selecting a color palette where the acrylic base and oil top layers complement each other. A professional tip is to use lighter colors for your acrylic underpainting and darker colors for the subsequent oil layers. Begin with a detailed sketch to plan proportions and ensure a balanced layout.
2. The Foundation: Acrylic Underpainting
Apply your base coat using acrylics or an acrylic-based gesso. This provides a stable, non-greasy foundation that controls the quantity of oil paint needed later. Using fluid acrylics here can help with detailed borders and edges.
3. The Crucial Waiting Period
Patience is the most important tool in this process. You must wait for the acrylic base coat to dry properly before adding any oil paint. While acrylics may feel dry in 20 minutes, giving them more time ensures the polymer has fully bonded.
4. Applying the Oil Layers
Build your oil paint in thin layers. It is much simpler to add more paint than it is to remove it, and thin layers reduce the risk of making a “mess” on your stable acrylic foundation. This technique allows the paints to adhere thoroughly, creating a professional-grade masterpiece.
Maintenance and Best Practices
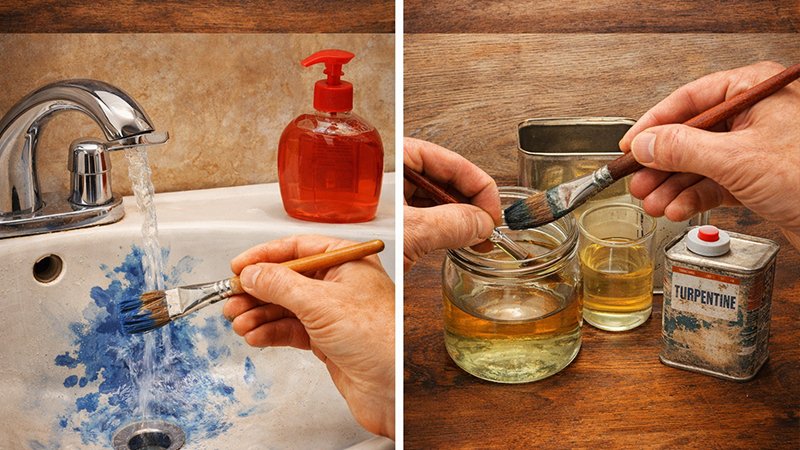
Professional Cleanup
- For Acrylics: Clean your brushes immediately with warm water and soap before the paint dries. Once dry, acrylic is notoriously difficult to remove.
- For Oils: Use white spirits or solvents to clean brushes.
- Important: You should not use the same brushes for both mediums simultaneously. If you must use a brush that previously held oil paint for an acrylic project, it must be meticulously cleaned with solvent and then soap and water to ensure no oil residue remains to repel the acrylic.
Surfaces and Preparation
Both paints are versatile and can be used on wood, metal, canvas, and more. However, oil-based paints generally require a primer or gesso on most surfaces to prevent the oil from rotting the support over time. Acrylics are more forgiving and can be applied to numerous surfaces directly.
Enhanced FAQ: Expert Answers to Common Queries
Q: Can I use a special medium to force acrylics and oils to mix?
A: No. There is no special medium currently available that will successfully bond oil and acrylic paint into a single mixture. They must be used separately and in the correct order.
Q: What are the drying times for each?
A: Acrylics dry to the touch in 10 to 20 minutes. Oils take significantly longer, requiring six to eight hours of drying time before you can safely add a subsequent oil layer.
Q: Is oil paint better than acrylic for home improvements?
A: It depends on the application. Oil-based enamel is excellent for high-traffic areas like windowsills and kitchens because it is water and stain-resistant once dry. However, acrylic-based latex paint is often preferred for walls and ceilings because it dries faster and is easier to clean.
Acrylic vs. Oil Comparison Table
| Property | Acrylic Paint | Oil Paint |
|---|---|---|
| Drying Time | Very fast (10-20 mins) | Very slow (6-8 hours to days) |
| Solvent | Water | White spirits / Turpentine |
| Toxicity | Non-toxic | Often toxic/fumes |
| Longevity | 2 – 15 years | 30 – 100 years |
| Order of Use | Must be the base layer | Must be the top layer |
| Color Shift | Dries darker | Remains consistent |
Conclusion: Elevate Your Artistic Standard
Understanding the chemical boundaries between acrylic and oil paint is not a limitation—it is a roadmap to professional-quality art.
By adhering to the “Acrylic-First” rule, you can harness the fast-drying convenience of acrylics for your underpainting and the rich, blendable beauty of oils for your finishing touches.
Whether you are working on a fine art canvas or a high-end home improvement project, respecting these materials ensures your work will stand the test of time without peeling, flaking, or cracking.