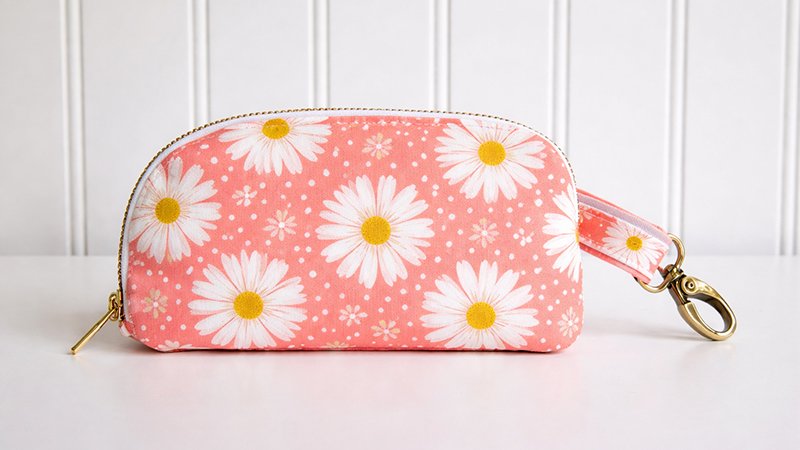
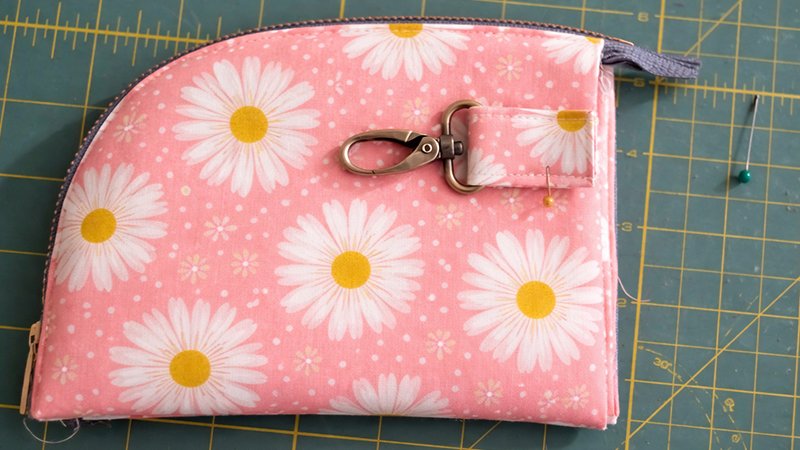
This 2-sided zipper pouch is a stylish and functional project—perfect for holding your phone, cards, and small essentials. It also gives you a chance to practice zipper installation (including metal zippers) while showcasing beautiful fabric combinations inside and out.
Finished Features
- Dual-sided zipper opening (reveals lining beautifully)
- Interior card pocket
- Optional swivel clip tab
- Compact size (fits most smartphones)
Materials Needed
Zipper & Hardware
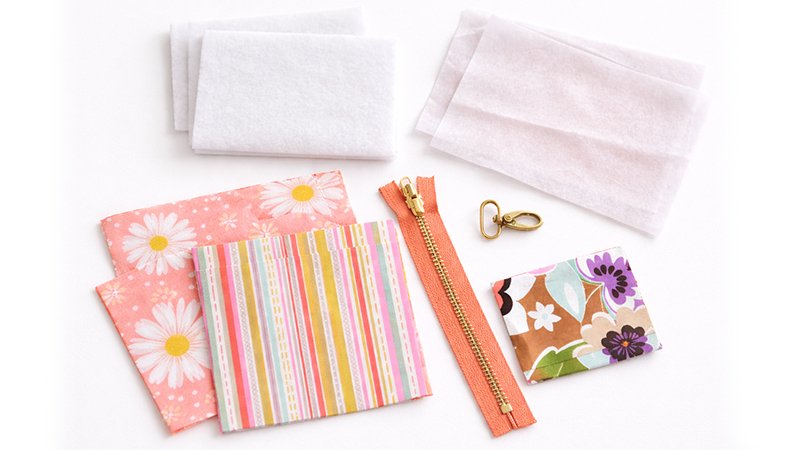
- 1 × 9” zipper (recommended: YKK #4.5 handbag zipper)
- 1 × 1” swivel clip (optional)
Fabric
- Exterior: 2 pieces (5” × 7”)
- Lining: 2 pieces (5” × 7”)
- Pocket: 1 piece (5” × 7”)
- Clip tab: 1 piece (3” × 4”)
Stabilizers
- 2 × fusible fleece (5” × 7”) – for exterior
- 2 × interfacing (5” × 7”) – for lining
Tools
- Sewing machine
- Zipper foot
- Pins or clips
- Iron
- Scissors/rotary cutter
- Curve template (plate, bowl, CD, etc.)
Step 1: Prepare Fabric & Cut Curves
- Fuse stabilizers:
- Attach fusible fleece to the wrong side of exterior pieces.
- Attach interfacing to the wrong side of the lining pieces.
- Cut curved corners:
- Stack exterior pieces right sides together.
- Trace a curve on the top right corner using a round object (about 3” radius).
- Cut both layers at once.
- Repeat for lining pieces.
Step 2: Make the Interior Pocket
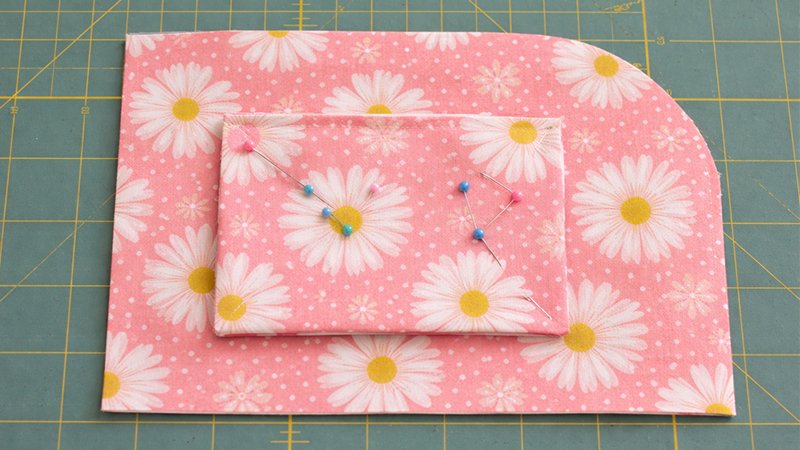
- Fold pocket piece in half (right sides together), matching the 5” edges.
- Stitch around edges, leaving a 3” gap for turning.
- Turn right side out and press flat.
- Topstitch along the folded edge (this becomes the pocket opening).
- Position pocket:
- Center it on one lining piece.
- Place the top edge near the curved corner.
- Stitch around sides and bottom to attach (this also closes the turning gap).
Step 3: Attach the Zipper (2-Sided Method)
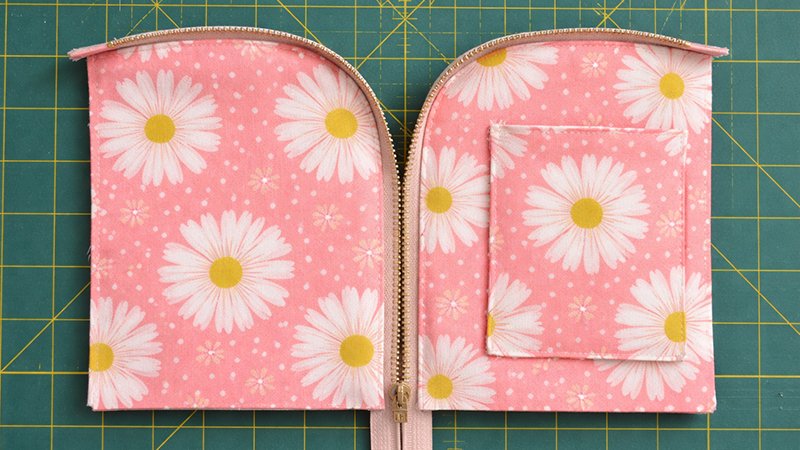
- Place the zipper on one lining piece:
- Wrong side of zipper → right side of lining
- Align along the curved edge.
- Important placement:
- Zipper pull should sit at least ¾” above the bottom edge.
- This ensures proper finishing later.
- Pin in place and baste using zipper foot (¼” seam).
- Repeat for the other lining piece on the opposite side of the zipper.
Step 4: Add Exterior & Topstitch
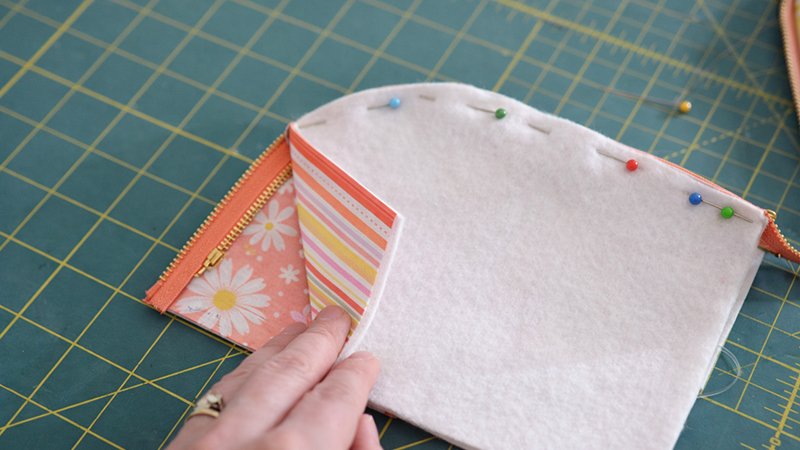
- Place the exterior piece on top of each lining piece:
- Right sides together
- Zipper sandwiched in between
- Stitch along curved edge (¼” seam).
- Turn the right side out and press.
- Topstitch:
- Sew ⅛” from the seam
- This prevents fabric from catching in the zipper
Step 5: Optional Swivel Clip Tab
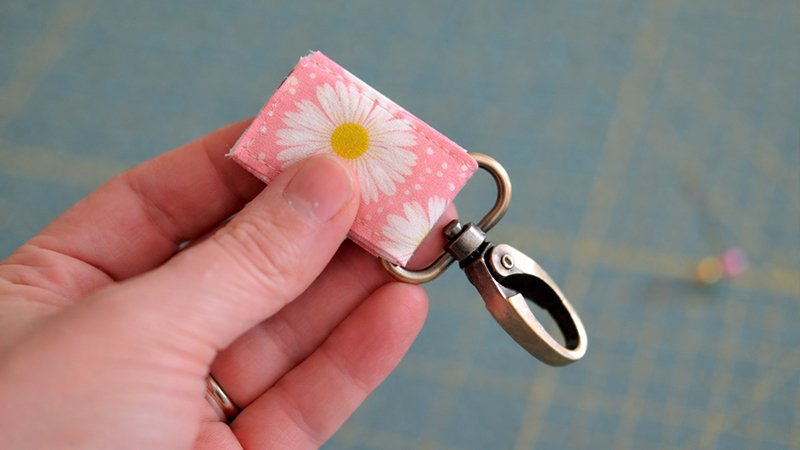
- Fold tab piece:
- Fold in half lengthwise and press
- Open and fold edges to the center
- Fold again → creates a 1” × 3” strip
- Topstitch along both long edges.
- Attach clip:
- Loop fabric through the swivel clip
- Fold in half
- Position tab:
- Place on exterior, about 1” below zipper
- Baste in place (sew only through the exterior layer)
Step 6: Assemble the Pouch
- Arrange pieces:
- Exterior pieces facing each other
- Lining pieces facing each other
- Important: Open the zipper halfway before sewing.
- Align zipper ends:
- Fold zipper ends toward the lining side
- Pin all around the edges.
- Stitch:
- Use ½” seam allowance
- Start near the zipper base
- Avoid sewing over metal teeth
- Leave a 3” opening in the lining for turning.
Step 7: Turn & Finish

- Trim bulk:
- Clip corners
- Trim seams if needed
- Turn the pouch right side out through the lining opening.
- Shape corners using a blunt tool.
- Press neatly.
- Close lining opening:
- Hand stitch or machine stitch
Done!
You now have a polished 2-sided zipper pouch with a professional finish!