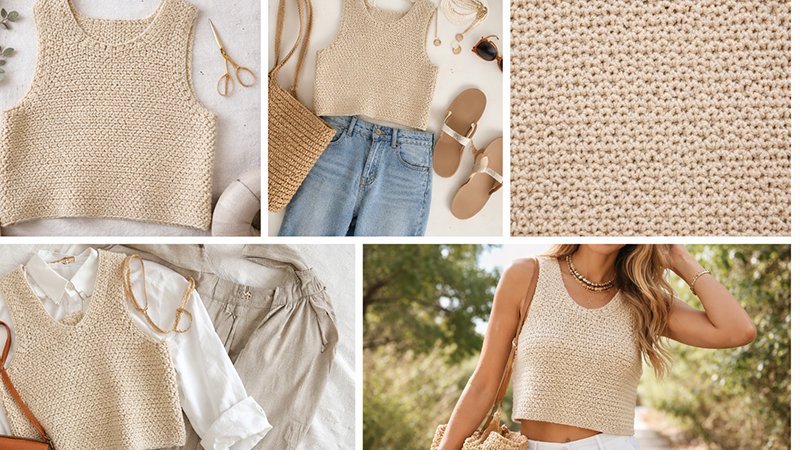
The Moss Stitch Crop Vest is a modern, minimalist crochet garment designed for effortless layering and everyday wear. Featuring the timeless moss stitch (also known as the linen stitch), this vest highlights clean texture, balanced drape, and a flattering cropped silhouette.
It’s the kind of piece that looks equally at home over a summer dress, paired with high-waisted jeans, or styled as a statement layer in transitional seasons.
This pattern-style guide walks you through the concept, construction, materials, sizing approach, and finishing techniques so you can confidently recreate or adapt this vest to suit your personal style.
Pattern Overview
- Project Type: Sleeveless crochet vest
- Style: Cropped, relaxed fit
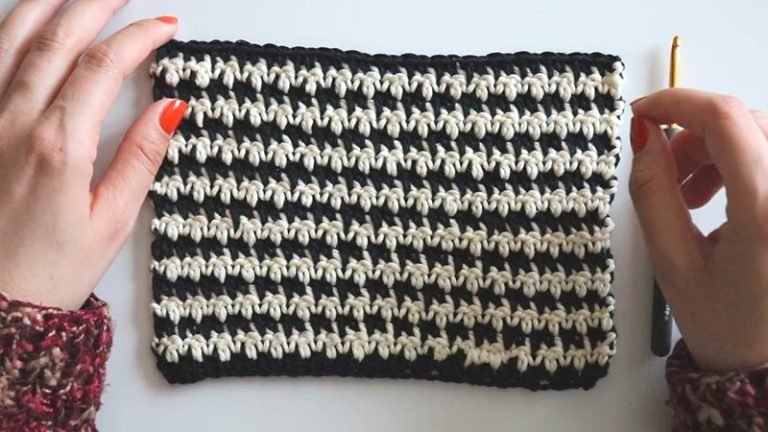
- Stitch Pattern: Moss Stitch (single crochet + chain spaces)
- Skill Level: Advanced Beginner
- Construction: Two flat panels (Front and Back), seamed at shoulders and sides
- Fit: Slight positive ease with customizable crop length
The Moss Stitch Crop Vest is designed to be approachable while still producing a polished, boutique-quality garment. Its simple stitch repeat makes it beginner-friendly, while the shaping and finishing details keep it interesting for experienced crocheters.
Why Moss Stitch?
Moss stitch is known for its woven appearance and subtle texture. It creates a fabric that is:
- Lightweight yet structured – ideal for vests
- Even and drapey – no curling edges
- Yarn-efficient – great for premium fibers
- Visually balanced – looks the same from a distance and up close
Because the stitch alternates single crochet and chain spaces, the fabric breathes well, making this vest comfortable in warmer weather while still layer-friendly in cooler months.
Materials & Tools
To achieve the best result, choose yarns that emphasize stitch definition without excessive bulk.
Recommended Yarn:
- Category: DK (Category 3) or light worsted
- Fiber options: Cotton, cotton-blend, bamboo, merino, or acrylic blends
- Yardage: Approximately 600–900 yards, depending on size and crop length
Hook Size:
- 4.0 mm to 5.0 mm (adjust to meet gauge)
Notions:
- Yarn needle
- Stitch markers
- Measuring tape
- Scissors
Gauge
Gauge is worked in moss stitch, blocked lightly.
- Approximate Gauge:
16–18 stitches and 16 rows = 4 inches (10 cm)
Matching gauge ensures the vest maintains its intended drape and proportions. If your fabric feels stiff, size up your hook; if it feels too loose, size down.
Sizing & Fit Philosophy
This vest is designed with flexible sizing, making it easy to adapt for different body types.
- Chest Width: Based on bust measurement plus 2–4 inches of ease
- Length: Cropped, typically ending at or just above the natural waist
- Armholes: Straight armhole shaping for clean lines
The cropped length can be easily adjusted by adding or removing rows before armhole shaping begins.
Construction Overview
The Moss Stitch Crop Vest is worked in two identical rectangles with minimal shaping.
Skill Level: Advanced Beginner
Finished Size: Adjustable (see notes)
Yarn: DK/light worsted (approx. 600–900 yards)
Hook: 4.0–5.0 mm (adjust to gauge)
Stitch Key:
- ch = chain
- sc = single crochet
- moss stitch (ms) = sc in next st, ch 1, skip next st; repeat across row
- st(s) = stitch(es)
- RS/WS = right side / wrong side
1. Back Panel
- Foundation Chain:
- Ch a multiple of 2 + 2 (for turning). For example, ch 66 for a bust width of ~36”. Adjust for your size.
- Row 1 (RS):
- Sc in 2nd ch from hook, ch 1, skip next ch, sc in next ch across. Turn.
- Row 2 (WS):
- Ch 1, sc in first sc, ch 1, sc in next sc across. Turn.
- Rows 3–X:
- Repeat Row 2 until the panel measures from hem to underarm: 12–14” (adjust to crop length preference).
- Armhole Shaping (optional):
- Continue moss stitch straight if you prefer a boxy armhole.
- Or decrease 1 st at each end of next 2–3 rows for slight shaping.
- Shoulder/Neck Shaping (optional):
- Work straight until back panel measures 16–18” total (or desired vest length).
- Fasten off.
2. Front Panel
- Foundation Chain:
- Same as back panel.
- Rows 1–X:
- Work moss stitch exactly like back panel.
- Neckline Shaping (optional):
- For a scoop neck: when panel measures ~12” from hem, work moss stitch across first half of row, leave remaining sts unworked, then continue each side separately decreasing 1 st every other row for 3–5 rows.
- For V-neck: decrease 1 st at center edge every other row until desired depth.
- Armhole Shaping:
- Same as back panel.
- Finish Front Panel:
- Work until front matches back in total length. Fasten off.
3. Assembly
- Block Panels:
- Lightly block to even out stitches and edges.
- Seam Shoulders:
- Align RS of panels together. Use mattress stitch or whipstitch to join shoulders.
- Seam Sides:
- Sew side seams, leaving armhole openings (~7–8” or as desired).
4. Edging (Optional)
- Neckline & Armholes:
- Ch 1, sc evenly around, working 3 sc in corners for smooth finish.
- Hem (Optional):
- Work 1–2 rows sc or reverse sc (crab stitch) for a polished edge.
5. Notes & Tips
- Length Customization: Add or subtract moss stitch rows before armhole shaping to lengthen or shorten vest.
- Width Adjustment: Add multiples of 2 to foundation chain for more or less ease.
- Yarn Choice: Use cotton or cotton-blend for summer wear; wool or acrylic blend for layering.
- Finishing Touches: Consider adding a row of buttons, tie closure, or color-block edging for a modern twist.
Neckline Options
The neckline is one of the most customizable features of this vest.
- Classic Crew: Straight neckline, minimal shaping
- Soft Scoop: Gradual decrease at center front
- Deep V: Split panel and decrease toward shoulders
For a cropped vest, a modest scoop or V-neck often balances the shorter length beautifully.
Assembly & Seaming
Once both panels are complete:
- Block Panels Lightly
Blocking evens out stitches and ensures clean edges. - Seam Shoulders
Use mattress stitch or slip stitch for a neat finish. - Seam Sides
Leave armhole openings according to desired depth.
The moss stitch texture hides seams exceptionally well, giving the garment a professional look even with simple joining methods.
Edging & Finishing
Edging adds structure and elevates the overall appearance of the vest.
Suggested Edging Options:
- Single crochet border for clean minimalism
- Reverse single crochet (crab stitch) for subtle texture
- Slip stitch edging for a modern, tailored finish
Work evenly around armholes, neckline, and hem to prevent puckering.
Styling the Moss Stitch Crop Vest
This vest is intentionally versatile and can be styled year-round:
- Summer: Wear alone with linen pants or shorts
- Fall: Layer over a fitted long-sleeve top
- Spring: Pair with flowy skirts or dresses
- Casual: Jeans, sneakers, and a crossbody bag
- Elevated: Over a button-down with tailored trousers
Neutral yarns highlight the stitch texture, while bold colors turn the vest into a statement piece.
Customization Ideas
Once you’ve mastered the base design, try these variations:
- Lengthen into a waist-length vest
- Add ribbing at the hem for contrast
- Use color-blocking for a modern edge
- Incorporate buttons or ties at the front
- Work the vest in the round for a seamless version
The moss stitch adapts beautifully to experimentation, making this vest a perfect base pattern for creative exploration.