Pattern Description:
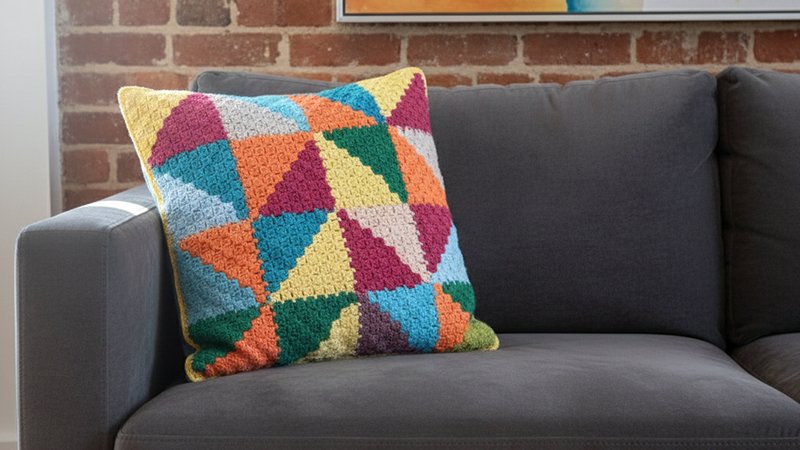
The Pastel Triangles Pillow uses the corner-to-corner (C2C) crochet technique with a seamless join-as-you-go method.
This technique is logical, easy for beginners, and saves time by eliminating the need to join separate elements.
The design is constructed in rows of “squares,” where each square is built from two C2C crocheted triangles.
Materials Needed & Measurements:
Materials Needed:
- Yarn: Leftovers of Soft Fun yarn by Scheepjes in 8 shades were used for the crochet decoration.
- Color Key: The following shades of Soft Fun yarn were used (listed for Row 1):
- Triangle 1 – shade 2624
- Triangle 2 – shade 2604
- Triangle 3 – shade 2613
- Triangle 4 – shade 2466
- Triangle 5 – shade 2531
- Triangle 6 – shade 2423
- Triangle 7 – shade 2611
- Triangle 8 – shade 2431
- Quantity Note: The designer used the project as a stash buster but estimated that 8 skeins of Soft Fun yarn should be enough for both sides of the pillow cover.
- Base: The finished crochet piece serves as a decoration for a fabric pillow cover.
Measurements/Construction Details:
- The triangles used within each “square” are not the same size.
- For the described pillow pattern, the triangles were made with 7 and 8 rows.
- The overall piece can be made bigger or smaller by altering the triangle size or the number of triangles used.
The Pastel Triangles Pillow pattern utilizes the Corner-to-Corner (C2C) crochet technique, employing a join-as-you-go (JAYG) methodology to create a seamless fabric.
Abbreviations Used:
- C2C: Corner-to-Corner crochet
- JAYG: Join-as-you-go
- RS/WS: Right Side/Wrong Side (Referencing sides of blocks)
Instructions for Making the Pastel Triangles Pillow Pattern:
Starting the Fabric & Reading the Chart
The flow for reading the chart is from bottom to top and from right to left. The order of triangles in every row is clearly marked with numbers. The starting point of each individual triangle is marked with arrows.
Row 1 Color Key (Soft Fun yarn):
| Triangle | Shade | Triangle | Shade |
| 1 | 2624 | 5 | 2531 |
| 2 | 2604 | 6 | 2423 |
| 3 | 2613 | 7 | 2611 |
| 4 | 2466 | 8 | 2431 |
Joining and Direction Rules
The pattern relies on the concept that the whole idea is that the triangles are joined continuously.
It is essential to understand how the first several triangles in each row are joined together, as the rest of the row is simply a repeat of that established joining method.
When joining new triangles, it is important to carefully watch the direction of the stitches: they should not be placed in the same direction as the stitches in the block being joined to.
Ideally, the wrong and right sides (WS and RS) of closely situated blocks should also alternate. However, the designer noted that this is not always possible and does not appear to have an impact on the final look of the project.
Pattern Repetition & Finishing
After Row 1 and Row 2 are completed, the remainder of the pattern is a repeating of Row 2. Once the entire piece is finished, you must work the border around it.