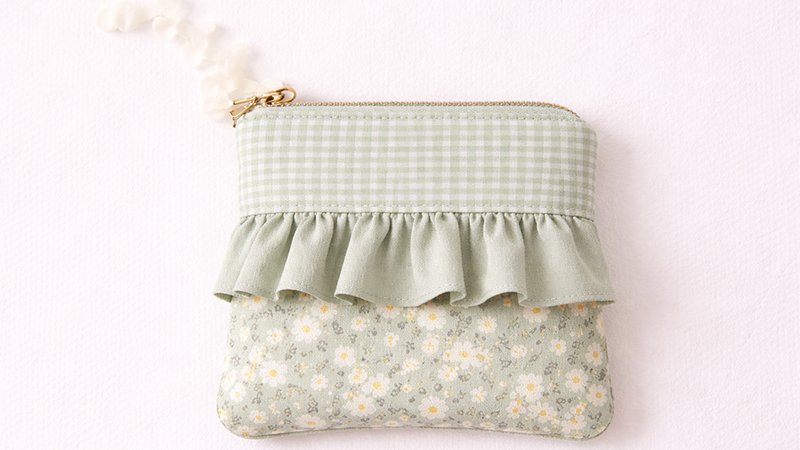
Whether you’re brand new to sewing or looking for a quick creative project, this Ruffle Zipper Pouch is the perfect mix of skill-building and fun. You’ll learn how to combine decorative stitches, create your own “printed” fabric, and sew a clean zipper pouch—all in one project.
What Makes This Project Special
Instead of relying on pre-printed fabric, you’ll design your own surface pattern using your sewing machine’s decorative stitches. The result looks high-end and unique—almost like a designer textile.
You’ll also learn:
- How to stabilize fabric for dense stitching
- How to gather and attach a ruffle neatly
- How to assemble a lined zipper pouch
Materials & Tools
Fabric & Notions
- Cotton fabric (light to medium weight)
- Bottom front: 3″ × 5″
- Top front: 2″ × 5″
- Back: 4″ × 5″
- Lining (2 pieces): 4″ × 5″ each
- Ruffle strip: 10″ × 3″
- Fusible interfacing (same size as bottom front piece)
- Zipper (5″ or slightly longer)
- Decorative thread (contrasting color recommended)
- Optional: Rick rack for zipper pull
Tools
- Sewing machine (with decorative stitches)
- Iron and ironing board
- Pins or clips
- Fabric scissors or rotary cutter
- Seam ripper (just in case!)
Step 1: Cut and Prepare Your Fabric
- Cut all pieces according to the measurements above.
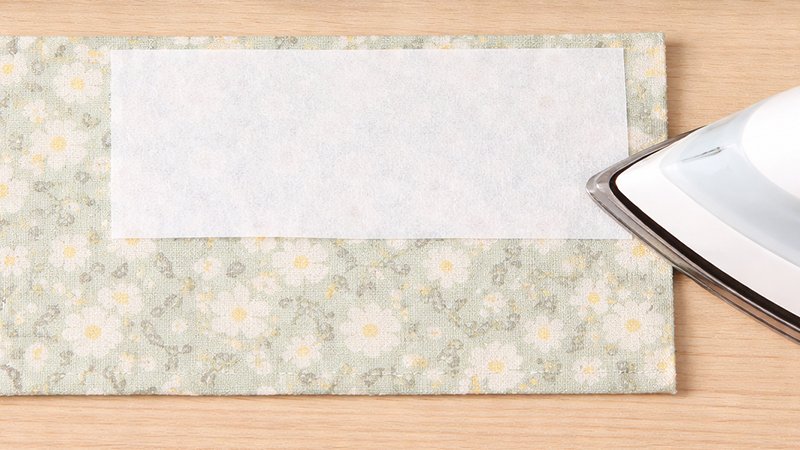
- Fuse interfacing to the wrong side of the 3″ × 5″ bottom front piece:
- Place the interfacing glue-side down
- Press with iron (no steam) for 10–15 seconds
- Let cool completely
Why this matters: Decorative stitching is dense and can cause puckering—interfacing prevents that.
Step 2: Create Your Custom “Printed” Fabric
This is where your pouch becomes unique.
How to do it:
- Place your interfaced bottom front piece under your machine.
- Choose 2–4 decorative stitches:
- Zigzag (wide)
- Triangle or arrow shapes
- Box or geometric lines
- Stitch across the fabric in rows:
- Keep rows straight or slightly angled
- Leave small gaps or overlap for texture
Pro Techniques:
- Pivot your fabric while stitching to create angles
- Alternate stitch types every row
- Use a contrasting thread for bold designs
Tip: Test stitches on scrap fabric first!
Step 3: Prepare the Ruffle
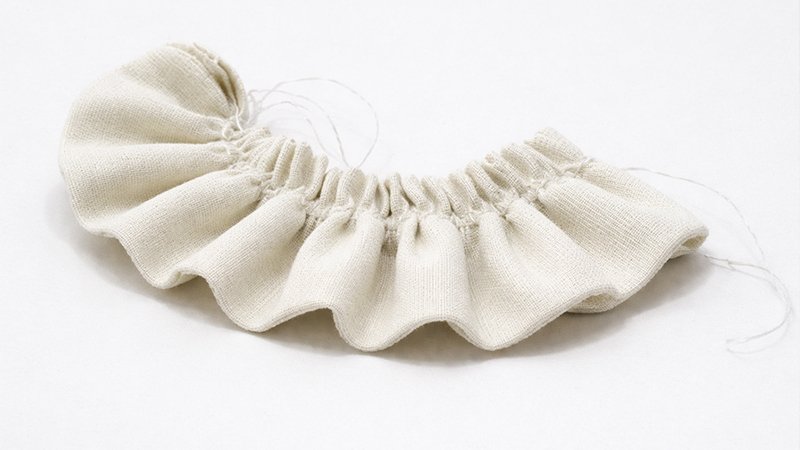
- Take your 10″ × 3″ strip
- Fold it lengthwise, wrong sides together
- Press firmly with an iron
Gather the ruffle:
- Sew 1–2 rows of long basting stitches along the raw edge:
- Stitch length: 4–5 mm
- Do NOT backstitch
- Gently pull the bobbin threads to gather:
- Adjust until the strip is 5″ wide
- Distribute gathers evenly
Goal: Soft, even ruffles—not bunchy or tight.
Step 4: Assemble the Front Panel
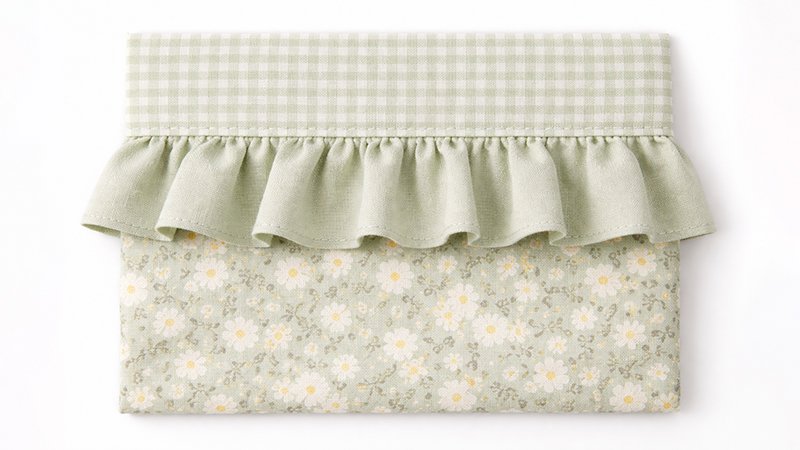
Layering order:
- Place the decorated bottom piece right side up
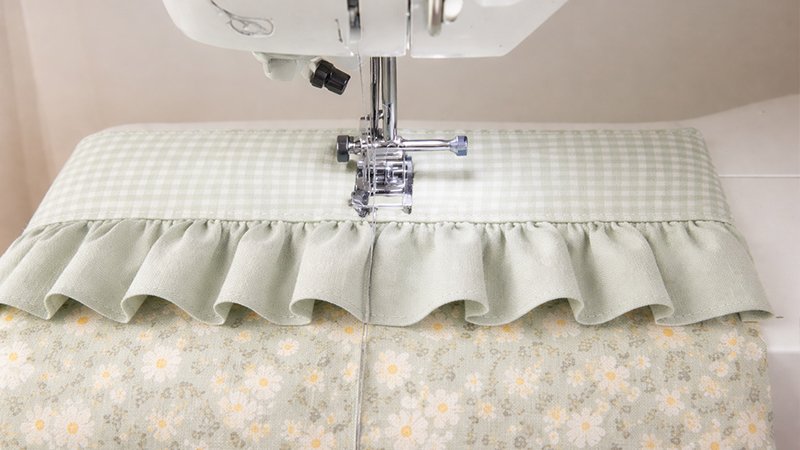
- Pin ruffle along the top edge, raw edges aligned
- Place the top front piece right side down on top
You now have a sandwich:
- Bottom piece (right side up)
- Ruffle
- Top piece (right side down)
Sew:
- Stitch across the top edge (½″ seam allowance)
- Flip the top piece upward
- Press seam flat
Optional but recommended:
- Topstitch along the seam for a clean finish
Step 5: Attach the Zipper
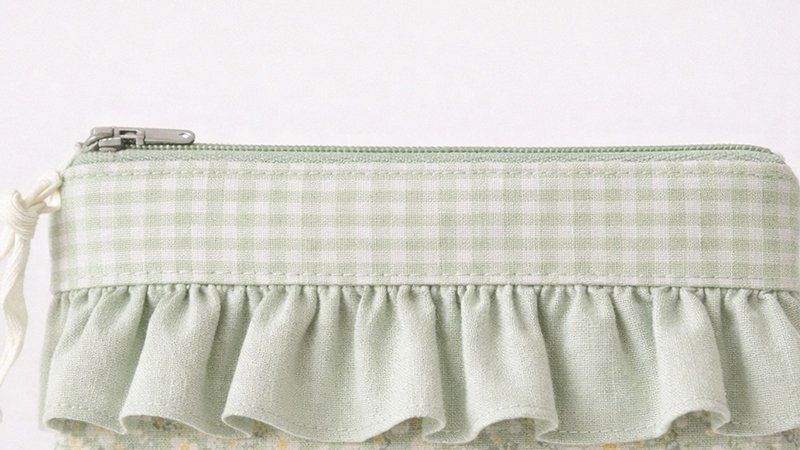
- Place the zipper right side down on the top edge of the front panel
- Place one lining piece right side down on top
- Clip or pin layers together
Sew:
- Stitch along the zipper edge using the zipper foot
- Flip the fabric away from the zipper
- Press
- Repeat for the back piece:
- Back panel (right side up)
- Zipper (right side down)
- Second lining (right side down)
Step 6: Sew the Pouch Together
- Open zipper halfway (VERY important!)
- Arrange layers:
- Outer pieces right sides together
- Lining pieces right sides together
- Pin all around the edges
Sew:
- Stitch around perimeter:
- Leave a 2–3″ gap in lining (for turning)
- Reinforce corners
Step 7: Turn and Finish
- Turn the pouch right side out through the lining gap
- Push out corners neatly
- Sew lining opening closed (hand stitch or machine)
- Push lining inside the pouch
Optional Finishing Touch
Tie a small piece of rick-rack onto the zipper pull for a fun detail that complements the geometric stitching.
Customization Ideas
- Use denim + neon thread for bold contrast
- Try monochrome stitching for a subtle look
- Add more stitch types for texture
- Increase the size of a makeup bag or clutch
Helpful Tips
- Always test decorative stitches first
- Use slow speed for better control
- Press after every major step for a polished result
- Keep ruffle fullness balanced (not too tight)
Final Thoughts
This pouch isn’t just functional—it’s a creative showcase of what your sewing machine can do. Once you try this, you’ll start seeing decorative stitches in a whole new way.