
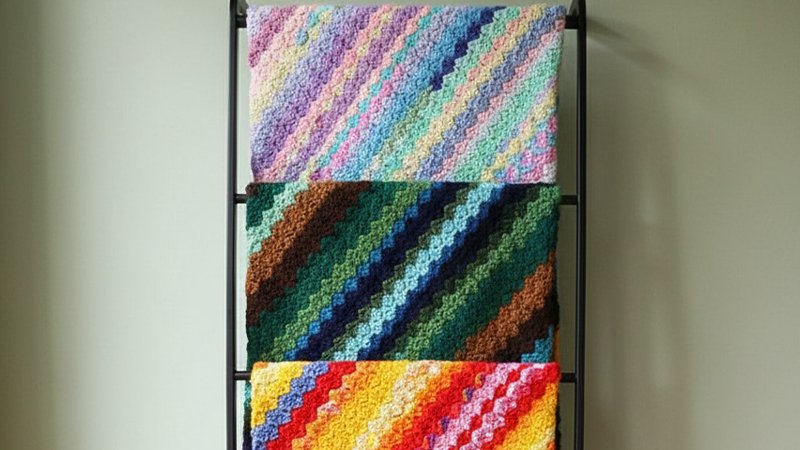
Pattern Description:
This quick and easy Scrappy Corner-to-Corner (C2C) Crochet Blanket pattern is perfect for utilizing a ton of scrap yarn.
It uses a Magic Yarn Ball which creates random color stripes and removes the need to weave in most yarn ends. The C2C technique makes the pattern adaptable to any size.
Materials Needed & Measurements:
| Item | Details/Specification | |
| Yarn | A large Magic Yarn Ball made from yarn scraps. The weight should be DK to Worsted weight (8-10ply). The amount needed is around 600g / 21 oz. | |
| Hook | 5mm crochet hook (US 8). | |
| Tools | Scissors. Yarn needle (for weaving in ends). | |
| Finished Size | 75cm x 95cm (30″x38″). | |
| Construction | The pattern is worked flat, diagonally, back and forth. The specified baby blanket is 48 rows wide and 60 rows long. |
Abbreviations Used:
- ch – Chain
- dc – Double Crochet (same as UK treble)
- sl st – Slip Stitch
- sp – Space (refers to the space created by 2 skipped chain stitches)
Instructions for Making the Scrappy Corner-to-Corner Crochet Blanket Pattern:
Corner-to-Corner Construction
The blanket is worked diagonally using the corner-to-corner (C2C) method. It is divided into three main stages: Increasing Rows, Working the Sides, and Decreasing Rows.
Increasing Rows (Rows 1-48)
In this stage, you will increase on both edges of the blanket in every row. Each row contains the same number of shell groups as the row number.
- Row 1:
- Ch 5
- Dc in 3rd ch from hook (creates a space to work into later)
- Dc in each of next 2 ch sts (first shell group)
- Row 2:
- Ch 5
- Dc in 3rd ch from hook
- Dc in each of next 2 ch sts
- Flip first shell group
- Sl st into the space created by the skipped 2 ch from previous row
- Ch 2, 3 dc into same space
- Row 3:
- Ch 5
- Dc in 3rd ch from hook
- Dc in each of next 2 ch sts
- Flip work
- Sl st into next ch-2 space, ch 2, 3 dc into same space
- Repeat across the row
- Rows 4-48: Repeat Row 3, continuing to increase at both ends until you have 48 shell groups.
Working the Sides (Lengthening the Rectangle, Rows 49-60)
This stage transitions the blanket into a rectangular shape by decreasing on one side while continuing to increase on the other.
- Row 49 (Decrease Row):
- Ch 1, turn
- Sl st in each of next 3 dc sts
- Sl st around next ch-2 space, ch 2, 3 dc into same space
- Repeat to end of row
- Row 50 (Increase Row):
- Work as per Row 3 (continuing the increase on the other edge)
- Rows 51–60:
- Odd rows: work as per Row 49 (decreasing edge)
- Even rows: work as per Row 50 (increasing edge)
- Continue until the longer side measures 60 rows tall.
Decreasing Rows (Row 61 Onward)
Once the desired length is reached, decrease on both edges in every row until only one shell group remains.
- Row 61 and onward:
- Ch 1, turn
- Sl st in each of the next 3 dc sts
- Sl st around next ch-2 space, ch 2, 3 dc into same space
- Repeat to end of row
- Continue until only one shell group remains.
Finishing
- Fasten off and weave in all ends.
- A border is optional; the edges are naturally tidy.
- Blocking or gentle use will help settle the blanket into shape if any bias skew occurs.


