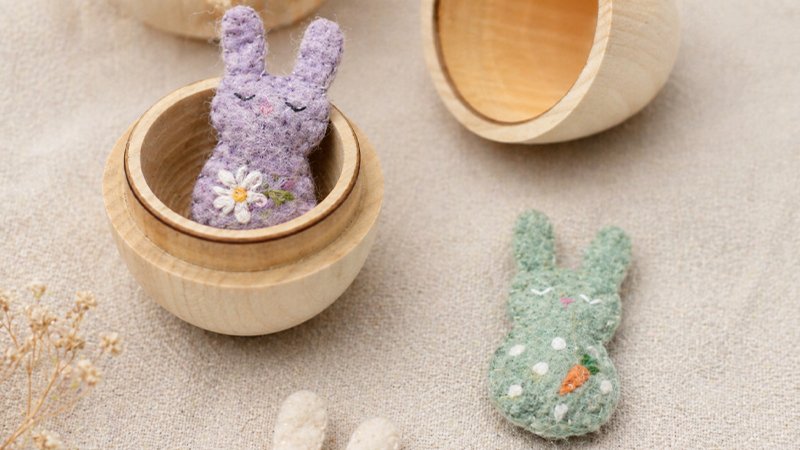
Step into the charming world of miniature handmade creations! These Mini Pocket Critter Bunnies are tiny (just 1–2 inches tall) and full of personality. Despite their size, they’re beginner-friendly and incredibly satisfying to make. This expanded guide will walk you through every step with extra clarity and helpful tips.
Materials & Tools (Detailed)
Before you begin, gather everything to make the process smooth:
- Wool Felt (Recommended):
Wool felt holds its shape better than synthetic felt and is easier to stitch without fraying. Choose soft pastel tones or classic bunny shades (white, cream, gray, brown). - Embroidery Floss:
Use 2–3 strands (not the full 6) for finer stitching on small pieces. Black or dark brown works well for eyes; pink for the nose. - Needle:
A size 7–9 embroidery needle is ideal—thin enough for detail but sturdy enough for felt. - Sharp Micro-tip Scissors:
Precision is crucial at this scale. Small scissors help you cut clean curves, especially around ears. - Stuffing (Poly-fill):
Use very small amounts. Overstuffing can distort the shape. - Stuffing Tool:
Hemostats are ideal, but a toothpick, skewer, or pencil works just fine. - Pattern Transfer Options:
- Sulky Fabri-Solvy™ (Best): Stick, stitch, rinse away.
- Freezer Paper: Iron onto felt and peel off later.
- Tracing: Lightly draw directly onto felt using a disappearing fabric pen.
Before You Start: Helpful Tips
- Work in good lighting—tiny stitches require visibility.
- Use short thread lengths to avoid tangling.
- Take your time—precision matters more than speed.
- Practice stitches on scrap felt if you’re new.
Step-by-Step Instructions (Expanded)
Step 1: Transfer the Pattern & Embroider Details
- Trace or transfer your bunny pattern onto the felt.
- On the front piece, embroider:
- Eyes: Use French knots or tiny straight stitches.
- Nose: A small triangle or “V” shape using satin stitch or simple stitches.
- On the back piece, stitch a small tail:
- Use a French knot or a few clustered stitches for a fluffy look.
Tip: Keep features minimal—too much detail can overwhelm such a small design.
Step 2: Cut Out the Bunny Shapes
- Carefully cut along the pattern lines.
- Make slow, controlled cuts—especially around ears.
- Ensure both front and back pieces match closely for easier stitching.
Step 3: Add the Belly Appliqué (Optional but Adorable)
- Cut a tiny heart shape (or oval) from contrasting felt.
- Position it on the front piece.
- Stitch it down using a running stitch or tiny whip stitch.
Optional: If using Fabri-Solvy™, rinse it away now and allow the felt to dry completely before continuing.
Step 4: Stitch the Body Together
- Place the front and back pieces together:
- Make sure the tail is facing outward.
- Thread your needle with matching floss (2–3 strands).
- Begin stitching around the edge using:
- Whip stitch (most common and neat), or
- Blanket stitch (for decorative edges).
Tip: Keep stitches small and evenly spaced (about 1–2 mm apart).
Step 5: Stuff the Bunny
- Stop stitching when about ¾ of the edge is sewn.
- Insert tiny bits of stuffing:
- Start with the ears and head, then move to the body.
- Use your tool to gently push stuffing into place.
Important: Do not overfill—this can stretch stitches or distort the bunny.
Step 6: Close the Seam
- Continue stitching to close the opening.
- Tie a small, secure knot at the end:
- Hide it by inserting the needle into the body and pulling it out slightly away before trimming the thread.
Pro tip: This “buries” the knot inside for a clean finish.
Creative Ideas & Variations
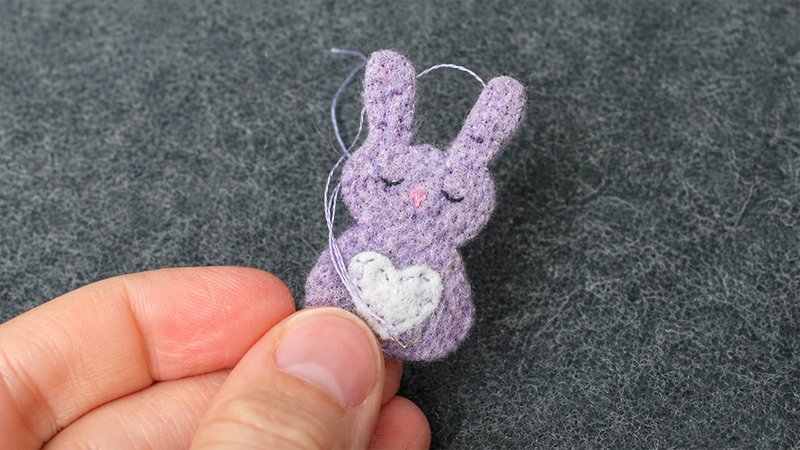
Once you’ve made your first bunny, try expanding your creativity:
Color Variations
- Soft pastels for Easter
- Bright rainbow sets
- Neutral woodland tones
Different Animals
Use the same technique to make:
- Bears
- Lambs
- Chicks
- Kittens
Fun Uses
- Necklace charms (add a loop at the top)
- Keychains
- Easter egg fillers
- Dollhouse or Lego accessories
- Mini gifts or collectibles
Final Thoughts
These tiny felt bunnies may be small, but they’re packed with charm. With just a bit of patience and creativity, you can create a whole world of miniature companions. Each one will have its own personality—and that’s part of the magic.
Enjoy the process and happy stitching!