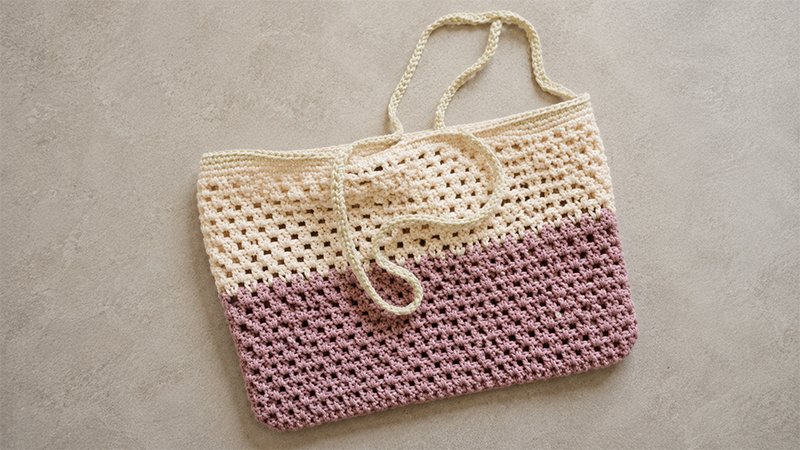
Step into sunny market mornings with a handcrafted tote that seamlessly blends vintage charm and modern durability.
The Fresh Market Tote offers an airy, open-work body inspired by classic motifs while remaining sturdy enough for fresh produce, books, or beach essentials.
Worked by holding two yarn strands together, this beginner-friendly project works up quickly using foundational stitches.
Clever finishing techniques ensure structural strength where it counts, preventing stretching along the handles and seams. Whether crafted as a functional everyday bag or a thoughtful handmade gift, this market bag is both practical and stylish.
Project Overview
-
Skill Level: Easy / Intermediate
-
Finished Measurements: Approximately 16.75 inches wide by 16.5 inches tall
-
Construction: Worked as a flat panel, seamed at the sides, and completed with built-in reinforced handles.
Required Materials
-
Light weight (Category 3) yarn – 1 cake
-
Medium weight (Category 4) 100% cotton yarn – 3 skeins
-
5.0 mm crochet hook
-
Tapestry needle
-
Scissors
Sizing & Gauge
-
Gauge: 4 inches = 10 double crochet stitches + 4 chain spaces x 6.5 rows
-
Note: Hold one strand of each yarn together continuously throughout the project.
Common Abbreviations
-
Ch / Chs: Chain / Chains
-
Dc: Double Crochet
-
Sc: Single Crochet
-
Sl St: Slip Stitch
-
Sp: Space
-
St / Sts: Stitch / Stitches
Pattern Notes
-
An initial chain-3 counts as a double crochet stitch.
-
An initial chain-4 counts as a double crochet stitch plus a chain-1 space.
Step-by-Step Instructions
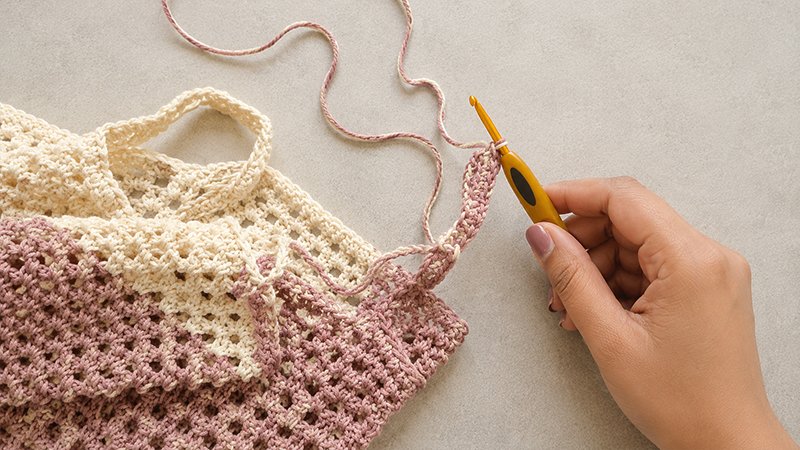
Main Body Panel
Holding both yarn strands together:
Foundation Row:
- Chain 122. Place 1 double crochet into the 4th chain from your hook.
- Place 1 double crochet into the next chain.
- *Chain 1, skip 1 chain, place 1 double crochet in each of the next 2 chains; repeat from * across until 3 chains remain.
- Chain 1, skip 1 chain, double crochet into the final chain.
Row 2
- Turn work. Chain 3.
- Work 2 double crochets into the very first chain-1 space.
- *Chain 1, work 2 double crochets into the next chain-1 space; repeat from * across to the turning chain.
- Work 3 double crochets directly into the turning chain space.
Row 3
- Turn work. Chain 4.
- *Work 2 double crochets into the next chain-1 space,
- chain 1; repeat from * across until 3 stitches remain.
- Place 1 double crochet in the space between the last double crochet and the turning chain.
Rows 4–27
- Repeat Rows 2 and 3 sequentially 12 additional times to complete 27 total rows.
Do not fasten off.
Seaming & Shaping
-
Side & Bottom Assembly: Chain 1. Turn the panel clockwise and fold the short edges together. To create the side seam using single crochet: work 2 single crochets into the end of the first row, then 1 single crochet into the end of the following row. Continue this alternating pattern down the edge. Chain 1, turn clockwise along the bottom fold, and single crochet evenly across the base. Fasten off.
Top Border & Handles
Round 1 (Edging Base)
- Turn bag right-side out. Join yarn in the stitch immediately left of the side seam.
- Chain 1. Work 1 single crochet into that same stitch and into every stitch and chain space around the top opening.
- Join with a slip stitch to the first single crochet. (118 stitches)
Round 2
- Chain 1. Single crochet into the joining stitch and into every single crochet around.
- Join with a slip stitch.
Round 3 (Handle Straps)
- Chain 1. Single crochet into the joining stitch and the next 18 stitches.
- Chain 85, skip 21 stitches (creating the first handle gap), single crochet into the next 38 stitches
- Chain 85, skip 21 stitches (creating the second handle gap), single crochet into the remaining 19 stitches
- Join with a slip stitch
Round 4 (Reinforcement):
- Chain 1. Single crochet in each stitch across, placing 1 single crochet directly into each handle chain to add stability.
Join with a slip stitch.
Finishing
Cut yarn, pull through the final loop, and use a yarn needle to weave in all loose ends securely before use.