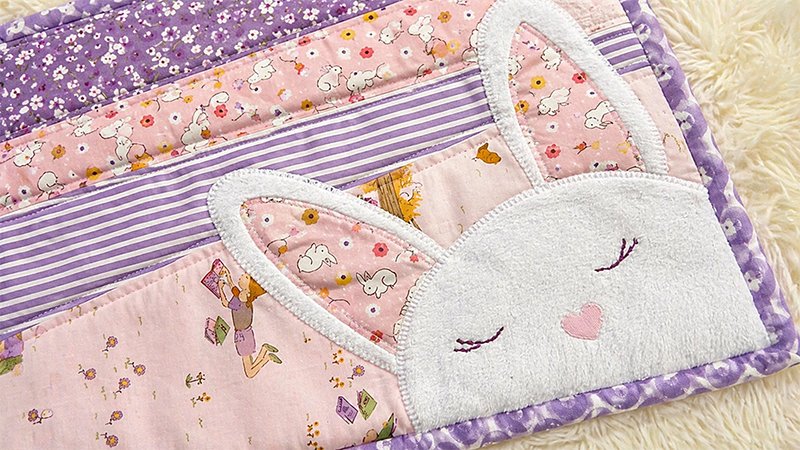
Create a charming, holiday-inspired table runner featuring adorable bunny appliqués. This project is beginner-friendly yet enjoyable for experienced sewists—perfect for a relaxing weekend make.
Finished Size
The exact size may vary slightly depending on seam allowances, but the runner uses approximately 106 inches of binding, making it suitable for most standard dining tables.
Materials & Tools
Fabric & Supplies:
- 6 fat quarters (assorted prints)
- ½ yard backing fabric
- 106 inches binding fabric (contrast color recommended)
- Craft-size quilt batting
Appliqué Materials:
- Fabric scraps for bunny details:
- White (cuddle/minky recommended for body)
- Pink or purple (inner ears)
- Red or pink (nose)
- Double-sided fusible web
Notions:
- Sewing thread
- Embroidery floss
- Hand sewing needle
Other:
- Printed bunny template
- Rotary cutter, ruler, and mat
- Iron
Fabric Cutting Instructions
Main Runner Strips
- From 5 fat quarters, cut:
- 2 strips each, measuring 4¼” wide (total: 10 strips)
- Taper each strip:
- Align your ruler diagonally from one corner to the opposite side
- Trim so one end narrows to 1½”
End Sections
- From the 6th fat quarter, cut:
- 1 strip, measuring 9″ wide (full fabric width)
- Shape into a wedge:
- Trim diagonally from corner to corner to match the taper of the main strips
Appliqué Preparation
- Trace
- Draw bunny shapes onto the paper side of the fusible web
- Leave about ½” space between shapes
- Rough Cut
- Cut out shapes with a ¼” margin around each
- Fuse
- Iron onto the wrong side of your chosen fabrics (follow product instructions)
- Final Cut
- Cut precisely along traced lines
- Set aside
Assembly Instructions
- Construct the Runner Top
- Sew tapered strips together side-by-side
- Press seams flat
- Prepare Appliqués
- Remove paper backing from fused shapes
- Arrange Design
- Position the bunnies on the runner top
- Adjust layout until satisfied
- Fuse in Place
- Press appliqués securely with an iron
- Decorative Stitching
- Stitch around the edges of each shape
- ✨ Tip: Use a blanket stitch with embroidery floss for a polished, handmade look
- Add Facial Details
- Hand embroider bunny eyes using floss
Quilting Suggestions
Keep quilting simple to highlight the appliqués:
- Straight-line quilting
- Stitch-in-the-ditch between wedges
This helps stabilize layers while maintaining a clean design.
Finishing the Runner
- Create Quilt Sandwich
- Layer:
- Runner top
- Batting
- Backing fabric
- Layer:
- Quilt Layers
- Quilt as desired
- Trim Edges
- Even up all sides
- Attach Binding
- Use 106″ of binding
- Sew around edges to finish
Tips & Variations
- Precision Matters: Carefully cut appliqué shapes for smoother stitching
- Press frequently: Flat seams improve overall appearance
- Add Texture: Use minky or cuddle fabric for soft, dimensional bunnies
- Customize Colors: Adapt fabrics for different holidays or themes
Quick Overview
- Fabric: 6 fat quarters + ½ yd backing
- Binding: 106 inches
- Main Cuts:
- (10) tapered strips (4¼” → 1½”)
- (1) 9″ tapered end piece
- Steps: Piece top → appliqué → stitch details → quilt → bind