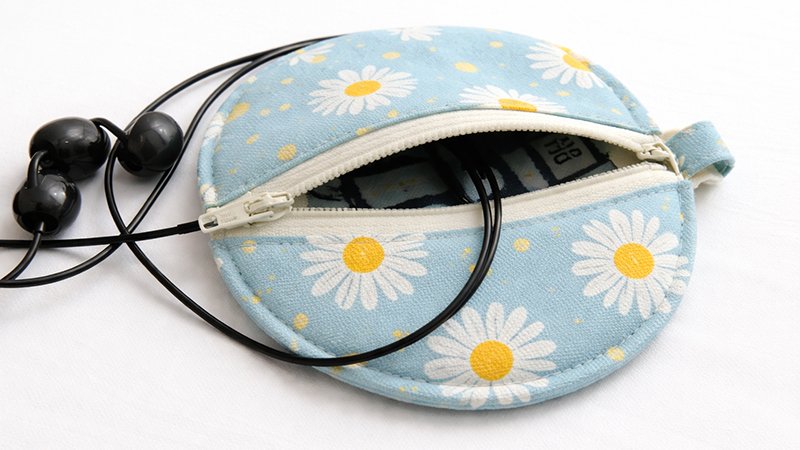
This project is one of those rare gems in sewing—it’s quick, beginner-friendly, and incredibly useful in everyday life.
Whether you are just starting your sewing journey or looking for a satisfying small project between larger makes, this pouch is a perfect choice. Let’s walk through everything you need to know, including step-by-step guidance, helpful tips, and creative uses.
Why This Pattern Stands Out?
The Circle Zip Earbud Pouch is loved because it combines simplicity with a polished, professional result. It’s especially great for:
- Practicing sewing curves
- Learning zipper installation
- Using up fabric scraps
- Creating quick handmade gifts
Even if you’ve never sewn a zipper before, this project gives you a manageable and rewarding introduction.
Materials You’ll Need
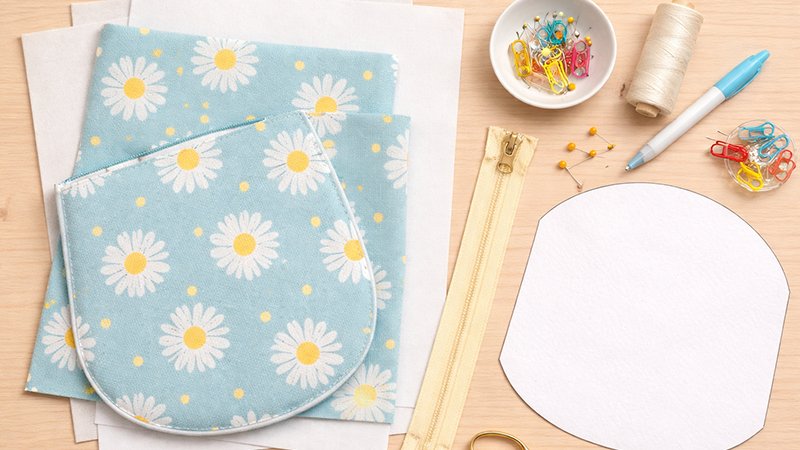
Before you begin, gather the following supplies:
- Fabric (Outer + Lining): Quilting cotton works well, but cotton canvas gives a sturdier pouch
- Zipper: About 7–9 inches (you will trim it down)
- Interfacing (optional): For added structure
- Thread: Matching or contrasting
- Basic tools: Scissors, pins/clips, sewing machine
- Template: Printable pattern OR a small bowl (for tracing circles)
Step-by-Step Instructions
Step 1: Cut Your Fabric
- Use a bowl or circular template (about 4–5 inches in diameter)
- Cut:
- 2 outer fabric circles
- 2 lining fabric circles
Tip: Fold fabric in half and cut two layers at once for accuracy.
Step 2: Create Half-Circles
- Cut each circle in half
- You will now have:
- 4 outer half-circles
- 4 lining half-circles
Alternatively, you can save time by cutting half-circles directly using the fold of your fabric.
Step 3: Attach the Zipper
- Take one outer half-circle and place it right side up
- Lay the zipper along the straight edge
- Place a lining half-circle right side down on top (sandwiching the zipper)
- Sew along the straight edge
Repeat for the other side of the zipper using the remaining halves.
Step 4: Press and Topstitch
- Turn the fabric right side out
- Press the seam flat
- Topstitch along the zipper edge
Important Tip:
Use a longer stitch length (3–3.5 mm) for topstitching. This creates a cleaner, more professional finish.
Step 5: Assemble the Pouch
- Open the zipper halfway (very important!)
- Match the outer pieces right sides together
- Match the lining pieces right sides together
- Pin or clip around the curved edges
Sew around the entire circle, leaving a 2–3 inch gap in the lining for turning.
Step 6: Turn and Finish
- Turn the pouch right side out through the lining gap
- Push out the curves gently
- Stitch the lining opening closed (by hand or machine)
- Push the lining inside the pouch
Your circle zip pouch is now complete!
Practical Uses for Your Pouch
Don’t let the name limit you—this pouch is incredibly versatile:
- Earbuds & chargers
- Coins and folded cash
- Jewelry storage
- Lip balm & small cosmetics
- Dog waste bags for walks
- Gift holders for small presents
Because they’re soft and padded, they protect delicate items while staying compact.
Tips for Best Results
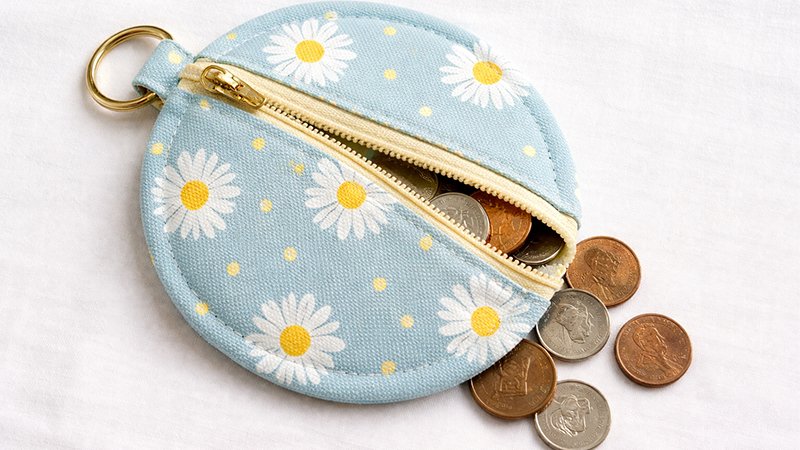
- Use scraps creatively: Try bold prints or fussy cutting to highlight designs
- Choose quality zippers: They make sewing smoother and improve durability
- Clip curves carefully: This helps your pouch lie flat and round
- Experiment with size: Use different bowls to create larger or smaller pouches
Great for Gifting and Charity
These pouches are perfect for:
- Handmade gifts
- School fundraisers
- Holiday markets
- Donation projects
They sew up quickly, making them ideal for batch sewing.
Final Thoughts
This pattern is a perfect blend of fun, function, and creativity. It’s beginner-friendly but still satisfying for experienced sewists. Once you make one, you’ll likely find yourself making many more—for yourself, friends, and even for community projects.
So grab your fabric scraps, pick a fun zipper, and start sewing your own collection of circle zip pouches.
Happy sewing!