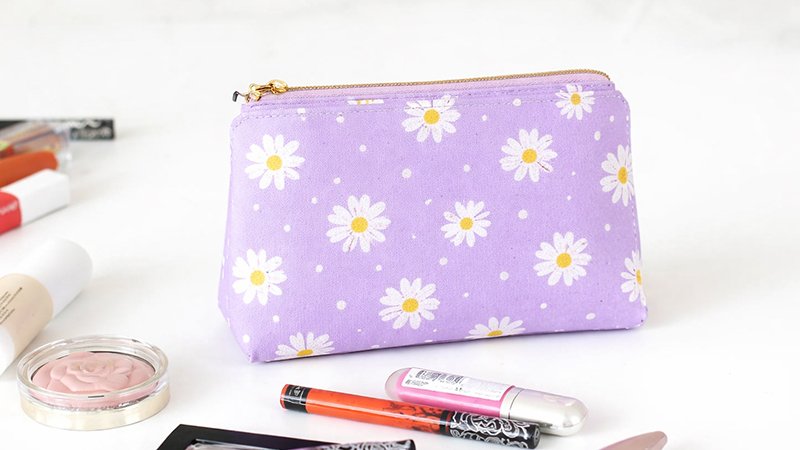
Welcome back to the sewing room! Today’s project is both practical and stylish: a flat-bottom zippered pouch. Unlike a basic pouch, this version features a boxed base, allowing it to stand upright and hold bulkier items like makeup bottles, toiletries, or sewing tools.
This guide walks you through every step in detail, making it beginner-friendly while still polished enough for experienced sewists.
Why You’ll Love This Design
- Stands upright for easy access
- Holds more volume than flat pouches
- Great for organizing cosmetics, travel items, or craft supplies
- Quick project (can be completed in under an hour)
Materials & Tools
Fabric & Notions
- Main Fabric (Outer): Quilting cotton or similar (2 pieces)
- Lining Fabric: Canvas or sturdy cotton (2 pieces)
- Fusible Interfacing: Medium-weight (2 pieces)
- Zipper: 8”–10” recommended
- Pattern Template: With boxed corner cutouts
Tools
- Sewing machine
- Zipper foot (recommended)
- Pins or clips
- Fabric scissors / rotary cutter
- Iron
- Thread
Seam Allowance
Use a 3/8” seam allowance throughout, unless otherwise noted.
Step 1: Cut & Prepare Your Pieces
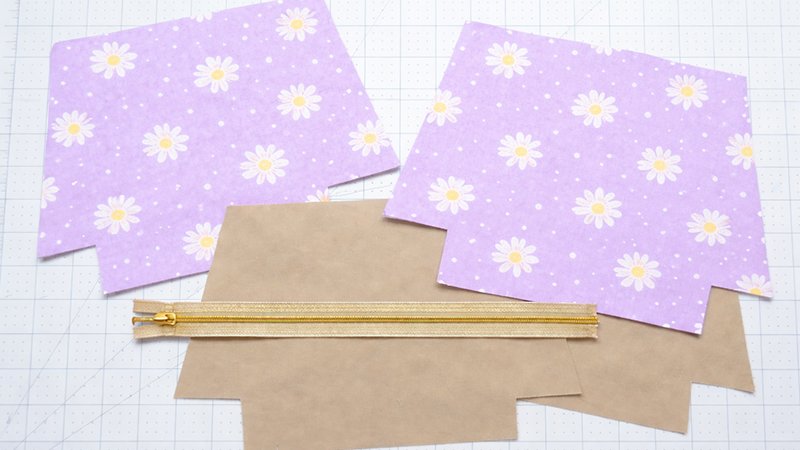
- Cut:
- 2 × Main fabric pieces
- 2 × Lining pieces
- 2 × Interfacing pieces
- Fuse interfacing:
- Place interfacing on the wrong side of the main fabric
- Use an iron (no steam unless instructed)
- Press firmly until fully bonded
This step gives your pouch structure and durability.
Step 2: Attach the Zipper
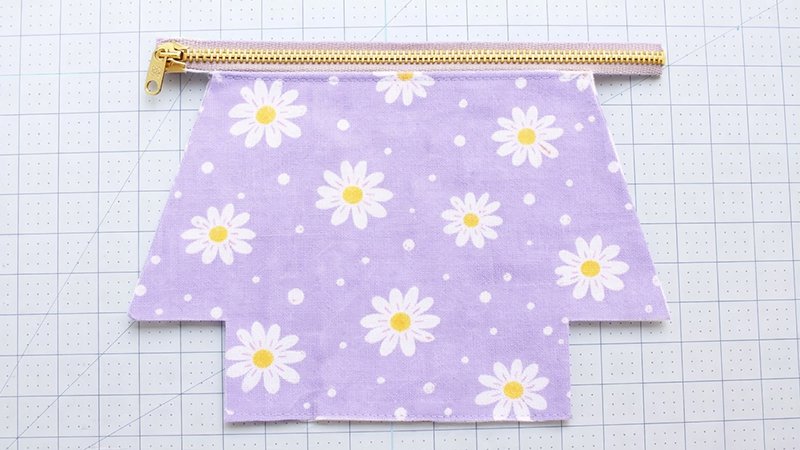
First Side
- Place the main fabric right side up
- Lay zipper face down on top (aligned with top edge)
- Place the lining fabric right side down on top
You now have a “sandwich”:
Lining (right side down)
Zipper (face down)
Main fabric (right side up)
- Pin or clip layers
- Sew along the zipper edge using the zipper foot
Press & Topstitch
- Flip fabrics so the wrong sides face each other
- Press seam flat
- Topstitch along the zipper edge on the main fabric side
This keeps fabric from catching in the zipper and gives a clean finish.
Repeat for the other side
Attach the remaining main + lining pieces to the other side of the zipper using the same method.
Step 3: Assemble the Pouch
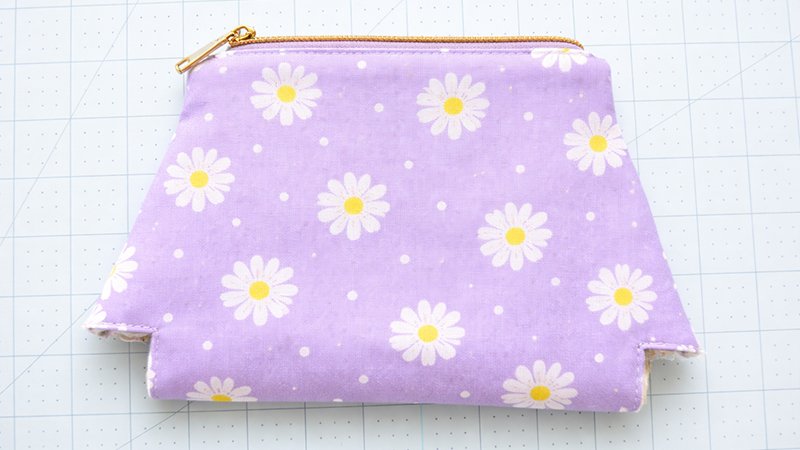
Important: Open the zipper halfway before sewing!
(Otherwise, you won’t be able to turn the pouch later.)
- Match:
- Main fabrics right sides together
- Lining fabrics right sides together
- Align seams at the zipper
- Pin around edges
Sew Around the Edges
- Sew both sides and the bottom edges
- Leave the square cutout corners unsewn
- (Optional but recommended) Leave a 2–3 inch gap in the lining at the bottom for turning
- Trim excess zipper ends if needed
Step 4: Create the Flat Bottom (Boxed Corners)
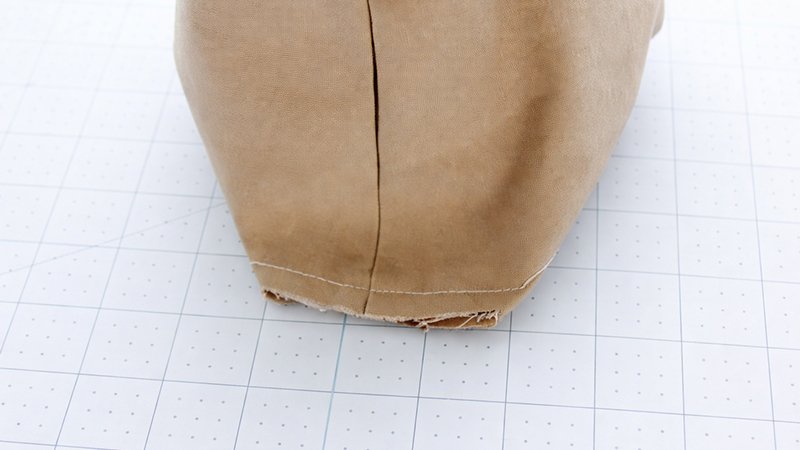
This is the key step that gives your pouch structure.
For each corner:
- Open the square cutout
- Pinch and align seams so edges form a straight line
- Match the side seam with the bottom seam
- Pin securely
- Sew straight across the opening
Repeat for all 4 corners (2 outer + 2 lining)
Step 5: Finish the Inside
- Finish raw edges using one of these methods:
- Zigzag stitch
- Serger
- Bias binding
- Turn the pouch right side out:
- Through the zipper (or lining gap if used)
- If you left a lining gap:
- Sew it closed using a straight stitch
Step 6: Final Shaping
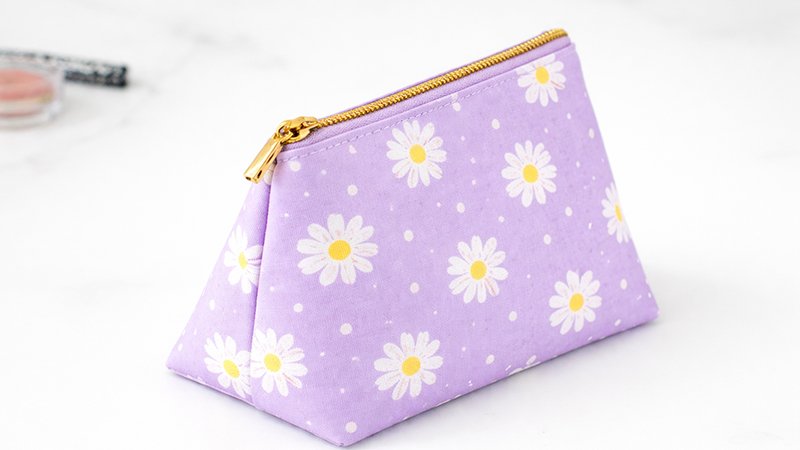
- Push out corners neatly
- Smooth lining inside
- Press lightly if needed
Your pouch should now stand upright with a flat base!
Tips for Best Results
Zipper Tips
- Longer zippers (9–10”) are easier to sew
- You can trim the excess after stitching
Fabric Options
- Cotton = easy beginner option
- Canvas = more structure
- Oilcloth = wipeable, great for cosmetics
Efficiency Tip
- Batch sewing saves time—make multiple pouches at once
What Fits Inside?
This pouch is perfect for:
- Makeup (foundation, blush, lipsticks)
- Travel toiletries
- Sewing supplies
- Chargers and small tech
The flat bottom allows bulkier items to sit comfortably without tipping over.
Project Variations
Try customizing your pouch:
- Quilted outer fabric
- Contrast zipper
- Decorative topstitching
- Waterproof lining
Final Thoughts
This flat-bottom zippered pouch is:
- Beginner-friendly
- Fast to sew
- Highly practical
- Perfect for gifts
Once you make one, you’ll likely want to make several more!