In an era where sustainability meets personal expression, the ability to revitalize tired leather goods is more than just a craft—it is a valuable skill that blends art with longevity.
Whether you are looking to breathe new life into a vintage leather jacket, provide a much-needed facelift to a weathered sofa, or personalize a pair of sneakers to make them truly one-of-a-kind, painting leather offers a sophisticated solution.
However, leather is a unique, porous, and flexible substrate that demands a specific technical approach. It is not as simple as applying any household paint to the surface.
To achieve a professional, durable finish that won’t crack or peel, one must understand the chemistry of the materials and the precision of the process.
This guide serves as your comprehensive roadmap to mastering the “staining” process of leather painting, ensuring your projects become the “talk of the town”.
Understanding the Medium: Why Specialized Paint Matters
The most critical decision in any leather-painting project is the selection of the medium. Unlike wood or canvas, leather is a dynamic material that bends, stretches, and breathes. Traditional paints often lack the elasticity required to move with the leather, leading to catastrophic failure of the finish.
1. The Chemistry of the Coating

When we speak of painting leather, it is technically more accurate to describe it as a staining process. Specialized leather paints are formulated to penetrate the surface and bond with the fibers rather than merely sitting on top of them as a rigid shell.
2. Comparative Analysis of Paint Types
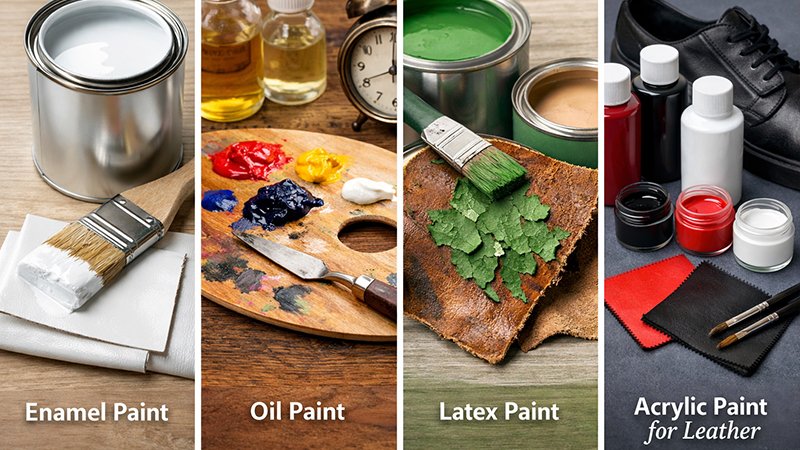
To understand why certain paints are preferred by professionals, we must examine the traditional alternatives:
- Enamel Paint: Favored by some for its smooth, brush-mark-free finish and the fact that it often requires only two coats, enamel is nonetheless oil-based. This makes it toxic and significantly slower to dry, which can be a drawback for home-based DIY enthusiasts.
- Oil Paint: While oil paints can enhance the natural beauty of matte or gloss surfaces, they are notoriously difficult to use on leather. They require an excessive number of coats to achieve a satisfactory finish and have a prolonged drying time that can stall project timelines.
- Latex Paint: Latex is generally discouraged for leather applications. It requires a perfectly dry surface to adhere, and its inherent lack of flexibility means that as the leather moves, the paint tends to crack and peel away in large flakes.
- Acrylic Paint (The Gold Standard): Standard acrylics are a popular entry point because they are water-based, quick-drying, and easy to clean. However, there is a distinct difference between “craft” acrylics and “leather” acrylics.
3. The Superiority of Acrylic Leather Paint

For a professional-grade result, Acrylic Leather Paint is the undisputed winner. Unlike regular acrylics used for paper or wood, which are often too thick and brittle, leather-specific acrylics are engineered for maximum flexibility.
The industry benchmark is often cited as the Angelus Acrylic Leather Paint Set. These paints are non-toxic, water-based, and designed to be wearable and waterproof.
They are specifically formulated to be scratch-resistant and flexible enough for athletic shoes and high-use furniture like couches.
While standard acrylics can be used if they are watered down to increase their fluidity, they will never match the durability or adhesion of a dedicated leather paint.
The Professional Toolkit: Essential Supplies
Success in leather painting is 90% preparation and 10% application.
The Must-Have Inventory:
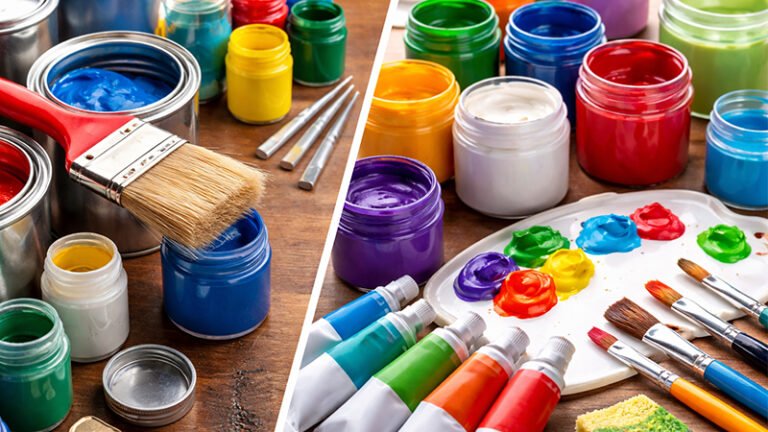
- Acrylic Leather Paint: Select a high-quality brand like Angelus for its 12+ vivid, mixable colors.
- De-glosser (Isopropyl Alcohol): This is the most critical chemical tool. It removes the factory’s clear protective coating, allowing the paint to “bite” into the leather.
- Degreaser: Used to strip away oils, waxes, and silicones that naturally accumulate on leather.
- Leather Paint Sealer (Finisher): Necessary to protect the final design from UV damage, fading, and moisture.
- Assorted Paintbrushes: Standard flat brushes for large areas and fine-tipped brushes for detail.
- Leather Conditioner: Essential for restoring suppleness if the cleaning process makes the leather too rigid.
- Optional: Acrylic Paint Pens: Ideal for those looking to add delicate designs or intricate line work without the mess of a brush.
The Step-by-Step Execution: From Prep to Polish
Follow this rigorous process to ensure a finish that is indistinguishable from a factory-made item.
Step 1: Surface Preparation (The Critical Phase)
If you skip this step, your paint will crack and peel. Leather comes from the factory with a protective “finish”—a shiny coating that repels liquids. You must remove this.
- Clean and Strip: Use a de-glosser and degreaser to strip the surface of all wax, silicone, and gloss.
- Sanding: If the surface remains slick or has imperfections, use fine-grit sandpaper to lightly abrade the area, being careful not to gouge the hide.
- Conditioning: If the chemicals make the leather feel brittle, apply a small amount of conditioner to soften it. Note: Leather is porous; do not soak it, as this will lead to extended drying times.
Step 2: The “Flex” Test and Masking
Before a single drop of paint touches the item, flex the leather in your hands. Observe where the natural creases form. You will want to paint in the direction of the flex to ensure the paint particles settle into the natural movements of the material.
- Masking: Use high-quality painter’s tape to mask off any areas—such as soles of shoes or hardware on a bag—that should remain unpainted.
Step 3: Application of the Base Coat
- Test Run: Always perform a test on an inconspicuous area to check for color accuracy and adhesion.
- The First Layer: Your first coat should be extremely thin. You may even thin the paint slightly with water to ensure it penetrates the leather fibers.
- Drying Time: Allow the base coat to dry for at least 15 to 30 minutes (though two hours is safer for the initial layer).
Step 4: Layering for Depth and Durability
- Thin is King: Never attempt to cover the leather in one thick coat. Apply multiple thin, even layers.
- Undiluted Paint: After the initial thinned base coat, use undiluted acrylic leather paint for subsequent layers to achieve full opacity.
- Environmental Control: Ensure you are working in a room that is approximately 60 degrees Fahrenheit (16 degrees Centigrade). If the room is too cold or too humid, the paint may not adhere properly, leading to cracking.
Step 5: Sealing and Waterproofing
Once you have achieved the desired color, you must protect your work.
- Clean the Surface: Ensure no dust has settled on the dry paint.
- Apply Finisher: Use an acrylic leather finisher. This can be applied in a ratio of one ounce of finisher to one pint of water.
- The 20-Coat Rule: For maximum protection, professionals often apply up to 20 ultra-thin coats of finisher, allowing five minutes of settling time between each. This creates a flexible, durable shield that ranges from matte to high gloss.
- Waterproofing: If the item will be worn outdoors (like shoes or jackets), apply a final waterproofing spray or coat for added longevity.
Specialty Techniques: Delicate Designs and Fine Art
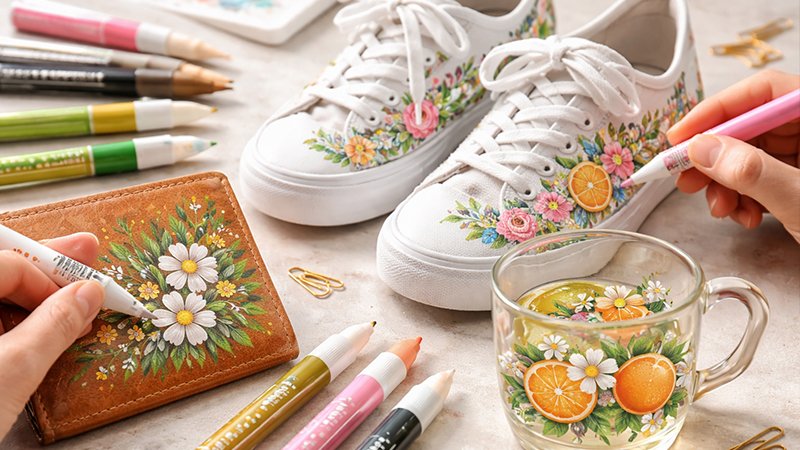
Not every project requires a full color change. Sometimes, the goal is to add a logo, a floral pattern, or custom typography.
Using Acrylic Paint Pens
For detailed artwork, acrylic paint pens or markers are superior to brushes.
- Precision: The felt tip allows for a controlled flow of paint, preventing the “thick layer” mistake that leads to cracking.
- Versatility: These pens are often multi-surface, working well on leather, rubber, and even wood or glass.
- Safety: Most are water-based and non-toxic, making them safe for home use. However, they are not dishwasher safe and should not be used on items that will be machine-washed.
Troubleshooting and Paint Removal: Handling Mistakes
Even professionals make mistakes. The key is knowing how to reverse them without damaging the leather’s delicate grain.
Softening the Paint
If you spill paint or need to correct a stroke, you must soften the acrylic bond.
- Warm, Soapy Water: The gentlest method. Soak the area for 30 minutes to soften the paint before gently scrubbing with a bristle brush.
- Oils: Olive oil, cooking oil, or baby oil can penetrate the paint. Apply with a cotton swab and wait for the paint to soften before lifting it with a scraper or a mixture of vinegar and baking soda.
Chemical Extraction
- Rubbing Alcohol: A few drops on a clean cloth can wipe away paint effectively. Warning: Alcohol dries out leather rapidly. You must apply a leather conditioner immediately after using this method to prevent the hide from cracking.
- Petroleum Jelly: Applying Vaseline and letting it sit can soften dried paint, allowing it to be gently peeled off with a dull knife.
Advanced Tips for Long-Term Durability
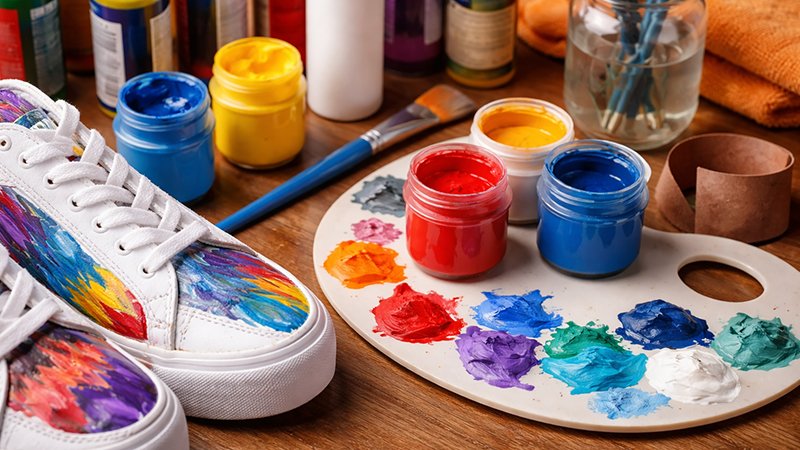
To ensure your project stands the test of time, keep these professional insights in mind:
- Brand Consistency: Avoid mixing acrylic paints from different manufacturers in the same project, as their chemical formulas may vary and cause adhesion issues.
- The 72-Hour Rule: While the paint may feel dry to the touch in 30 minutes, it takes time to fully cure. Wait 24 hours before sealing and at least 72 hours before wearing or cleaning the item.
- Restoration: If a painted item begins to yellow or fade after several years, you can repaint it. However, you must strip the old sealer and finish entirely to allow the new paint to bond with the surface.
Frequently Asked Questions (Enhanced FAQ)
Q: Can I paint my leather shoes with this method?
A: Absolutely. Leather shoe paint is essentially acrylic leather paint. The methods of preparation, thin layering, and sealing remain identical and are highly effective for athletic shoes and boots.
Q: Will the paint wash off in the rain?
A: Not if prepared and sealed correctly. Because acrylic leather paint is a staining process that soaks into the fibers, and when protected by a sealer and waterproofing coat, it becomes highly resistant to the elements.
Q: Why did my paint crack after only a few weeks?
A: This is usually due to one of three things: failing to remove the factory de-glosser, applying the paint in layers that were too thick, or painting in a room that was too cold.
Conclusion: Transforming the Ordinary into Extraordinary
Painting leather is a rewarding intersection of maintenance and creativity. By moving away from “painting” as a surface coating and embracing it as a staining and sealing process, you can achieve results that are both beautiful and permanent.
Whether you are restoring a family heirloom or customizing a new pair of boots, the keys remain the same: Preparation, Patience, and Proper Materials.
With the right tools—like the Angelus set—and a commitment to thin, flexible layers, your leather items can take on a whole new life, serving as unique talking points for years to come.