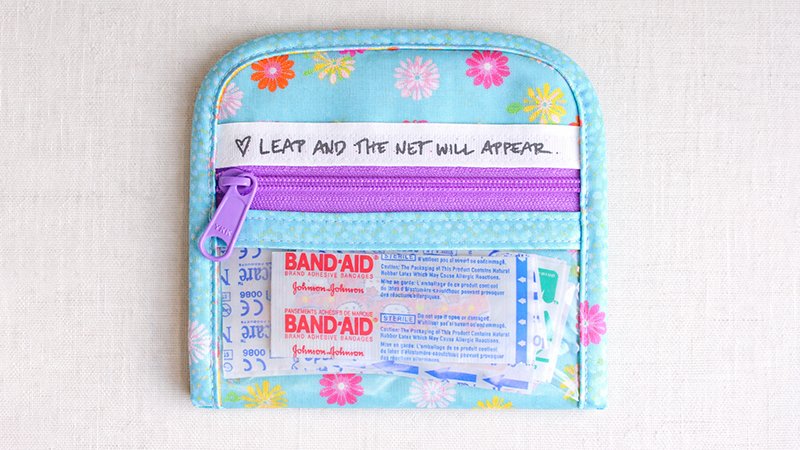
We’ve all experienced that stressful moment—digging through a cluttered bag while a child cries or a small cut needs attention. The essentials are always there… just impossible to find. That’s exactly why this Vinyl First Aid Pouch is such a game-changer.
Hi, I’m Jennie from Clover & Violet! I love creating sewing projects that are not only beautiful but genuinely useful. This pouch is quick, scrap-friendly, and incredibly practical—perfect for gifting or everyday organization.
Why This Pouch Works So Well
- Clear vinyl window lets you instantly see what’s inside
- Compact size fits easily into purses, diaper bags, or glove boxes
- Scrap-friendly project—perfect for using leftover fabric
- Beginner-friendly techniques with a professional finish
Materials You’ll Need
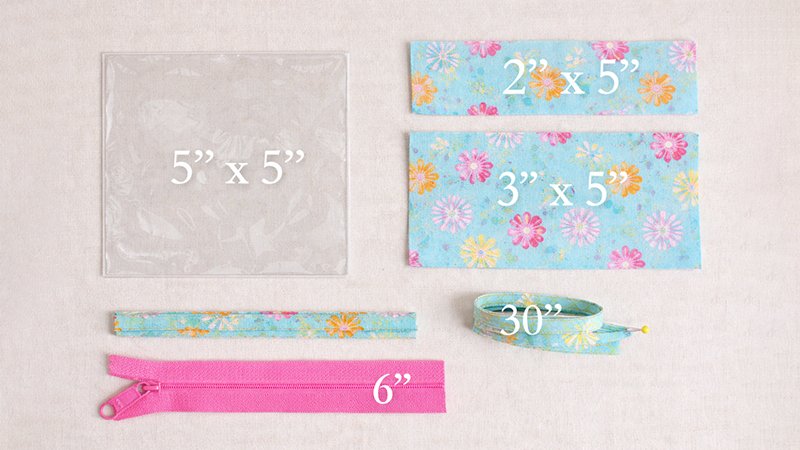
Before starting, gather everything so your sewing session goes smoothly:
- Vinyl: 5″ × 5″ (8-gauge recommended for durability and ease of sewing)
- Fabric A: 2″ × 5″ (top piece; salvage edge optional but helpful)
- Fabric B: 3″ × 5″ (bottom piece)
- Zipper: 6″ long
- Bias Tape: 30″ of ½″ width
- Clips (not pins) – essential for vinyl
- Basic sewing supplies (machine, thread, scissors, etc.)
Before You Start: Vinyl Sewing Tips
Vinyl behaves differently from cotton, so keep these in mind:
1. Use a Longer Stitch Length
Set your machine to a longer stitch (around 3.0–3.5).
Short stitches can weaken vinyl by creating a perforation line.
2. Prevent Sticking
- Use a Teflon/non-stick presser foot, OR
- Place a small piece of tape under your regular foot
3. Help Fabric Glide Smoothly
If vinyl sticks to your machine bed, add a strip of tape where it feeds.
Step-by-Step Instructions
Step 1: Prepare the Vinyl Window

- Take your 5″ × 5″ vinyl square
- Cut a 5″ piece of bias tape
- Open the bias tape and sandwich the top edge of the vinyl inside it
- Secure with clips (avoid pins—they leave permanent holes)
- Stitch along the edge, close to the fold
This creates a clean, finished top edge for your pouch.
Step 2: Attach the Bottom Fabric (Fabric B)
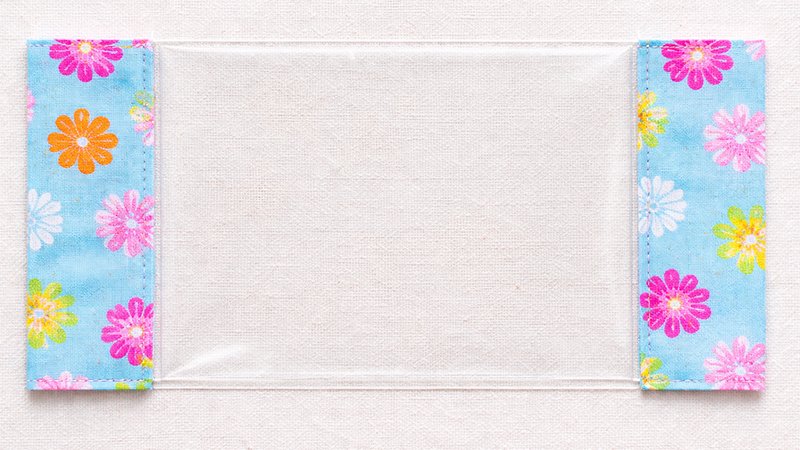
- Take your 3″ × 5″ fabric piece
- Fold one long (5″) edge ¼″ toward the wrong side and press
- Place this folded edge right side down onto the bottom edge of the vinyl
- Stitch along the folded edge to attach
- Flip the fabric down so the right side is facing up
- Topstitch along the seam (through vinyl and fabric)
This strengthens the seam and gives a polished look.
Step 3: Install the Zipper
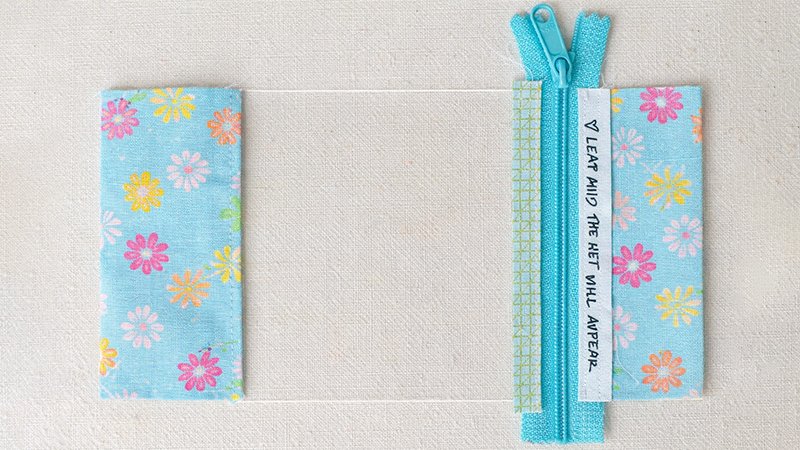
Bottom Side:
- Take your vinyl unit
- Align the bias-bound edge with one side of the zipper
- Stitch in place
Top Side:
- Take Fabric A (2″ × 5″)
- If using salvage edge:
- Place the salvage edge directly against the zipper and sew
- If not:
- Fold edge down ¼″ and sew as you did for Fabric B
Now your zipper connects both top and bottom sections.
Step 4: Trim and Shape

- Trim the entire piece so it measures exactly 5″ wide
- Cut off excess zipper ends
- Fold the pouch in half:
- A vinyl window should be on one side
- Fabric A on the other
- Decide on your corner style:
- Square corners: easier for beginners
- Rounded corners: more polished look (trace and trim evenly)
Step 5: Bind the Edges
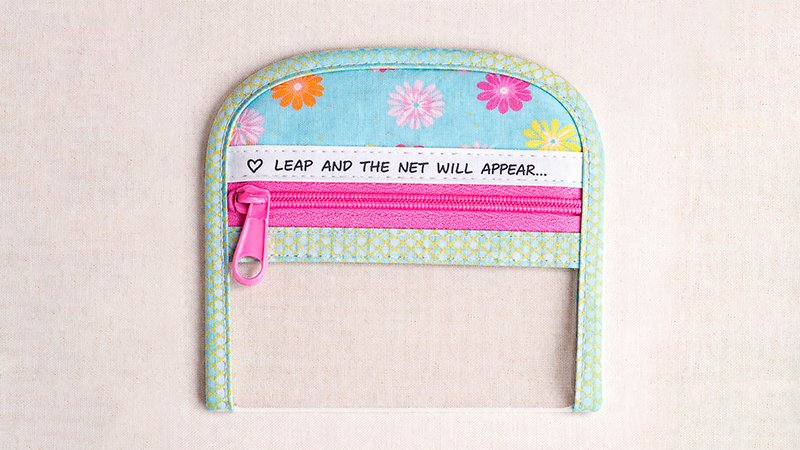
This step finishes and strengthens your pouch.
- Take your remaining bias tape
- Fold ¼″ of the starting end inward (clean edge)
- Starting at one side:
- Sandwich the raw edges of the pouch inside the bias tape
- Clip in place as you go
- Sew slowly around:
- Keep edges aligned
- Carefully curve around corners
- When you reach the end:
- Trim the tape slightly longer
- Fold the end inward
- Stitch closed neatly
This encloses all raw edges and completes the pouch.
Customization Ideas
Make each pouch unique:
- Fussy cut fabric to highlight cute prints
- Create themed kits:
- First aid kit
- Sewing emergency kit
- Beauty essentials pouch
- Use bright or playful fabrics for kids
- Add labels or tags for personalization
Great Gift Ideas
- Teacher appreciation gifts
- Stocking stuffers
- Mom’s survival kits
- Travel essentials organizers
Final Thoughts
This project is:
- Quick (can be finished in an afternoon)
- Practical (you’ll actually use it!)
- Addictive (you’ll want to make more)
Once you make one, you’ll likely create several—for your car, your family, and your friends.
Happy sewing!